Chapter 4. Layout Managers
In this chapter:
4.1 Layouts overview
In this chapter we present several examples showing how to use various layouts to satisfy specific goals, and how to create two custom layout managers that simplify the construction of many common interfaces. We also show how to construct a basic container for JavaBeans which must be able to manage a dynamic number of components. But before we present these examples it is helpful to understand the big picture of layouts, which classes use their own custom layouts, and exactly what it means to be a layout manager.
All layout managers implement one of two interfaces defined in the
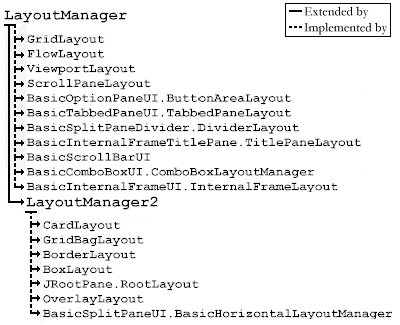
java.awt package: LayoutManager or its subclass, LayoutManager2. LayoutManager declares a set of methods that are intended to provide a straight-forward, organized means of managing component positions and sizes in a container. Each implementation of LayoutManager defines these methods in different ways accoring to its specific needs. LayoutManager2 enhances this by adding methods intended to aid in managing component postitions and sizes using constraints-based objects. Constraints-based objects usually store position and sizing information about one component and implementations of LayoutManager2 normally store one contraints-based object per component. For instance, GridBagLayout uses a Hashtable to map each Component it manages to its own GridBagConstraints object.Figure 4.1 shows all the classes implementing
LayoutManager and LayoutManager2. Note that there are several UI classes implementing these interfaces to provide custom layout functionality for themselves. The other classes--the classes we are most familar and concerned with--are built solely to provide help in laying out containers they are assigned to.Each container should be assigned one layout manager, and no layout manager should be used to manage more than one container.
Note: In the case of several UI components shown in figure 4.1, the container and the layout manager are the same object. Normally, however, the container and the layout manager are separate objects that communicate heavily with each other.

Figure 4.1 LayoutManager and LayoutManager2 implementations
<<file figure4-1.gif>>
4.1.1 LayoutManager
abstract interface java.awt.LayoutManager
This interface must be implemented by any layout manager. Two methods are especially noteworthy:
layoutContainer(Container parent)
calculates and sets the bounds for all components in the given container.preferredLayoutSize(Container parent)
calculates the preferred size requirements to lay out components in the given container and returns a Dimension instance representing this size.4.1.2 LayoutManager2
abstract interface java.awt.LayoutManager2
This interface extends
LayoutManager to provide a framework for those layout managers that use constraints-based layouts. Method addLayoutComponent(Component comp, Object constraints) adds a new component associated with a constraints-based object which carries information about how to lay out this component.A typical implementation is
BorderLayout which requires a direction (north, east, etc.) to position a component. In this case the constraint objects used are static Strings such as BorderLayout.NORTH, BorderLayout.EAST, etc. We are normally blind to the fact that BorderLayout is constraints-based because we are never required to manipulate the constraint objects at all. This is not the case with layouts such as GridBagLayout, where we must work directly with the contraint objects (instances of Grid! BagConstraints).4.1.3 BoxLayout
class javax.swing.BoxLayout
BoxLayout
organizes the components it manages along either the x-axis or y-axis of the owner panel. The only constructor, BoxLayout(Container target, int axis), takes a reference to the Container component it will manage and a direction (BoxLayout.X_AXIS or BoxLayout.Y_AXIS). Components are laid out according to their preferred sizes and not wrapped, even if the container does not provide enough space.4.1.4 Box
class javax.swing.Box
To make using the
BoxLayout manager easier, Swing also provides a class named Box which is a container with an automatically assigned BoxLayout manager. To create an instance of this container we simply pass the desired alignment to its constructor. The Box class also supports the insertion of invisible blocks (instances of Box.Filler--see below) allowing regions of unused space to be specified. These blocks are basically lightweight components with bounds (position and size) but no view.4.1.5 Filler
static class javax.swing.Box.Filler
This static inner class defines invisible components that affect a containerís layout. The
Box class provides convenient static methods for the creation of three different variations: glue, struts, and rigid areas.createHorizontalGlue()
, createVerticalGlue(): returns a component which fills the space between its neighboring components, pushing them aside to occupy all available space (this functionality is more analagous to a spring than it is to glue).createHorizontalStrut(int width)
, createVerticalStrut(int height): returns a fixed-width (height) component which provides a fixed gap between its neighbors.createRigidArea(Dimension d)
: returns an invisible component of fixed width and height.
Note: All relevant
Box methods are static and, as such, they can be applied to any container managed by a BoxLayout, not just instances of Box. Box should be thought of as utilities class as much as it is a container.
4.1.6 FlowLayout
class java.awt.FlowLayout
This is a simple layout which places components from left to right in a row using the preferred component sizes (i.e. size returned by
getPreferredSize()) until no space in the container is available. When no space is available a new row is started. Because this placement depends on the current size of the container we cannot always guarantee in advance which row a component will be placed in.FlowLayout
is too simple to rely on in serious applications where we want to be sure, for instance, that a set of buttons will reside at the bottom of a dialog and not on it's right side. However, it can be useful as a pad for a single component to ensure that this component will be placed in the center of a container. Note that FlowLayout is the default layout for all JPanels (the only exception is the content pane of a JRootPane which is always initialized with a BorderLayout).4.1.7 GridLayout
class java.awt.GridLayout
This layout places components in a rectangular grid. There are three constructors:
GridLayout()
: creates a layout with one column per component. Only one row is used.GridLayout(int rows, int cols)
: creates a layout with the given number of rows and columns.GridLayout(int rows, int cols, int hgap, int vgap)
: creates a layout with the given number of rows and columns, and the given size of horizontal and vertical gaps between each row and column.GridLayout
places components from left to right and from top to bottom assigning the same size to each. It forces occupation of all available container space and shares this space evenly between components. When not used carefully this can lead to undesirable component sizing, such as text boxes three times higher than expected.4.1.8 GridBagLayout
class java.awt.GridBagLayout, class java.awt.GridBagConstraints
This layout extends the capabilities of
GridLayout to become constraints-based. It breaks the container's space into equal rectangular pieces (like bricks in a wall) and places each component in one or more of these pieces. You need to create and fill a GridBagConstraints object for each component to inform GridBagLayout how to place and size that component.GridBagLayout
can be effectively used for placement of components, if no special behavior is required on resizing. However, due to it's complexity it usually requires some helper methods or classes to handle all necessary constraints information. James Tan, a usability expert and GridBagLayout extraordinaire, gives a comprehensive overview of this manager in section 4.3. He also presents a helper class to ease the burden of dealing with GridBagConstraints.4.1.9 BorderLayout
class java.awt.BorderLayout
This layout divides a container into five regions: center, north, south, east, and west. To specify the region to place a component in we use
Strings of the form "Center," "North," etc., or the static String fields defined in BorderLayout: BorderLayout.CENTER, BorderLayout.NORTH, etc. During the layout process, components in the north and south regions will first be alotted their preferred heig! ht (if possible) and the width of the container. Once south and north components have been assigned sizes, components in the east and west regions will attempt to occupy their preferred width and any remaining height between the north and south components. A component in the center region will occupy all remaining available space. BorderLayout is very useful, especially in conjunction with other layouts as we will see in this and future chapters.4.1.10 CardLayout
class java.awt.CardLayout
CardLayout
treats all components similar to cards of equal size overlapping one another. Only one card component is visible at any given time (figure 4.2 illustrates). Methods first(), last(), next(), previous(), and show() can be called to switch between components in the parent Container.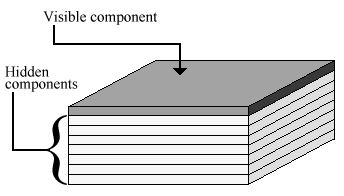
Figure 4.2 CardLayout
<<file figure4-2.gif>>
In a stack of several cards, only the top-most card is visible. The following code a simple
CardLayout demo, which endlessly flips through four cards containing buttons.4.1.11 JPanel
class javax.swing.JPanel
This class represents a generic lightweight container. It works in close cooperation with layout managers. The default constructor creates a
JPanel with FlowLayout, but different layouts can be specified in the constructor or assigned using the setLayout() method (see chapter 3 for more about JPanel).
Note: The content pane of a
JRootPane container is a JPanel which, by default, is assigned a BorderLayout, not a FlowLayout.
Note: We have purposely omitted the discussion of several layout managers here (e.g.
ViewportLayout, ScrollPaneLayout, JRootPane.RootPaneLayout, etc.) because they are rarely used by developers and are more appropriately discussed in terms of the components that rely on them. For instance, we discuss ViewportLayout and ScrollPaneLayout in chapter 7.
4.2 Comparing common layout managers
The following example demonstrates the most commonly used AWT and Swing layout managers. It shows a set of
JInternalFrames containing identical sets of components, each using a different layout. The purpose of this example is to allow direct simultaneous layout manager comparisons using resizable containers.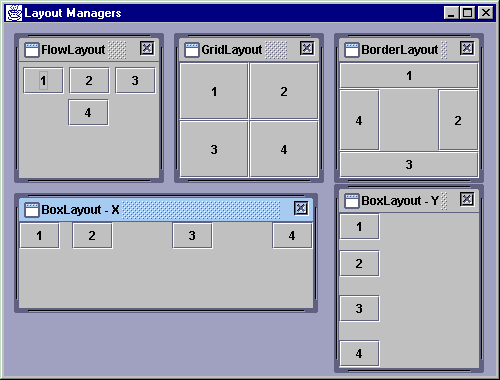
Figure 4.3 Comparing common layouts
<<file figure4-3.gif>>
The Code: CommonLayouts.java
see \Chapter4\1
import java.awt.*;
import java.awt.event.*;
import java.util.*;

import javax.swing.*;
import javax.swing.border.*;
import javax.swing.event.*;

public class CommonLayouts extends JFrame
{
  public CommonLayouts() {
    super("Common Layout Managers");
    setSize(500, 380);

    JDesktopPane desktop = new JDesktopPane();
    getContentPane().add(desktop);

    JInternalFrame fr1 =
      new JInternalFrame("FlowLayout", true, true);
    fr1.setBounds(10, 10, 150, 150);
    Container c = fr1.getContentPane();
    c.setLayout(new FlowLayout());
    c.add(new JButton("1"));
    c.add(new JButton("2"));
    c.add(new JButton("3"));
    c.add(new JButton("4"));
    desktop.add(fr1, 0);

    JInternalFrame fr2 =
      new JInternalFrame("GridLayout", true, true);
    fr2.setBounds(170, 10, 150, 150);
    c = fr2.getContentPane();
    c.setLayout(new GridLayout(2, 2));
    c.add(new JButton("1"));
    c.add(new JButton("2"));
    c.add(new JButton("3"));
    c.add(new JButton("4"));
    desktop.add(fr2, 0);

    JInternalFrame fr3 =
      new JInternalFrame("BorderLayout", true, true);
    fr3.setBounds(330, 10, 150, 150);
    c = fr3.getContentPane();
    c.add(new JButton("1"), BorderLayout.NORTH);
    c.add(new JButton("2"), BorderLayout.EAST);
    c.add(new JButton("3"), BorderLayout.SOUTH);
    c.add(new JButton("4"), BorderLayout.WEST);
    desktop.add(fr3, 0);

    JInternalFrame fr4 = new JInternalFrame("BoxLayout - X",
      true, true);
    fr4.setBounds(10, 170, 250, 120);
    c = fr4.getContentPane();
    c.setLayout(new BoxLayout(c, BoxLayout.X_AXIS));
    c.add(new JButton("1"));
    c.add(Box.createHorizontalStrut(12));
    c.add(new JButton("2"));
    c.add(Box.createGlue());
    c.add(new JButton("3"));
    c.add(Box.createHorizontalGlue());
    c.add(new JButton("4"));
    desktop.add(fr4, 0);

    JInternalFrame fr5 = new JInternalFrame("BoxLayout - Y",
      true, true);
    fr5.setBounds(330, 170, 150, 180);
    c = fr5.getContentPane();
    c.setLayout(new BoxLayout(c, BoxLayout.Y_AXIS));
    c.add(new JButton("1"));
    c.add(Box.createVerticalStrut(10));
    c.add(new JButton("2"));
    c.add(Box.createGlue());
    c.add(new JButton("3"));
    c.add(Box.createVerticalGlue());
    c.add(new JButton("4"));
    desktop.add(fr5, 0);

    try {
      fr1.setSelected(true);
    }
    catch (java.beans.PropertyVetoException ex) {}

    WindowListener wndCloser = new WindowAdapter() {
      public void windowClosing(WindowEvent e) {
        System.exit(0);
      }
    };
    addWindowListener(wndCloser);

    setVisible(true);
  }

  public static void main(String argv[]) {
    new CommonLayouts();
  }
}
Understanding the Code
Class CommonLayouts
The
CommonLayouts constructor creates five JInternalFrames and places them in a JDesktopPane. Each of these frames contains four JButtons labeled "1," "2," "3" and "4." Each frame is assigned a unique layout manager: a FlowLayout, a 2x2 GridLayout, a BorderLayout, an x-oriented BoxLayout, and a y-oriented BoxLayout respectively. Note that the internal frames using BoxLayout also use strut and glue filler components to demonstrate their behavior.Running the Code
Figure 4.3 shows
CommonLayouts in action. Note the differences in each frameís content as it changes size:FlowLayout
places components in one or more rows depending on the width of the container.GridLayout
assigns an equal size to all components and fills all container space.BorderLayout
places components along the sides of the container.x-oriented
BoxLayout always places components in a row. The distance between the first and second components is 12 pixels (determined by the horizontal strut component). Distances between the second, third, and fourth components are equalized and take up all remaining width (determined by the two glue filler components).y-oriented
BoxLayout always places components in a column. The distance between the first and second components is 10 pixels (determined by the vertical strut component). Distances between the second, third, and fourth components are equalized and take up all available height (determined by the two glue filler components).4.3 Using GridBagLayout
...by James Tan, Systems Analyst, United Overseas Bank Singapore, jamestan@earthling.net
Of all the layouts included with Swing and AWT,
GridBagLayout is by far the most complex. In this section, we will walk through the various constraints attributes it relies on, along with several short examples showing how to use them. We follow up this discussion with a comprehensive input dialog example putting together all these attributes. We then conclude this section with the construction and demonstration of a helper class designed to make using GridBagLayout more convenient.
4.3.1 Default behavior of GridBagLayout
By simply setting a containerís layout to a
GridBagLayout and adding Components to it, the result will be a row of components, each set to their preferred size, tightly packed and placed in the center of the container. Unlike FlowLayout, GridBagLayout will allow components to be clipped by the edge of the managing container, and it will not move child components down into a new row. The following code demonstrates, and figure 4.4 shows the result:
  JInternalFrame fr1 = new JInternalFrame ("Example 1", true, true );
  fr1.setBounds( 5, 5, 270, 100 );
  cn = fr1.getContentPane();
  cn.setLayout( new GridBagLayout() );
  cn.add( new JButton( "Wonderful" ) );
  cn.add( new JButton( "World" ) );
  cn.add( new JButton( "Of" ) );
  cn.add( new JButton( "Swing !!!" ) );
  desktop.add( fr1, 0 );

Figure 4.4 Default GridBagLayout behaviour
<<figure4-4.gif>>
4.3.2 Introducing GridBagConstraint
When a component is added to a container which has been assigned a
GridBagLayout, a default GridBagConstraints object is used by the layout manager to place the component accordingly, as in the above example. By creating and setting a GridBagConstraintsí attributes and passing it in as an additional parameter in the add() method, we can flexibly manage the placement of our components.Below are the various attributes we can set in a
GridBagConstraints object along with their default values. The behaviour of these attributes will be explained in the examples that follow.
public int gridx = GridBagConstraints.RELATIVE;
public int gridy = GridBagConstraints.RELATIVE;
public int gridwidth = 1;
public int gridheight = 1;
public double weightx = 0.0;
public double weighty = 0.0;
public int anchor = GridBagConstraints.CENTER;
public int fill = GridBagConstraints.NONE;
public Insets insets = new Insets( 0, 0, 0, 0 );
public int ipadx = 0;
public int ipady = 0;
4.3.3 Using the gridx, gridy, insets, ipadx and ipady constraints
The
gridx and gridy constraints (or column and row constraints) are used to specify the exact grid cell location where we want our component to be placed. Components placement starts from the upper left corner of the container, and gridx and gridy begin with values of 0. Specifying negative values for either of these attributes is equivalent to setting them to GridBagConstraints.RELATIVE, which means that the next component added will be placed directly after the previous gridx orThe
insets constraint adds an invisible exterior padding around the associated component. Negative values can be used which will force the component to be sized larger than the cell it is contained in.The
ipadx and ipady constraints add an interior padding which increases the preferred size of the associated component. Specifically,it adds ipadx * 2 pixels to the preferred width and ipady * 2 pixels to the preferred height (* 2 because this padding applies to both sides of the component).In this example we place the "Wonderful" and "World" buttons in the first row and the other two buttons in the second row. We also associate insets with each button so they donít look too cluttered, and they vary in both height and width.
  JInternalFrame fr2 = new JInternalFrame("Example 2", true, true );
  fr2.setBounds( 5, 110, 270, 140 );
  cn = fr2.getContentPane();
  cn.setLayout( new GridBagLayout() );

  c = new GridBagConstraints();
  c.insets = new Insets( 2, 2, 2, 2 );
  c.gridx = 0;   // column 0
  c.gridy = 0;   // row 0
  c.ipadx = 5;   // increases component width by 10 pixels
  c.ipady = 5;   // increases component height by 10 pixels
  cn.add( new JButton( "Wonderful" ), c );

  c.gridx = 1;   // column 1
  c.ipadx = 0;   // reset the padding to 0
  c.ipady = 0;
  cn.add( new JButton( "World" ), c );

  c.gridx = 0;   // column 0
  c.gridy = 1;   // row 1
  cn.add( new JButton( "Of" ), c );

  c.gridx = 1;   // column 1
  cn.add( new JButton( "Swing !!!" ), c );

  desktop.add( fr2, 0 );
We begin by creating a
GridBagConstraints object to set the constraints for the first button component. We pass it in together with the button in the add() method. We reuse this same constraints object by changing the relevant attributes and passing in again for each remaining component. This conserves memory and also relieves us of having to reassign a whole new group of attributes. Figure 4.5 shows the result.
Figure 4.5 Using the gridx, gridy, insets, ipadx and ipady constraints.
<<figure4-5.gif>>
4.3.4 Using weightx and weighty constraints
When the container in the above example is resized, the components respect the constraints we have assigned, but the whole group remains in the center of the container. Why donít the buttons grow to occupy a proportional amount of the increased space surrounding them? The answer lies in the use of the
weightx and weighty constraints, which both default to zero when GridBagConstraints is instantiated.These two constraints specify how any extra space in a container should be distributed among each componentís cell. The
weightx attribute is used to specify the fraction of extra horizontal space to occupy. Similarly, weighty is used to specify the fraction of extra vertical space to occupy. Both constraints can be assigned values ranging from 0.0 to 1.0.For example, lets say we have two buttons, A and B, placed in columns 0 and 1 of row 0 respectively. If we specify
weightx = 1.0 for the first button and weightx = 0 for the second button, when we resize the container, all extra space will be distributed to the first buttonís cell -- 50% on the left of the button and 50% on the right. The other button will be pushed to the right of the container as far as possible. Figure 4.6 illustrates.
Figure 4.6 weightx and weighty constraints.
<<figure4-6.gif>>
Getting back to our "Wonderful" "World" "Of" "Swing !!!" example, we now modify all button cells to share any extra container space equally as the container is resized. Specifying
weightx = 1.0 and weighty = 1.0, and keeping these attributes constant as each component is added, will tell GridBagLayout to use all available space for each cell.
  JInternalFrame fr3 = new JInternalFrame("Example 3", true, true );
  fr3.setBounds( 5, 255, 270, 140 );
  cn = fr3.getContentPane();
  cn.setLayout( new GridBagLayout() );

  c = new GridBagConstraints();
  c.insets = new Insets( 2, 2, 2, 2 );
  c.weighty = 1.0;
  c.weightx = 1.0;
  c.gridx = 0;
  c.gridy = 0;
  cn.add( new JButton( "Wonderful" ), c );

  c.gridx = 1;
  cn.add( new JButton( "World" ), c );

  c.gridx = 0;
  c.gridy = 1;
  cn.add( new JButton( "Of" ), c );

  c.gridx = 1;
  cn.add( new JButton( "Swing !!!" ), c );

  desktop.add( fr3, 0 );

Figure 4.7 Using weightx and weighty constraints.
<<figure4-7.gif>>
4.3.5 Using gridwidth and gridheight constraints
GridBagLayout
also allows us to span components across multiple cell using the gridwidth and gridheight constraints. To demonstrate we modify our example to force the "Wonderful" button to occupy 2 rows and the "World" button to occupy 2 columns. Figure 4.8 illustrates. Note that occupying more cells forces more rows and/or columns to be created based on current container size.
  JInternalFrame fr4 = new JInternalFrame("Example 4", true, true );
  fr4.setBounds( 280, 5, 270, 140 );
  cn = fr4.getContentPane();
  cn.setLayout( new GridBagLayout() );

  c = new GridBagConstraints();
  c.insets = new Insets( 2, 2, 2, 2 );
  c.weighty = 1.0;
  c.weightx = 1.0;
  c.gridx = 0;
  c.gridy = 0;
  c.gridheight = 2; // span across 2 rows
  cn.add( new JButton( "Wonderful" ), c );

  c.gridx = 1;
  c.gridheight = 1; // remember to set back to 1 row
  c.gridwidth = 2; // span across 2 columns
  cn.add( new JButton( "World" ), c );

  c.gridy = 1;
  c.gridwidth = 1; // remember to set back to 1 column
  cn.add( new JButton( "Of" ), c );

  c.gridx = 2;
  cn.add( new JButton( "Swing !!!" ), c );

  desktop.add( fr4, 0 );

Figures 4.8 Using gridwidth and gridheight constraints.
<<figure4-8.gif>>
4.3.6 Using anchor constraints
We can control how a component is aligned within its cell(s) by setting the
anchor constraint. By default this is set to GridBagConstraints.CENTER, which forces the component to be centered within its occupied cell(s). We can choose from the following anchor settings:GridBagConstraints.NORTH
GridBagConstraints.SOUTH
GridBagConstraints.EAST
GridBagConstraints.WEST
GridBagConstraints.NORTHEAST
GridBagConstraints.NORTHWEST
GridBagConstraints.SOUTHEAST
GridBagConstraints.SOUTHWEST
GridBagConstraints.CENTER
Below weíve modified our example to anchor the "Wonderful" button
NORTH and the "World" button SOUTHWEST. The "Of" and "Swing !!!" buttons are achored in the CENTER of their cells. Figure 4.9 illustrates.
  JInternalFrame fr5 = new JInternalFrame("Example 5", true, true );
  fr5.setBounds( 280, 150, 270, 140 );
  cn = fr5.getContentPane();
  cn.setLayout( new GridBagLayout() );

  c = new GridBagConstraints();
  c.insets = new Insets( 2, 2, 2, 2 );
  c.weighty = 1.0;
  c.weightx = 1.0;
  c.gridx = 0;
  c.gridy = 0;
  c.gridheight = 2;
  c.anchor = GridBagConstraints.NORTH;
  cn.add( new JButton( "Wonderful" ), c );

  c.gridx = 1;
  c.gridheight = 1;
  c.gridwidth = 2;
  c.anchor = GridBagConstraints.SOUTHWEST;
  cn.add( new JButton( "World" ), c );

  c.gridy = 1;
  c.gridwidth = 1;
  c.anchor = GridBagConstraints.CENTER;
  cn.add( new JButton( "Of" ), c );

  c.gridx = 2;
  cn.add( new JButton( "Swing !!!" ), c );

  desktop.add( fr5, 0 );

Figure 4.9 Using gridwidth and gridheight constraints.
<<figure4-9.gif>>
4.3.7 Using fill constraints
The most common reason for spanning multiple cells is because we want the component contained in that cell to occupy this enlarged space. To do this we use the
gridheight/gridwidth constraints as described above, as well as the fill constraint. The fill constraint can be assigned any of the following values:GridBagConstraints.NONE
GridBagConstraints.HORIZONTAL
GridBagConstraints.VERTICAL
GridBagConstraints.BOTH
Below we modify our example to force the "Wonderful" button to occupy all available cell space, both vertically and horizontally. The "World" button now occupies all available horizontal cell space, but continues to use its preferred vertical size. The "Of" button does not make use of the fill constraint and simply uses its preferred size. The "Swing !!!" button occupies all available vertical cell space, but uses its preferred horizontal size. Figure 4.10 illustrates.
  JInternalFrame fr6 = new JInternalFrame("Example 6", true, true );
  fr6.setBounds( 280, 295, 270, 140 );
  cn = fr6.getContentPane();
  cn.setLayout( new GridBagLayout() );

  c = new GridBagConstraints();
  c.insets = new Insets( 2, 2, 2, 2 );
  c.weighty = 1.0;
  c.weightx = 1.0;
  c.gridx = 0;
  c.gridy = 0;
  c.gridheight = 2;
  c.fill = GridBagConstraints.BOTH;
  cn.add( new JButton( "Wonderful" ), c );

  c.gridx = 1;
  c.gridheight = 1;
  c.gridwidth = 2;
  c.fill = GridBagConstraints.HORIZONTAL;
  cn.add( new JButton( "World" ), c );

  c.gridy = 1;
  c.gridwidth = 1;
  c.fill = GridBagConstraints.NONE;
  cn.add( new JButton( "Of" ), c );

  c.gridx = 2;
  c.fill = GridBagConstraints.VERTICAL;
  cn.add( new JButton( "Swing !!!" ), c );

  desktop.add( fr6, 0 );

Figure 4.10 Using fill constraints.
4.3.8 Putting it all together: Constructing a complaints dialog
Figure 4.11 shows a sketch of a generic complaints dialog that can be used for various forms of user feedback. This sketch shows clearly how we plan to lay out the various components, and the columns and rows in which they will be placed. In order to set the constraints correctly so that the components will be laid out as shown, we must do the following:
For the "Short Description" text field, we set the
For the "Description" text area, we set the
gridwidth constraint to 3, gridheight to 2, and the fill constraint to GridBagConstraint.BOTH. In order to make this field occupy all available horizontal and vertical space, we set the weightx and weighty constraints to 1.0.For the "Name," "Telephone," "Sex" and "ID Number" input fields, we want each to use their preferred width. Since widths each exceed the width of one cell, we set
gridwidth to 3, and set weightx to 0.0 so that they have enough space to fit but they will not use any additional available horizontal space.For the "Help" button, we set the
anchor constraint to GridBagConstraint.NORTH so that it will stick together with the upper two buttons, "Submit" and "Cancel." The fill constraint is set to HORIZONTAL to force each of these buttons to occupy all available horizontal cell space.All labels use their preferred sizes, and each component in this dialog is anchored
WEST.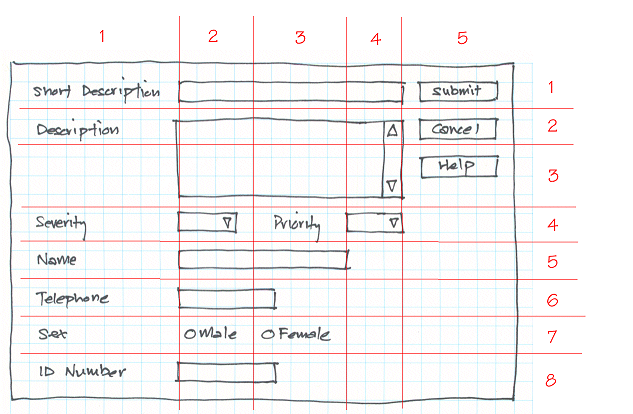
Figure 4.11 Sketch of a generic complaints dialog.
<<figure4-11.gif>>
Our implementation follows, and figure 4.12 shows the resulting dialog.
import javax.swing.*;
import javax.swing.border.*;
import java.awt.*;
import java.awt.event.*;

public class ComplaintsDialog extends JDialog
{
   public ComplaintsDialog( JFrame frame )
   {
      super( frame, true );
      setTitle( "Simple Complaints Dialog" );
      setSize( 500, 300 );

      // Creates a panel to hold all my components
      JPanel panel = new JPanel( new BorderLayout() );
      panel.setLayout( new GridBagLayout() );
      // give the panel a border gap of 5 pixels
      panel.setBorder( new EmptyBorder( new Insets( 5, 5, 5, 5 ) ) );
      getContentPane().add( BorderLayout.CENTER, panel );

      GridBagConstraints c = new GridBagConstraints();

      // Define preferred sizes for my entry fields
      Dimension shortField = new Dimension( 40, 20 );
      Dimension mediumField = new Dimension( 120, 20 );
      Dimension longField = new Dimension( 240, 20 );
      Dimension hugeField = new Dimension( 240, 80 );

      // Spacing between the label and the field
      EmptyBorder border = new EmptyBorder( new Insets( 0, 0, 0, 10 ) );
      EmptyBorder border1 = new EmptyBorder( new Insets( 0, 20, 0, 10 ) );

      // add some space around all my components to avoid cluttering
      c.insets = new Insets( 2, 2, 2, 2 );

      // anchors all my components to the west
      c.anchor = GridBagConstraints.WEST;

      // Short description label and field
      JLabel lbl1 = new JLabel( "Short Description" );
      lbl1.setBorder( border ); // add some space on the right
      panel.add( lbl1, c );
      JTextField txt1 = new JTextField();
      txt1.setPreferredSize( longField );
      c.gridx = 1;
      c.weightx = 1.0; // use all available horizontal space
      c.gridwidth = 3; // spans across 3 columns
      c.fill = GridBagConstraints.HORIZONTAL; // fills up the 3 columns
      panel.add( txt1, c );

      // Description label and field
      JLabel lbl2 = new JLabel( "Description" );
      lbl2.setBorder( border );
      c.gridwidth = 1;
      c.gridx = 0;
      c.gridy = 1;;
      c.weightx = 0.0; // do not use any available horizontal space
      panel.add( lbl2, c );
      JTextArea area1 = new JTextArea();
      JScrollPane scroll = new JScrollPane( area1 );
      scroll.setPreferredSize( hugeField );
      c.gridx = 1;
      c.weightx = 1.0; // use all available horizontal space
      c.weighty = 1.0; // use all available vertical space
      c.gridwidth = 3; // spans across 3 columns
      c.gridheight = 2; // spans across 2 rows
      c.fill = GridBagConstraints.BOTH; // fills up the cols & rows
      panel.add( scroll, c );

      // Severity label and combo box
      JLabel lbl3 = new JLabel( "Severity" );
      lbl3.setBorder( border );
      c.gridx = 0;
      c.gridy = 3;
      c.gridwidth = 1;
      c.gridheight = 1;
      c.weightx = 0.0;
      c.weighty = 0.0;
      c.fill = GridBagConstraints.NONE;
      panel.add( lbl3, c );
      JComboBox combo3 = new JComboBox();
      combo3.addItem( "A" );
      combo3.addItem( "B" );
      combo3.addItem( "C" );
      combo3.addItem( "D" );
      combo3.addItem( "E" );
      combo3.setPreferredSize( shortField );
      c.gridx = 1;
      panel.add( combo3, c );

      // Priority label and combo box
      JLabel lbl4 = new JLabel( "Priority" );
      lbl4.setBorder( border1 );
      c.gridx = 2;
      panel.add( lbl4, c );
      JComboBox combo4 = new JComboBox();
      combo4.addItem( "1" );
      combo4.addItem( "2" );
      combo4.addItem( "3" );
      combo4.addItem( "4" );
      combo4.addItem( "5" );
      combo4.setPreferredSize( shortField );
      c.gridx = 3;
      panel.add( combo4, c );

      // Name label and text field
      JLabel lbl5 = new JLabel( "Name" );
      lbl5.setBorder( border );
      c.gridx = 0;
      c.gridy = 4;
      panel.add( lbl5, c );
      JTextField txt5 = new JTextField();
      txt5.setPreferredSize( longField );
      c.gridx = 1;
      c.gridwidth = 3;
      panel.add( txt5, c );

      // Telephone label and text field
      JLabel lbl6 = new JLabel( "Telephone" );
      lbl6.setBorder( border );
      c.gridx = 0;
      c.gridy = 5;
      panel.add( lbl6, c );
      JTextField txt6 = new JTextField();
      txt6.setPreferredSize( mediumField );
      c.gridx = 1;
      c.gridwidth = 3;
      panel.add( txt6, c );

      // Sex label and radio button
      JLabel lbl7 = new JLabel( "Sex" );
      lbl7.setBorder( border );
      c.gridx = 0;
      c.gridy = 6;
      panel.add( lbl7, c );
      JPanel radioPanel = new JPanel();
      // Creates a FlowLayout layout JPanel with 5 pixel of horizontal gaps
      // and no vertical gaps
      radioPanel.setLayout( new FlowLayout( FlowLayout.LEFT, 5, 0 ) );
      ButtonGroup group = new ButtonGroup();
      JRadioButton radio1 = new JRadioButton( "Male" );
      radio1.setSelected( true );
      group.add( radio1 );
      JRadioButton radio2 = new JRadioButton( "Female" );
      group.add( radio2 );
      radioPanel.add( radio1 );
      radioPanel.add( radio2 );
      c.gridx = 1;
      c.gridwidth = 3;
      panel.add( radioPanel, c);

      // ID Number label and text field
      JLabel lbl8 = new JLabel( "ID Number" );
      lbl8.setBorder( border );
      c.gridx = 0;
      c.gridy = 7;
      c.gridwidth = 1;
      panel.add( lbl8, c );
      JTextField txt8 = new JTextField();
      txt8.setPreferredSize( mediumField );
      c.gridx = 1;
      c.gridwidth = 3;
      panel.add( txt8, c );

      // Okay button
      JButton submitBtn = new JButton( "Submit" );
      c.gridx = 4;
      c.gridy = 0;
      c.gridwidth = 1;
      c.fill = GridBagConstraints.HORIZONTAL;
      panel.add( submitBtn, c );

      // Cancel button
      JButton cancelBtn = new JButton( "Cancel" );
      c.gridy = 1;
      panel.add( cancelBtn, c );

      // Help button
      JButton helpBtn = new JButton( "Help" );
      c.gridy = 2;
      c.anchor = GridBagConstraints.NORTH; // anchor north
      panel.add( helpBtn, c );

      WindowListener wndCloser = new WindowAdapter()
      {
         public void windowClosing(WindowEvent e)
         {
             System.exit(0);
         }
      };
      addWindowListener( wndCloser );

      setVisible( true );
   }

   public static void main( String[] args )
   {
      new ComplaintsDialog( new JFrame() );
   }
}
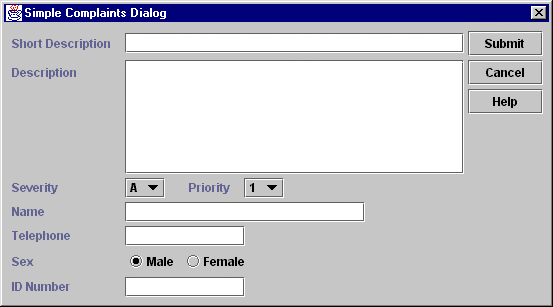
Figure 4.12 The Complaints Dialog.
<<figure4-12.gif>>
4.3.9 Simple Helper class example
As we can see from the code above, constructing dialogs with more than a few components easily becomes a very tedious task and reduces source code legibility as well as organization. One way to make the use of
GridBagLayout cleaner and easier is to create a helper class that manages all constraints for us, and provides self-explanitory method names and predefined parameters.Below is the source code of a simple helper class we have constructed for this purpose. The method names used are easier to understand and laying out our components using row and column parameters is more intuitive than
gridx and gridy. Methods implemented in this class are each a variation of one of the following:addComponent
: used to add a component that needs to adhere to its preferred size.addAnchoredComponent
: used to add a component that needs to be anchored.addFilledComponent
: used to add a component that will fill the entire cell space allocated to it.
import javax.swing.*;
import java.awt.*;

public class GriddedPanel extends JPanel
{
    private GridBagConstraints constraints;
    // define some default constraints values
    private static final int C_HORZ = GridBagConstraints.HORIZONTAL;
    private static final int C_NONE = GridBagConstraints.NONE;
    private static final int C_WEST = GridBagConstraints.WEST;
    private static final int C_WIDTH = 1;
    private static final int C_HEIGHT = 1;


    // Creates a grid bag layout panel using a default insets constraints.

    public GriddedPanel()
    {
        this( new Insets( 2, 2, 2, 2 ) );
    }


    // Creates a grid bag layout panel using the specified insets
    // constraints.

    public GriddedPanel( Insets insets )
    {
        super( new GridBagLayout() );
        // creates the constraints object and set the desired
        // default values
        constraints = new GridBagConstraints();
        constraints.anchor = GridBagConstraints.WEST;
        constraints.insets = insets;
    }


    // Adds the component to the specified row and col.

    public void addComponent( JComponent component, int row, int col )
    {
        addComponent( component, row, col, C_WIDTH,
                      C_HEIGHT, C_WEST, C_NONE );
    }


    // Adds the component to the specified row and col that spans across
    // a specified number of columns and rows.

    public void addComponent( JComponent component, int row, int col,
                              int width, int height )
    {
       addComponent( component, row, col, width, height, C_WEST, C_NONE );
    }


    // Adds the component to the specified row and col that anchors at
    // the specified position.

    public void addAnchoredComponent( JComponent component, int row,
                                      int col, int anchor )
    {
       addComponent( component, row, col, C_WIDTH, C_HEIGHT, anchor, C_NONE );
    }


    // Adds the component to the specified row and col that spans across
    // a specified number of columns and rows that anchors at the specified
    // position.

    public void addAnchoredComponent( JComponent component, int row, int col,
                                      int width, int height, int anchor )
    {
       addComponent( component, row, col, width, height, anchor, C_NONE );
    }


    // Adds the component to the specified row and col filling the column
    // horizontally.

    public void addFilledComponent( JComponent component, int row, int col )
    {
        addComponent( component, row, col, C_WIDTH, C_HEIGHT, C_WEST, C_HORZ );
    }

    // Adds the component to the specified row and col with the specified
    // filling direction.

    public void addFilledComponent( JComponent component, int row, int col,
                                    int fill )
    {
       addComponent( component, row, col, C_WIDTH, C_HEIGHT, C_WEST, fill );
    }


    // Adds the component to the specified row and col that spans across
    // a specified number of columns and rows with the specified filling
    // direction.


    public void addFilledComponent( JComponent component, int row, int col,
                                    int width, int height, int fill )
    {
       addComponent( component, row, col, width, height, C_WEST, fill );
    }


    // Adds the component to the specified row and col that spans across
    // a specified number of columns and rows with the specified filling
    // direction and an anchoring position.

    public void addComponent( JComponent component, int row, int col,
                              int width, int height, int anchor, int fill )
    {
       // sets the constraints object
       constraints.gridx = col;
       constraints.gridy = row;
       constraints.gridwidth = width;
       constraints.gridheight = height;
       constraints.anchor = anchor;
       double weightx = 0.0;
       double weighty = 0.0;

       // only use the extra horizontal or vertical spaces if the component
       // spans more than one column or/and row.
       if( width > 1 )
       {
          weightx = 1.0;
       }
       if( height > 1 )
       {
          weighty = 1.0;
       }

       switch( fill )
       {
           case GridBagConstraints.HORIZONTAL:
               constraints.weightx = weightx;
               constraints.weighty = 0.0;
               break;
           case GridBagConstraints.VERTICAL:
               constraints.weighty = weighty;
               constraints.weightx = 0.0;
               break;
           case GridBagConstraints.BOTH:
               constraints.weightx = weightx;
               constraints.weighty = weighty;
               break;
           case GridBagConstraints.NONE:
               constraints.weightx = 0.0;
               constraints.weighty = 0.0;
               break;
           default:
               break;
       }
       constraints.fill = fill;
       add( component, constraints );
    }
}
Below is the source code used to construct the same complaints dialog as above, using our helper class methods instead of manipulating the constraints directly. Note that the size of the code has been reduced and the readability improved. Also note that we add components starting at row 1 and column 1, rather than row 0 and column 0, as this is the most common numbering scheme for rows and columns (see figure 4.11).
import javax.swing.*;
import javax.swing.border.*;
import java.awt.*;
import java.awt.event.*;

public class ComplaintsDialog2 extends JDialog
{
   public ComplaintsDialog2( JFrame frame )
   {
      super( frame, true );
      setTitle( "Simple Complaints Dialog" );
      setSize( 500, 300 );

      // Creates the helper class panel to hold all my components
      GriddedPanel panel = new GriddedPanel();
      // give the panel a border gap of 5 pixels
      panel.setBorder( new EmptyBorder( new Insets( 5, 5, 5, 5 ) ) );
      getContentPane().add( BorderLayout.CENTER, panel );

      // Define preferred sizes for my entry fields
      Dimension shortField = new Dimension( 40, 20 );
      Dimension mediumField = new Dimension( 120, 20 );
      Dimension longField = new Dimension( 240, 20 );
      Dimension hugeField = new Dimension( 240, 80 );

      // Spacing between the label and the field
      EmptyBorder border = new EmptyBorder( new Insets( 0, 0, 0, 10 ) );
      EmptyBorder border1 = new EmptyBorder( new Insets( 0, 20, 0, 10 ) );

      // Short description label and field
      JLabel lbl1 = new JLabel( "Short Description" );
      lbl1.setBorder( border ); // add some space on the right
      panel.addComponent( lbl1, 1, 1 );
      JTextField txt1 = new JTextField();
      txt1.setPreferredSize( longField );
      panel.addFilledComponent( txt1, 1, 2, 3, 1, GridBagConstraints.HORIZONTAL );

      // Description label and field
      JLabel lbl2 = new JLabel( "Description" );
      lbl2.setBorder( border );
      panel.addComponent( lbl2, 2, 1 );
      JTextArea area1 = new JTextArea();
      JScrollPane scroll = new JScrollPane( area1 );
      scroll.setPreferredSize( hugeField );
      panel.addFilledComponent( scroll, 2, 2, 3, 2, GridBagConstraints.BOTH );

      // Severity label and combo box
      JLabel lbl3 = new JLabel( "Severity" );
      lbl3.setBorder( border );
      panel.addComponent( lbl3, 4, 1 );
      JComboBox combo3 = new JComboBox();
      combo3.addItem( "A" );
      combo3.addItem( "B" );
      combo3.addItem( "C" );
      combo3.addItem( "D" );
      combo3.addItem( "E" );
      combo3.setPreferredSize( shortField );
      panel.addComponent( combo3, 4, 2 );

      // Priority label and combo box
      JLabel lbl4 = new JLabel( "Priority" );
      lbl4.setBorder( border1 );
      panel.addComponent( lbl4, 4, 3 );
      JComboBox combo4 = new JComboBox();
      combo4.addItem( "1" );
      combo4.addItem( "2" );
      combo4.addItem( "3" );
      combo4.addItem( "4" );
      combo4.addItem( "5" );
      combo4.setPreferredSize( shortField );
      panel.addComponent( combo4, 4, 4 );

      // Name label and text field
      JLabel lbl5 = new JLabel( "Name" );
      lbl5.setBorder( border );
      panel.addComponent( lbl5, 5, 1 );
      JTextField txt5 = new JTextField();
      txt5.setPreferredSize( longField );
      panel.addComponent( txt5, 5, 2, 3, 1 );

      // Telephone label and text field
      JLabel lbl6 = new JLabel( "Telephone" );
      lbl6.setBorder( border );
      panel.addComponent( lbl6, 6, 1 );
      JTextField txt6 = new JTextField();
      txt6.setPreferredSize( mediumField );
      panel.addComponent( txt6, 6, 2, 3, 1 );

      // Sex label and radio button
      JLabel lbl7 = new JLabel( "Sex" );
      lbl7.setBorder( border );
      panel.addComponent( lbl7, 7, 1 );
      JPanel radioPanel = new JPanel();
      // Creates a FlowLayout layout JPanel with 5 pixel of horizontal gaps
      // and no vertical gaps
      radioPanel.setLayout( new FlowLayout( FlowLayout.LEFT, 5, 0 ) );
      ButtonGroup group = new ButtonGroup();
      JRadioButton radio1 = new JRadioButton( "Male" );
      radio1.setSelected( true );
      group.add( radio1 );
      JRadioButton radio2 = new JRadioButton( "Female" );
      group.add( radio2 );
      radioPanel.add( radio1 );
      radioPanel.add( radio2 );
      panel.addComponent( radioPanel, 7, 2, 3, 1 );

      // ID Number label and text field
      JLabel lbl8 = new JLabel( "ID Number" );
      lbl8.setBorder( border );
      panel.addComponent( lbl8, 8, 1 );
      JTextField txt8 = new JTextField();
      txt8.setPreferredSize( mediumField );
      panel.addComponent( txt8, 8, 2, 3, 1 );

      // Okay button
      JButton submitBtn = new JButton( "Submit" );
      panel.addFilledComponent( submitBtn, 1, 5 );

      // Cancel button
      JButton cancelBtn = new JButton( "Cancel" );
      panel.addFilledComponent( cancelBtn, 2, 5 );

      // Help button
      JButton helpBtn = new JButton( "Help" );
      panel.addComponent( helpBtn, 3, 5, 1, 1, GridBagConstraints.NORTH,
                          GridBagConstraints.HORIZONTAL );


      WindowListener wndCloser = new WindowAdapter()
      {
         public void windowClosing(WindowEvent e)
         {
             System.exit(0);
         }
      };
      addWindowListener( wndCloser );

      setVisible( true );
   }

   public static void main( String[] args )
   {
      new ComplaintsDialog2( new JFrame() );
   }
}
4.4 Choosing the right layout
In this section weíll show how to choose the right combination of layouts and intermediate containers to satisfy a pre-defined program specification. Consider a sample application which makes airplane ticket reservations. The following specification describes which components should be included and how they should be placed in the application frame:
1. A text field labeled "Date:", a combo box labeled "From:", and a combo box labeled "To:" must reside at the top of frame. Labels must be placed to the left side of their corresponding component. The text field and combo boxes must be of equal size, reside in a column, and occupy all available width.
2. A group of radio buttons titled "Options" must reside in the top right corner of the frame. This group must include "First class", "Business", and "Coach" radio buttons.
3. A list component titled "Available Flights" must occupy the central part of the frame and it should grow or shrink when the size of the frame changes.
4. Three buttons titled "Search", "Purchase", and "Exit" must reside at the bottom of the frame. They must form a row, have equal sizes, and be center-aligned.
Our
FlightReservation example demonstrates how to fulfill these requirements. We do not process any input from these controls and do not attempt to put them to work; we just display them on the screen in the correct position and size . (Three variants are shown to accomplish the layout of the text fields, combo boxes, and their associated labels. Two are commented out, and a discussion of each is given below.)
Note: A similar control placement assignment is part of Sunís Java Developer certification exam.
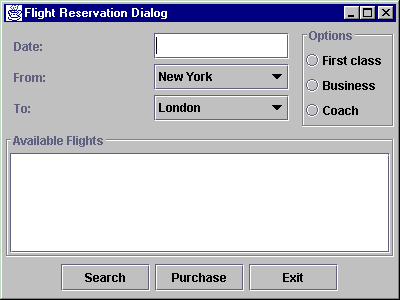
Figure 4.13 FlightReservation layout - Variant 1
<<file figure4-13.gif>>
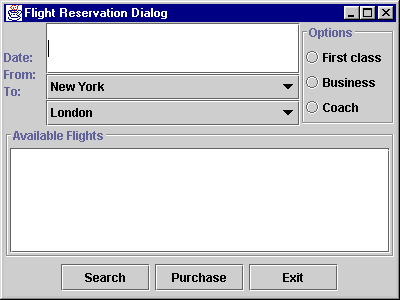
Figure 4.14 FlightReservation layout - Variant 2
<<file figure4-14.gif>>
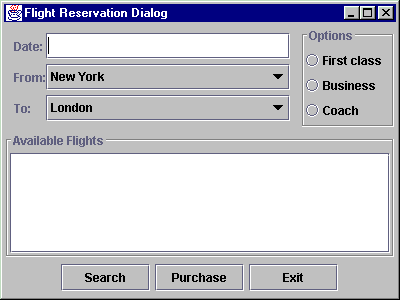
Figure 4.15 FlightReservation layout - Variant 3
<<file figure4-15.gif>>
The Code: FlightReservation.java
see \Chapter4\3
import java.awt.*;
import java.awt.event.*;

import javax.swing.*;
import javax.swing.border.*;
import javax.swing.event.*;

public class FlightReservation extends JFrame
{
  public FlightReservation() {
    super("Flight Reservation Dialog");
    setSize(400, 300);

    JPanel p1 = new JPanel();
    p1.setLayout(new BoxLayout(p1, BoxLayout.X_AXIS));

    JPanel p1r = new JPanel();
    p1r.setBorder(new EmptyBorder(10, 10, 10, 10));

    // Variant 1
    p1r.setLayout(new GridLayout(3, 2, 5, 5));

    p1r.add(new JLabel("Date:"));
    p1r.add(new JTextField());

    p1r.add(new JLabel("From:"));
    JComboBox cb1 = new JComboBox();
    cb1.addItem("New York");
    p1r.add(cb1);

    p1r.add(new JLabel("To:"));
    JComboBox cb2 = new JComboBox();
    cb2.addItem("London");
    p1r.add(cb2);

    p1.add(p1r);

    ///////////////
    // Variant 2 //
    ///////////////
    // JPanel p11 = new JPanel();
    // p11.setLayout(new BoxLayout(p11, BoxLayout.Y_AXIS));
    //
    // JPanel p12 = new JPanel();
    // p12.setLayout(new BoxLayout(p12, BoxLayout.Y_AXIS));
    //
    // p11.add(new JLabel("Date:"));
    // p12.add(new JTextField());
    //
    // p11.add(new JLabel("From:"));
    // JComboBox cb1 = new JComboBox();
    // cb1.addItem("New York");
    // p12.add(cb1);
    //
    // p11.add(new JLabel("To:"));
    // JComboBox cb2 = new JComboBox();
    // cb2.addItem("London");
    // p12.add(cb2);
    //
    // p1.add(p11);
    // p1.add(Box.createHorizontalStrut(10));
    // p1.add(p12);

    ///////////////
    // Variant 3 //
    ///////////////
    // JPanel p11 = new JPanel();
    // p11.setLayout(new GridLayout(3, 1, 5, 5));
    //
    // JPanel p12 = new JPanel();
    // p12.setLayout(new GridLayout(3, 1, 5, 5));
    //
    // p11.add(new JLabel("Date:"));
    // p12.add(new JTextField());
    //
    // p11.add(new JLabel("From:"));
    // JComboBox cb1 = new JComboBox();
    // cb1.addItem("New York");
    // p12.add(cb1);
    //
    // p11.add(new JLabel("To:"));
    // JComboBox cb2 = new JComboBox();
    // cb2.addItem("London");
    // p12.add(cb2);
    //
    // p1r.setLayout(new BorderLayout());
    // p1r.add(p11, BorderLayout.WEST);
    // p1r.add(p12, BorderLayout.CENTER);
    // p1.add(p1r);

    JPanel p3 = new JPanel();
    p3.setLayout(new BoxLayout(p3, BoxLayout.Y_AXIS));
    p3.setBorder(new TitledBorder(new EtchedBorder(),
      "Options"));

    ButtonGroup group = new ButtonGroup();
    JRadioButton r1 = new JRadioButton("First class");
    group.add(r1);
    p3.add(r1);

    JRadioButton r2 = new JRadioButton("Business");
    group.add(r2);
    p3.add(r2);

    JRadioButton r3 = new JRadioButton("Coach");
    group.add(r3);
    p3.add(r3);

    p1.add(p3);

    getContentPane().add(p1, BorderLayout.NORTH);

    JPanel p2 = new JPanel(new BorderLayout());
    p2.setBorder(new TitledBorder(new EtchedBorder(),
      "Available Flights"));
    JList list = new JList();
    JScrollPane ps = new JScrollPane(list);
    p2.add(ps, BorderLayout.CENTER);
    getContentPane().add(p2, BorderLayout.CENTER);

    JPanel p4 = new JPanel();
    JPanel p4c = new JPanel();
    p4c.setLayout(new GridLayout(1, 3, 5, 5));

    JButton b1 = new JButton("Search");
    p4c.add(b1);

    JButton b2 = new JButton("Purchase");
    p4c.add(b2);

    JButton b3 = new JButton("Exit");
    p4c.add(b3);

    p4.add(p4c);
    getContentPane().add(p4, BorderLayout.SOUTH);

    WindowListener wndCloser = new WindowAdapter() {
      public void windowClosing(WindowEvent e) {
        System.exit(0);
      }
    };
    addWindowListener(wndCloser);

    setVisible(true);
  }

  public static void main(String argv[]) {
    new FlightReservation();
  }
}
Understanding the Code
Class FlightReservation
The constructor of the
FlightReservation class creates and positions all necessary GUI components. We will explain step by step how we've chosen intermediate containers and their layouts to fulfill the requirements listed at the beginning of this section.The frame (more specifically it's
contentPane) is managed by a BorderLayout by default. A text field, and the combo boxes and associated labels are added in a separate container to the north along with the radio buttons; push buttons in the south; and the list component is placed in the center. This guarantees that top and bottom (north and south) containers will receive their natural height, and that the central component (the list) will occupy all remaining space.The intermediate container,
JPanel p1r, holds the text field, combo boxes, and their associated labels and is placed in panel p1 which is managed by a horizontally aligned BoxLayout. The p1r panel is surrounded by an EmptyBorder to provide typical surrounding white space.This example offers three variants of managing
p1r and its six child components. The first variant uses a 3x2 GridLayout. This places labels and boxes in two columns opposite one another. Since this panel resides in the north region of the BorderLayout, it receives its natural (preferable) height. In the horizontal direction this layout works satisfactory: it resizes boxes and labels to occupy all available space. The only remaining problem is that GridLayout assigns too much space to the labels (see figure 4.13). We do not need to make labels equal in size to their corresponding input boxes. We need only allow them to occupy their preferred width.
The second variant uses two vertical
BoxLayouts so one can hold labels and the other can hold the corresponding text field and combo boxes. If you try recompiling and running the code with this variant you'll find that the labels now occupy only their necessary width, and the boxes occupy all remaining space (see figure 4.14). This is good, but another problem arises: now the labels are aligned exactly opposite with their corresponding components. Instead, they are shifted in the vertical direction!The third variant offers the best solution. It places the labels and their corresponding components in two columns, but uses 3x1
GridLayouts instead of BoxLayouts. This places all components evenly in the vertical direction. To provide only the minimum width to the labels (the first column) and assign all remaining space to the boxes (the second column) we place these two containers into another intermediate container managed by a BorderLayout: labels in the west, and corresponding components in the center. This solves our problem (see figure 4.15). The only downside to this solution is that it requires the construction of three intermediate containers with different layouts. In the next section weíll show how to build a custom layout manag! er that simplifies this relatively common layout task.Now let's return to the remaining components. A group of
JRadioButtons seems to be the simplest part of our design. They're placed into an intermediate container, JPanel p3, with a TitledBorder containing the required title: "Options". A vertical BoxLayout is used to place these components in a column and a ButtonGroup is used to coordinate their selection. This container is then added to panel p1 (managed by a horizontal BoxLayout) to sit on the eastern side of! panel p1r.The
JList component is added to a JScrollPane to provide scrolling capabilities. It is then placed in an intermediate container, JPanel p2, with a TitledBorder containing the required title "Available Flights".
Note: We do not want to assign a
TitledBorder to the JScrollPane itself because this would substitute its natural border, resulting in a quite awkward scroll pane view. So we nest the JScrollPane in its own JPanel with a TitledBorder.Since the list grows and shrinks when the frame is resized and the group of radio buttons (residing to the right of the list) must occupy only the necessary width, it only makes sense to placed it in the center of the
BorderLayout. We can then use the south region for the three remaining buttons.Since all three buttons must be equal in size, they're added to a
JPanel, p4c, with a 1x3 GridLayout. However, this GridLayout will occupy all available width (fortunately it's limited in the vertical direction by parent BorderLayout). This is not exactly the behavior we are looking for. To resolve this problem we use another intermediate container, JPanel p4, with a FlowLayout. This sizes the only added component, p4cRunning the Code
Figure 4.13, 4.14, and 4.15 show the resulting placement of our components in the parent frame using the first, second, and third variants described above. Note that variant 3ís placement satisfies our specification. Note also that components are resized as expected when the frame container is resized.
When the frame is stretched in the horizontal direction, the text field, combo boxes, and list component consume additional space, and the buttons at the bottom are shifted to the center. When the frame is stretched in the vertical direction, the list component and the panel containing the radio buttons consume all additional space and all other components remain unchanged.
UI Guideline : Harnessing the Power of Java Layouts
Layout managers are powerful but awkward to use. In order to maximize the effectiveness of the visual communication we must make extra effort with the code. Making a bad choice of layout or making sloppy use of default settings may lead to designs which look poor or communicate badly.
In this example, we have shown three alternative designs for the same basic specification. Each exhibit pros and cons and highlight the design trade-offs which can be made, reflecting the principles which were discussed in chapter 2.
A sense of balance.
This occurs when there is sufficient white space used to balance the size of the components. An unbalanced panel can be fixed by bordering the components with a compound border including an empty border.
A sense of scale
Balance can be further affected by the extraordinary size of some components such as the combo boxes shown in Fig 4.14. The combo boxes are bit too big for the purpose intended. This affects the sense of scale as well as the balance of the design. Its important to size comboboxes appropriately. Layout managers have a tendency to stretch components to be larger than might be desirable.
4.5 Custom layout manager: part I -Label/field pairs
This example is intended to familiarize you with developing custom layouts. You may find this knowledge useful in cases where the traditional layouts are not satisfactory or are too complex. In developing large scale applications it is often more convenient to build custom layouts, such as the one we develop here, to help with specific tasks. This often provides increased consistency, and may save a significant amount of coding in the long run.
The example in the previous section highlighted a problem: what is the best way to lay out input field components (e.g. text fields, combo boxes, etc.) and their corresponding labels? We have seen that it can be done using a combination of several intermediate containers and layouts. This section shows how we can simplify the process by using a custom-built layout manager. The goal is to construct a layout manager that knows how to lay out labels and their associated input fields in two columns, allocating the minimum required space to the column containing the labels, and using the remainder for the column containing the input fields.
First we need to clearly state our design goals for this layout manager, which we will appropriately call
DialogLayout. It is always a good idea to reserve plenty of time for thinking about your design. Well-defined design specifications can save you tremendous amounts of time in the long run, and can help pinpoint flaws and oversights before they arise in the code. (We strongly recommend that adopting a design specification stage become part of your development regimin.)DialogLayout
specification:
1. This layout manager will be applied to a container that has all the necessary components added to it in the following order:
2. The components must be placed in pairs forming two vertical columns.
3. Components making up each pair must be placed opposite one another (i.e.
label1 field1). Each pairís label and field must receive the same preferable height, which should be the preferred height of the field.4. Each left component (labels) must receive the same width. This width should be the maximum preferable width of all left components.
5. Each right component (input fields) must also receive the same width. This width should occupy all the remaining space left over from that taken by the left components column.
The code below introduces our custom
DialogLayout class which satisfies the above design specification. This class is placed in its own package named dl. The code used to construct the GUI is alsmot identical to that of the previous example. However, we now revert back to variant 1 and use an instance of DialogLayout instead of a GridLayout to manage the p1r JPanel.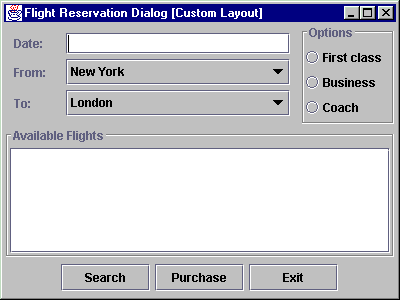
Figure 4.16 Using DialogLayout - custom layout manager part I
<<file figure4-16.gif>>
The Code: FlightReservation.java
see \Chapter4\4
import java.awt.*;
import java.awt.event.*;

import javax.swing.*;
import javax.swing.border.*;
import javax.swing.event.*;

import dl.*;

public class FlightReservation extends JFrame
{
  public FlightReservation() {
    super("Flight Reservation Dialog [Custom Layout]");
    setSize(400, 300);

    JPanel p1 = new JPanel();
    p1.setLayout(new BoxLayout(p1, BoxLayout.X_AXIS));

    JPanel p1r = new JPanel();
    p1r.setBorder(new EmptyBorder(10, 10, 10, 10));

    // Variant 1
    p1r.setLayout(new DialogLayout(20, 5));

    p1r.add(new JLabel("Date:"));
    p1r.add(new JTextField());

    p1r.add(new JLabel("From:"));
    JComboBox cb1 = new JComboBox();
    cb1.addItem("New York");
    p1r.add(cb1);

    p1r.add(new JLabel("To:"));
    JComboBox cb2 = new JComboBox();
    cb2.addItem("London");
    p1r.add(cb2);

    p1.add(p1r);

    ///////////////
    // Variant 2 //
    ///////////////
    // p11.setLayout(new BoxLayout(p11, BoxLayout.Y_AXIS));
    //
    // JPanel p12 = new JPanel();
    // p12.setLayout(new BoxLayout(p12, BoxLayout.Y_AXIS));
    //
    // p11.add(new JLabel("Date:"));
    // p12.add(new JTextField());
    //
    // p11.add(new JLabel("From:"));
    // JComboBox cb1 = new JComboBox();
    // cb1.addItem("New York");
    // p12.add(cb1);
    //
    // p11.add(new JLabel("To:"));
    // JComboBox cb2 = new JComboBox();
    // cb2.addItem("London");
    // p12.add(cb2);
    //
    // p1.add(p11);
    // p1.add(Box.createHorizontalStrut(10));
    // p1.add(p12);

    ///////////////
    // Variant 3 //
    ///////////////
    // JPanel p11 = new JPanel();
    // p11.setLayout(new GridLayout(3, 1, 5, 5));
    //
    // JPanel p12 = new JPanel();
    // p12.setLayout(new GridLayout(3, 1, 5, 5));
    //
    // p11.add(new JLabel("Date:"));
    // p12.add(new JTextField());
    //
    // p11.add(new JLabel("From:"));
    // JComboBox cb1 = new JComboBox();
    // cb1.addItem("New York");
    // p12.add(cb1);
    //
    // p11.add(new JLabel("To:"));
    // JComboBox cb2 = new JComboBox();
    // cb2.addItem("London");
    // p12.add(cb2);
    //
    // p1r.setLayout(new BorderLayout());
    // p1r.add(p11, BorderLayout.WEST);
    // p1r.add(p12, BorderLayout.CENTER);
    // p1.add(p1r);

    JPanel p3 = new JPanel();
    p3.setLayout(new BoxLayout(p3, BoxLayout.Y_AXIS));
    p3.setBorder(new TitledBorder(new EtchedBorder(),
      "Options"));

    ButtonGroup group = new ButtonGroup();
    JRadioButton r1 = new JRadioButton("First class");
    group.add(r1);
    p3.add(r1);

    JRadioButton r2 = new JRadioButton("Business");
    group.add(r2);
    p3.add(r2);

    JRadioButton r3 = new JRadioButton("Coach");
    group.add(r3);
    p3.add(r3);

    p1.add(p3);

    getContentPane().add(p1, BorderLayout.NORTH);

    JPanel p2 = new JPanel(new BorderLayout());
    p2.setBorder(new TitledBorder(new EtchedBorder(),
      "Available Flights"));
    JList list = new JList();
    JScrollPane ps = new JScrollPane(list);
    p2.add(ps, BorderLayout.CENTER);
    getContentPane().add(p2, BorderLayout.CENTER);

    JPanel p4 = new JPanel();
    JPanel p4c = new JPanel();
    p4c.setLayout(new GridLayout(1, 3, 5, 5));

    JButton b1 = new JButton("Search");
    p4c.add(b1);

    JButton b2 = new JButton("Purchase");
    p4c.add(b2);

    JButton b3 = new JButton("Exit");
    p4c.add(b3);

    p4.add(p4c);
    getContentPane().add(p4, BorderLayout.SOUTH);

    WindowListener wndCloser = new WindowAdapter() {
      public void windowClosing(WindowEvent e) {
        System.exit(0);
      }
    };
    addWindowListener(wndCloser);

    setVisible(true);
  }

  public static void main(String argv[]) {
    new FlightReservation();
  }
}
DialogLayout.java
see \Chapter4\4\dl
package dl;

import java.awt.*;
import java.util.*;

public class DialogLayout implements LayoutManager
{
	protected int m_divider = -1;
	protected int m_hGap = 10;
	protected int m_vGap = 5;

	public DialogLayout() {}

	public DialogLayout(int hGap, int vGap)
	{
		m_hGap = hGap;
		m_vGap = vGap;
	}

	public void addLayoutComponent(String name, Component comp) {}

	public void removeLayoutComponent(Component comp) {}

	public Dimension preferredLayoutSize(Container parent)
	{
		int divider = getDivider(parent);

		int w = 0;
		int h = 0;
		for (int k=1 ; k 0)
			m_divider = divider;
	}

	public int getDivider()
	{
		return m_divider;
	}

	protected int getDivider(Container parent)
	{
		if (m_divider > 0)
			return m_divider;

		int divider = 0;
		for (int k=0 ; k < parent.getComponentCount(); k += 2)
		{
			Component comp = parent.getComponent(k);
			Dimension d = comp.getPreferredSize();
			divider = Math.max(divider, d.width);
		}
		divider += m_hGap;
		return divider;
	}

	public String toString()
	{
		return getClass().getName() + "[hgap=" + m_hGap + ",vgap="
			+ m_vGap + ",divider=" + m_divider + "]";
	}
}
Understanding the Code
Class FlightReservation
This class now imports package
dl and sets that layout for JPanel p1r (which contains the labels and input fields). Package dl contains our custom layout, DialogLayout.Class DialogLayout
This class implements the
LayoutManager interface to serve as our custom layout manager. Three instance variables are needed:int m_divider
: width of the left components. This can be calculated or set to some mandatory value.int m_hGap
: horizontal gap between components.int m_vGap
: vertical gap between components.Two constructors are available to create a
DialogLayout: a no-argument default constructor and a constructor which takes horizontal and vertical gap sizes as parameters. The rest of the code implements methods from the LayoutManager interface.Methods
addLayoutComponent() and removeLayoutComponent() are not used in this class and receive empty implementations. We do not support an internal collection of the components to be managed. Rather, we refer to these component directly from the container which is being managed.The purpose of the
preferredLayoutSize() method is to return the preferable container size required to lay out the components in the given container according to the rules used in this layout. In our implementation we first determine the divider size (the width of the first column plus the horizontal gap, m_hGap) by calling the getDivider() custom method.int divider = getDivider(parent);
If no positive divider size has been specified using the
setDivider() method (see below), the getDivider() method looks at each even indexed component in the container (this should be all the labels if the components were added to the container in the correct order) and returns the largest preferred width found plus the horizontal gap value, m_hGap (which defaults to 10 if the default constructor is used):
    if (m_divider > 0)
      return m_divider;

    int divider = 0;
    for (int k=0 ; k<parent.getComponentCount(); k+=2) {
      Component comp = parent.getComponent(k);
      Dimension d = comp.getPreferredSize();
      divider = Math.max(divider, d.width);
    }
    divider += m_hGap;
    return divider;
Now, back to the
preferredLayoutSize() method. Once getDivider returns we then examine all components in the container with odd indices (this should be all the input fields) and determine the maximum width, w. This is found by checking the preferred width of each input field. While we are determining this maximum width, we are also continuing to accumulate the height, h, of the whole input fields column by summing each fieldís preferred height (not forgetting to add the vertical gap size, m_vGap, each time; notice that m_vGap is sub! tracted from the height at the end because there is no vertical gap for the last field). (Remember that m_vGap defaults to 5 if the the default constructor is used.)
    int w = 0;
    int h = 0;
    for (int k=1 ; k<parent.getComponentCount(); k+=2) {
      Component comp = parent.getComponent(k);
      Dimension d = comp.getPreferredSize();
      w = Math.max(w, d.width);
      h += d.height + m_vGap;
    }
    h -= m_vGap;
So at this point we have determined the width of the labels column (including the space between columns),
divider, and the preferred hieght, h, and width, w, of the input fields column. So divider+w gives us the preferred width of the container, and h gives us the total preferred height. Not forgetting to take into account any Insets that might have been applied to the container, we can now return the correct preferred size:
    Insets insets = parent.getInsets();
    return new Dimension(divider+w+insets.left+insets.right,
                         h+insets.top+insets.bottom);
The purpose of the
minimumLayoutSize() method is to return the minimum size required to lay out the components in the given container according to the rules used in this layout. We return preferredLayoutSize() in this method, because we chose not to make a distinction between minimum and preferable sizes (to avoid over-complication).layoutContainer()
is the most important method in any layout manager. This method is responsible for actually assigning the bounds (position and size) for the components in the container being managed. First it determines the size of the divider (as discussed above), which represents the width of the labels column plus an additional m_hGap. From this it determines the width, w, of the fields column by subtracting the container's left and right insets and divider from the width of the whole container:
    int divider = getDivider(parent);

    Insets insets = parent.getInsets();
    int w = parent.getWidth() - insets.left - insets.right - divider;
    int x = insets.left;
    int y = insets.top;
Now all pairs of components are examined in turn. Each left component receives a width equal to
divider-m_hGap, and all right components receive a width of w. Both left and right components receive the preferred height of the right component (which should be the input field).Coordinates of the left components are assigned starting with the containerís
Insets, x and y. Notice that y is continually incremented based on the preferred height of each right component plus the vertical gap, m_vGap. The right components are assigned a y-coordinate identical to their left component counterpart, and an x-coordinate of x+divider (remember that divider includes the horizontal gap, m_hGap):
    for (int k=1 ; k<parent.getComponentCount(); k+=2) {
      Component comp1 = parent.getComponent(k-1);
      Component comp2 = parent.getComponent(k);
      Dimension d = comp2.getPreferredSize();

      comp1.setBounds(x, y, divider-m_hGap, d.height);
      comp2.setBounds(x+divider, y, w, d.height);
      y += d.height + m_vGap;
    }
Method
setDivider() allows us to manually set the size of the left column. The int value passed as parameter gets stored in the m_divider instance variable. Whenever m_divider is greater than 0 the calculations of divider size are overridden in the getDivider() method and this value is returned instead.The
toString method provides typical class name and instance variable information. (It is always a good idea to implement informative toString() methods for each class. Although we donít consistently do this throughout this text, we feel that production code should always include this functionality.)Running the Code
At this point you can compile and execute this example. Figure 4.16 shows the sample interface introduced in the previous section now using
DialogLayout to manage the layout of the input fields (text field and two combo boxes) and their corresponding labels. Note that the labels occupy only their preferred space and do not resize when the frame resizes. The gap between labels and boxes can be managed easily by manually setting the divider size with the setDivider() method (discussed above). The input fields form the right column and occupy all remaining space.Using
DialogLayout, all that is required is adding the labels and input fields in the correct order. We can now use this layout manager each time we encounter label/input field pairs without worrying about intermediate containers. In the next section we build upon DialogLayout to create an even more general layout manager that can be used to create complete dialog interfaces very easily.
UI Guideline : Alignment across controls as well as within
It is a common mistake in UI Design to achieve good alignment with a control or component but fail to achieve this across a whole screen, panel or dialog. Unfortunately, the architecture of Swing lends itself to this problem. For example, if you have 4 custom components which inherit from a JPanel, each has its own Layout Manager and each is functional in its own right. Then you wish to build a composite component which requires all four. So you create a new Component with a Grid Layout for example, then add each of your 4 components in turn.
4.6 Custom layout manager: part II - Common interfaces
In section 4.4 we saw how to choose intermediate containers and appropriate layouts for placing components according to a given specification. This required the use of several intermediate containers and several variants were developed in a search for the best solution. This raises the question: can we somehow just add components one after another to a container which is intelligent enough to lay them out as we would typically expect? The answer is yes, to a certain extent.
In practice the contents of many Java frames and dialogs are constructed using a scheme similar to the following (we realize that this is a big generalization, but you will see these situations arise in many examples throughout this text):
1. Groups (or panels) of controls are laid out in the vertical direction.
2. Labels and their corresponding input fields form two-column structures as described in the previous section.
3. Large components (e.g. lists, tables, text areas, trees, etc.) are usually placed in scroll panes and occupy all space in the horizontal direction.
4. Groups of buttons, including check boxes and radio buttons, are centered in an intermediate container and laid out in the horizontal direction. (In this example we purposefully avoid the vertical placement of buttons for simplicity.)
The example in this section shows how to build a layout manager that places components according to this specification. Its purpose is to further demonstrate that layout managers can be built to define template-like pluggable containers. By adhering to intelligently designed specifications, such templates can be developed to help maximize code reuse and increase productivity. Additionally, in the case of large-scale applications, several different interface designers may consider sharing customized layout managers to enforce interface consistency.
The code below introduces our new custom layout manager,
DialogLayout2, which builds upon DialogLayout. To provide boundaries between control groupings, we construct a new component, DialogSeparator. DialogSeparator is simply a label containing text and a horizontal bar that is drawn across the container. Both DialogLayout2 and DialogSeparator are added to our dl package. The FlightReservation class now shows how to construct the sample airline ticket reservation interface we have been working with since section 4.4 using DialogLayout2 and DialogSeparator. In order to comply with our new layout scheme we are forced to place the radio buttons in a row above the list component. The main things to note are that the code involved to build this interface is done with little regard for the existence of a layout manager, and absolutely no intermediate containers are need to be created!
Note: Constructing custom layout managers for use in a single application is not recommended. Only build them when you know that they will be reused again and again to perform common layout tasks. In general, custom layout manager classes belong within custom packages or embedded as inner classes in custom components. They normally do not belong being defined in applications themselves.
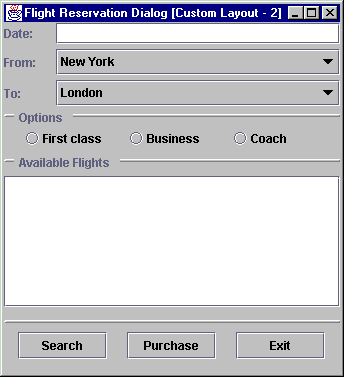
Figure 4.17 Using DialogLayout2 custom layout manager.
<<file figure4-17.gif>>
The Code: FlightReservation.java
see \Chapter4\5
import java.awt.*;
import java.awt.event.*;

import javax.swing.*;
import javax.swing.border.*;
import javax.swing.event.*;

import dl.*;

public class FlightReservation extends JFrame
{
  public FlightReservation() {
    super("Flight Reservation Dialog [Custom Layout - 2]");

    Container c = getContentPane();
    c.setLayout(new DialogLayout2(20, 5));

    c.add(new JLabel("Date:"));
    c.add(new JTextField());

    c.add(new JLabel("From:"));
    JComboBox cb1 = new JComboBox();
    cb1.addItem("New York");
    c.add(cb1);

    c.add(new JLabel("To:"));
    JComboBox cb2 = new JComboBox();
    cb2.addItem("London");
    c.add(cb2);

    c.add(new DialogSeparator("Available Flights"));
    JList list = new JList();
    JScrollPane ps = new JScrollPane(list);
    c.add(ps);

    c.add(new DialogSeparator("Options"));

    ButtonGroup group = new ButtonGroup();
    JRadioButton r1 = new JRadioButton("First class");
    group.add(r1);
    c.add(r1);

    JRadioButton r2 = new JRadioButton("Business");
    group.add(r2);
    c.add(r2);

    JRadioButton r3 = new JRadioButton("Coach");
    group.add(r3);
    c.add(r3);

    c.add(new DialogSeparator());

    JButton b1 = new JButton("Search");
    c.add(b1);

    JButton b2 = new JButton("Purchase");
    c.add(b2);

    JButton b3 = new JButton("Exit");
    c.add(b3);

    WindowListener wndCloser = new WindowAdapter() {
      public void windowClosing(WindowEvent e) {
        System.exit(0);
      }
    };
    addWindowListener(wndCloser);

    pack();
    setVisible(true);
  }

  public static void main(String argv[]) {
    new FlightReservation();
  }
}
The Code: DialogLayout2.java
see \Chapter4\5\dl
package dl;

import java.awt.*;
import java.util.*;

import javax.swing.*;

public class DialogLayout2
	implements LayoutManager
{
	protected static final int COMP_TWO_COL = 0;
	protected static final int COMP_BIG = 1;
	protected static final int COMP_BUTTON = 2;

	protected int m_divider = -1;
	protected int m_hGap = 10;
	protected int m_vGap = 5;
	protected Vector m_v = new Vector();

	public DialogLayout2() {}

	public DialogLayout2(int hGap, int vGap)
	{
		m_hGap = hGap;
		m_vGap = vGap;
	}

	public void addLayoutComponent(String name, Component comp) {}

	public void removeLayoutComponent(Component comp) {}

	public Dimension preferredLayoutSize(Container parent)
	{
		m_v.removeAllElements();
		int w = 0;
		int h = 0;
		int type = -1;

		for (int k=0 ; k < parent.getComponentCount(); k++)
		{
			Component comp = parent.getComponent(k);
			int newType = getLayoutType(comp);
			if (k == 0)
				type = newType;

			if (type != newType)
			{
				Dimension d = preferredLayoutSize(m_v, type);
				w = Math.max(w, d.width);
				h += d.height + m_vGap;
				m_v.removeAllElements();
				type = newType;
			}

			m_v.addElement(comp);
		}

		Dimension d = preferredLayoutSize(m_v, type);
		w = Math.max(w, d.width);
		h += d.height + m_vGap;

		h -= m_vGap;

		Insets insets = parent.getInsets();
		return new Dimension(w+insets.left+insets.right,
			h+insets.top+insets.bottom);
	}

	protected Dimension preferredLayoutSize(Vector v, int type)
	{
		int w = 0;
		int h = 0;
		switch (type)
		{
		case COMP_TWO_COL:
			int divider = getDivider(v);
			for (int k=1 ; k < v.size(); k+=2)
			{
				Component comp = (Component)v.elementAt(k);
				Dimension d = comp.getPreferredSize();
				w = Math.max(w, d.width);
				h += d.height + m_vGap;
			}
			h -= m_vGap;
			return new Dimension(divider+w, h);

		case COMP_BIG:
			for (int k=0 ; k < v.size(); k++)
			{
				Component comp = (Component)v.elementAt(k);
				Dimension d = comp.getPreferredSize();
				w = Math.max(w, d.width);
				h += d.height + m_vGap;
			}
			h -= m_vGap;
			return new Dimension(w, h);

		case COMP_BUTTON:
			Dimension d = getMaxDimension(v);
			w = d.width + m_hGap;
			h = d.height;
			return new Dimension(w*v.size()-m_hGap, h);
		}
		throw new IllegalArgumentException("Illegal type "+type);
	}

	public Dimension minimumLayoutSize(Container parent)
	{
		return preferredLayoutSize(parent);
	}

	public void layoutContainer(Container parent)
	{
		m_v.removeAllElements();
		int type = -1;

		Insets insets = parent.getInsets();
		int w = parent.getWidth() - insets.left - insets.right;
		int x = insets.left;
		int y = insets.top;

		for (int k=0 ; k < parent.getComponentCount(); k++)
		{
			Component comp = parent.getComponent(k);
			int newType = getLayoutType(comp);
			if (k == 0)
				type = newType;

			if (type != newType)
			{
				y = layoutComponents(m_v, type, x, y, w);
				m_v.removeAllElements();
				type = newType;
			}

			m_v.addElement(comp);
		}

		y = layoutComponents(m_v, type, x, y, w);
		m_v.removeAllElements();
	}

	protected int layoutComponents(Vector v, int type,
		int x, int y, int w)
	{
		switch (type)
		{
		case COMP_TWO_COL:
			int divider = getDivider(v);
			for (int k=1 ; k < v.size(); k+=2)
			{
				Component comp1 = (Component)v.elementAt(k-1);
				Component comp2 = (Component)v.elementAt(k);
				Dimension d = comp2.getPreferredSize();

				comp1.setBounds(x, y, divider, d.height);
				comp2.setBounds(x+divider, y, w-divider, d.height);
				y += d.height + m_vGap;
			}
			//y -= m_vGap;
			return y;

		case COMP_BIG:
			for (int k=0 ; k < v.size(); k++)
			{
				Component comp = (Component)v.elementAt(k);
				Dimension d = comp.getPreferredSize();
				comp.setBounds(x, y, w, d.height);
				y += d.height + m_vGap;
			}
			//y -= m_vGap;
			return y;

		case COMP_BUTTON:
			Dimension d = getMaxDimension(v);
			int ww = d.width*v.size() + m_hGap*(v.size()-1);
			int xx = x + Math.max(0, (w - ww)/2);
			for (int k=0 ; k < v.size(); k++)
			{
				Component comp = (Component)v.elementAt(k);
				comp.setBounds(xx, y, d.width, d.height);
				xx += d.width + m_hGap;
			}
			return y + d.height;
		}
		throw new IllegalArgumentException("Illegal type "+type);
	}

	public int getHGap()
	{
		return m_hGap;
	}

	public int getVGap()
	{
		return m_vGap;
	}

	public void setDivider(int divider)
	{
		if (divider > 0)
			m_divider = divider;
	}

	public int getDivider()
	{
		return m_divider;
	}

	protected int getDivider(Vector v)
	{
		if (m_divider > 0)
			return m_divider;

		int divider = 0;
		for (int k = 0 ; k < v.size(); k += 2)
		{
			Component comp = (Component)v.elementAt(k);
			Dimension d = comp.getPreferredSize();
			divider = Math.max(divider, d.width);
		}
		divider += m_hGap;
		return divider;
	}

	protected Dimension getMaxDimension(Vector v)
	{
		int w = 0;
		int h = 0;
		for (int k = 0 ; k < v.size(); k++)
		{
			Component comp = (Component)v.elementAt(k);
			Dimension d = comp.getPreferredSize();
			w = Math.max(w, d.width);
			h = Math.max(h, d.height);
		}
		return new Dimension(w, h);
	}

	protected int getLayoutType(Component comp)
	{
		if (comp instanceof AbstractButton)
			return COMP_BUTTON;
		else if (comp instanceof JPanel ||
			comp instanceof JScrollPane ||
			comp instanceof DialogSeparator)
			return COMP_BIG;
		else
			return COMP_TWO_COL;
	}

	public String toString()
	{
		return getClass().getName() + "[hgap=" + m_hGap + ",vgap="
			+ m_vGap + ",divider=" + m_divider + "]";
	}
}
The Code: DialogSeparator.java
see \Chapter4\5\dl
package dl;

import java.awt.*;

import javax.swing.*;

public class DialogSeparator extends JLabel
{
	public static final int OFFSET = 15;

	public DialogSeparator() {}

	public DialogSeparator(String text)
	{
		super(text);
	}

	public Dimension getPreferredSize()
	{
		return new Dimension(getParent().getWidth(), 20);
	}

	public Dimension getMinimumSize()
	{
		return getPreferredSize();
	}

	public Dimension getMaximumSize()
	{
		return getPreferredSize();
	}

	public void paint(Graphics g)
	{
		g.setColor(getBackground());
		g.fillRect(0, 0, getWidth(), getHeight());

		Dimension d = getSize();
		int y = (d.height-3)/2;
		g.setColor(Color.white);
		g.drawLine(1, y, d.width-1, y);
		y++;
		g.drawLine(0, y, 1, y);
		g.setColor(Color.gray);
		g.drawLine(d.width-1, y, d.width, y);
		y++;
		g.drawLine(1, y, d.width-1, y);

		String text = getText();
		if (text.length()==0)
			return;

		g.setFont(getFont());
		FontMetrics fm = g.getFontMetrics();
		y = (d.height + fm.getAscent())/2;
		int l = fm.stringWidth(text);

		g.setColor(getBackground());
		g.fillRect(OFFSET-5, 0, OFFSET+l, d.height);

		g.setColor(getForeground());
		g.drawString(text, OFFSET, y);
	}
}
Understanding the Code
Class FlightReservation
This variant of our airplane ticket reservation sample application uses an instance of
DialogLayout2 as a layout for the whole content pane. Note that no other JPanels are used, and no other layouts are involved. All components are added directly to the content pane and managed by the new layout. This incredibly simplifies the creation of the user interface. Note, however, that we still need to add the label/input field pairs in the correct order because DialogLayout2 manages these pairs identically to DialogLayout.Note that instances of our
DialogSeparator class are used to provide borders between groups of components.Class DialogLayout2
This class implements the
LayoutManager interface to serve as a custom layout manager. It builds on features from DialogLayout to manage all components in its associated container. Three constants declared at the top of the class correspond to the three types of components which are recognized by this layout:int COMP_TWO_COL
: text fields, comboboxes, and their associated labels which must be laid out in two columns using a DialogLayout.int COMP_BIG
: wide components (instances of JPanel, JScrollPane, or DialogSeparator) which must occupy the maximum horizontal container space wherever they are placed.int COMP_BUTTON
: button components (instances of AbstractButton) which must all be given an equal size, laid out in a single row, and centered in the container.The instance variables used in
DialogLayout2 are the same as those used in DialogLayout with one addition: we declare Vector m_v to be used as a temporary collection of components.To lay out components in a given container we need to determine, for each component, which category it falls under with regard to our
DialogLayout2.COMP_XX constants. All components of the same type added in a contiguous sequence must be processed according to the specific rules described above.
Method
preferredLayoutSize() steps through the list of components in a given container and determines their type with our custom getLayoutType() method (see below) and stores it in the newType local variable. Local variable type holds the type of the previous component in the sequence. For the first component in the container, type receives the same value as newType.
  public Dimension preferredLayoutSize(Container parent) {
    m_v.removeAllElements();
    int w = 0;
    int h = 0;

    int type = -1;
    for (int k=0 ; k<parent.getComponentCount(); k++) {
      Component comp = parent.getComponent(k);
      int newType = getLayoutType(comp);
      if (k == 0)
        type = newType;
If we find a break in the sequence of types this triggers a call to the overloaded
preferredLayoutSize(Vector v, int type) method (discussed below) which determines the preferred size for a temporary collection of the components stored in the Vector m_v. Then w and h local variables, which are accumulating the total preferred width and height for this layout, are adjusted, and the temporary collection, m_v is cleared. The newly processed component is then added to m_v.
      if (type != newType) {
        Dimension d = preferredLayoutSize(m_v, type);
        w = Math.max(w, d.width);
        h += d.height + m_vGap;
        m_v.removeAllElements();
        type = newType;
      }

      m_v.addElement(comp);
    }
Once our loop finishes we make the unconditional call to
preferredLayoutSize() to take into account the last (unprocessed) sequence of components and update h and w accordingly (just as we did in the loop). We then subtract the vertical gap value, m_vGap, from h because we know that we have just processed the last set of components and therefore there is no vertical gap necessary. Taking into account any Insets set on the container, we can now return the computed preferred size as a Dimension instance:
    Dimension d = preferredLayoutSize(m_v, type);
    w = Math.max(w, d.width);
    h += d.height + m_vGap;

    h -= m_vGap;

    Insets insets = parent.getInsets();
    return new Dimension(w+insets.left+insets.right,
      h+insets.top+insets.bottom);
  }
The overloaded method
preferredLayoutSize(Vector v, int type) computes the preferred size to lay out a collection of components of a given type. This size is accumulated in w and h local variables. For a collection of type COMP_TWO_COL this method invokes a mechanism that should be familiar (see section 4.5). For a collection of type COMP_BIG this method adjusts the preferable width and increments the height for each component, since these components will be placed in a column:
      case COMP_BIG:
        for (int k=0 ; k<v.size(); k++) {
          Component comp = (Component)v.elementAt(k);
          Dimension d = comp.getPreferredSize();
          w = Math.max(w, d.width);
          h += d.height + m_vGap;
        }
        h -= m_vGap;
        return new Dimension(w, h);
For a collection of type
COMP_BUTTON this method invokes our getMaxDimension method (see below) to calculate the desired size of a single component. Since all components of this type will have an equal size and be contained in one single row, the resulting width for this collection is calculated through multiplication by the number of components, v.size():
      case COMP_BUTTON:
        Dimension d = getMaxDimension(v);
        w = d.width + m_hGap;
        h = d.height;
        return new Dimension(w*v.size()-m_hGap, h);
Method
layoutContainer(Container parent) assigns bounds to the components in the given container. (Remember that this is the method that actually performs the layout of its associated container.) It processes an array of components similar to the preferredLayoutSize() method. First it steps through the components in the given container, forms a temporarily collection from contiguous components of the same type, and calls the overloaded layoutComponents(Vector v, int type, int x, int y, int w) method to lay out that collection.Method
layoutContainer(Vector v, int type, int x, int y, int w) lays out components from the temporary collection of a given type, starting from the given coordinates x and y, and using the specified width, w, of the container. It returns an adjusted y-coordinate which may be used to lay out a new set of components.For a collection of type
COMP_TWO_COL this method lays out components in two columns identical to how DialogLayout did this (see section 4.5). For a collection of type COMP_BIG the method assigns all available width to each component:
      case COMP_BIG:
        for (int k=0 ; k<v.size(); k++) {
          Component comp = (Component)v.elementAt(k);
          Dimension d = comp.getPreferredSize();
          comp.setBounds(x, y, w, d.height);
          y += d.height + m_vGap;
        }
        return y;
For a collection of type
COMP_BUTTON this method assigns an equal size to each component and places them in the center arranged horizontally:
      case COMP_BUTTON:
        Dimension d = getMaxDimension(v);
        int ww = d.width*v.size() + m_hGap*(v.size()-1);
        int xx = x + Math.max(0, (w - ww)/2);
        for (int k=0 ; k<v.size(); k++) {
          Component comp = (Component)v.elementAt(k);
          comp.setBounds(xx, y, d.width, d.height);
          xx += d.width + m_hGap;
        }
        return y + d.height;
Note that a more sophisticated implementation might split a sequence of buttons up into several rows if not enough space is available. We do not do that here to avoid over-complication. This might be an interesting exercise to give you more practice at customizing layout managers.
The remainder of the
DialogLayout2 class contains methods which were either explained already, or are simple enough to be considered self-explanatory.Class DialogSeparator
This class implements a component used to separate two groups of components placed in a column. It extends
JLabel to inherit all its default characteristics (font, foreground, etc.). Two available constructors allow the creation of a DialogSeparator with or without a text label.Method
getPreferredSize returns a fixed height, and a width equal to the width of the container. Methods getMinimumSize() and getMaximumSize() simply delegate calls to the getPreferredSize() method.The
paintComponent() method draws a separating bar with a raised appearance across the available component space, and draws the title text (if any) at the left-most side taking into account a pre-defined offset, 15.Running the Code
At this point you can compile and execute this example. Figure 4.17 shows our sample application which now uses
DialogLayout2 to manage the layout of all components. You can see that we have the same set of components placed and sized in accordance with our general layout scheme presented in the beginning of this section. The most important thing to note is that we did not have to use any intermediate containers and layouts to achieve this: all components are added directly to the frameís content pane which is intelligently managed by DialogLayout2.
UI Guideline : Consistency of Button Placement
It is important to be consistent with the placement of buttons in Dialogs and Option Panes. In the example shown here, a symmetrical approach to button placement has been adopted. This is a good safe choice. It ensures balance. With Data Entry Dialogs it is also common to use an asymmetrical layout such as Bottom RHS of the dialog.
In addition to achieving balance with the layout, by being consistent with your placement you allow the User to rely on directional memory to find a specific button location. Directional Memory is strong. Once the User learns where you have placed buttons, they will quickly be able to locate the correct button in many dialog and option situations. It is therefore, vital that you place buttons in a consistent order e.g. OK, Cancel, always and never Cancel, OK.
As a general rule, always use symmetrical layout with option dialogs and be consistent with whatever you decide to use for data entry dialogs.
It makes sense to develop custom components such as JOKCancelButtons and JYesNoButtons. You can then re-use these components every time you need a such a set of buttons. This encapsulates the placement and ensures consistency.
4.7 Dynamic layout in a JavaBeans container
In this section we will use different layouts to manage JavaBeans in a simple container application. This will help us to further understand the role of layouts in dynamically managing containers with a variable number of components. This example also sets up the framework for a powerful bean editor environment developed in chapter 18 using
JTables. By allowing modification of component properties we can use this environment to experiment with preferred, maximum, and minimum sizes, and observe the behavior different layout managers exibit in various situations. This provides us with the ability to learn much more about each layout manager, and allows us to prototype simple interfaces without actually implementing them.This example consists of a frame container that allows the creation, loading, and saving of JavaBeans using serialization. Beans can be added and removed from this container and we implement a focus mechanism to visually identify the currently selected bean. Most importantly, the layout manager of this container can be changed at run-time. (You may want to review the JavaBeans material in chapter 2 before attempting to work through this example.)
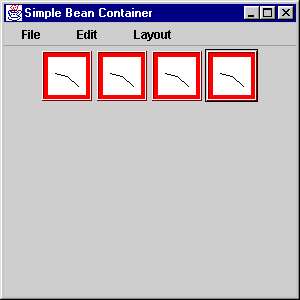
Figure 4.18 BeanContainer displaying 4 Clock components using a FlowLayout
<<file figure4-18.gif>>
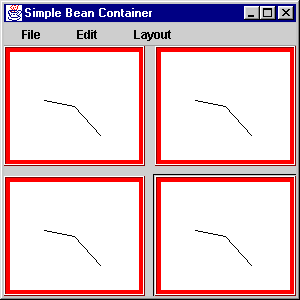
Figure 4.19 BeanContainer displaying 4 Clock components using a GridLayout
<<file figure4-19.gif>>
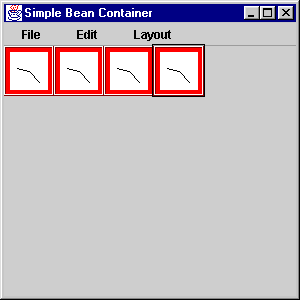
Figure 4.20 BeanContainer displaying 4 Clock components using a horizontal BoxLayout
<<file figure4-20.gif>>
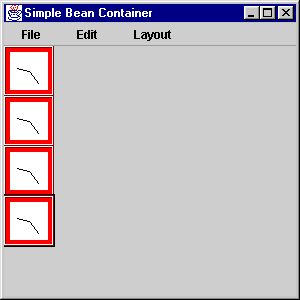
Figure 4.21 BeanContainer displaying 4 Clock components using a vertical BoxLayout
<<file figure4-21.gif>>
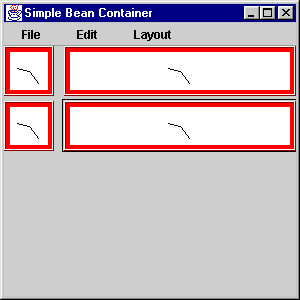
Figure 4.22 BeanContainer displaying 4 Clock components using a DialogLayout
<<file figure4-22.gif>>
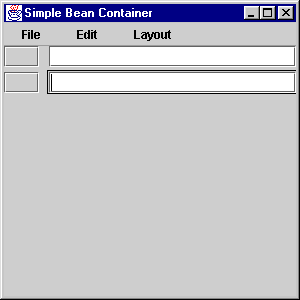
Figure 4.23 BeanContainer displaying button/input field pairs using DialogLayout
<<file figure4-23.gif>>
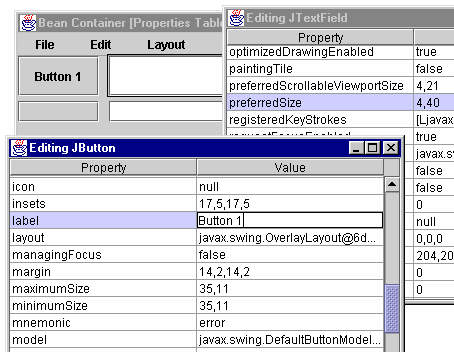
Figure 4.24 BeanContainer displaying button/input field pairs using DialogLayout
<<file figure4-24.gif>>
The Code: BeanContainer.java
see \Chapter4\6
import java.awt.*;
import java.awt.event.*;
import java.io.*;
import java.beans.*;
import java.lang.reflect.*;

import javax.swing.*;

import dl.*;

public class BeanContainer extends JFrame implements FocusListener
{
  protected File m_currentDir = new File(".");
  protected Component m_activeBean;
  protected String m_className = "clock.Clock";
  protected JFileChooser m_chooser = new JFileChooser();

  public BeanContainer() {
    super("Simple Bean Container");
    getContentPane().setLayout(new FlowLayout());

    setSize(300, 300);

    JPopupMenu.setDefaultLightWeightPopupEnabled(false);

    JMenuBar menuBar = createMenuBar();
    setJMenuBar(menuBar);

    WindowListener wndCloser = new WindowAdapter() {
      public void windowClosing(WindowEvent e) {
        System.exit(0);
      }
    };
    addWindowListener(wndCloser);

    setVisible(true);
  }

  protected JMenuBar createMenuBar() {
    JMenuBar menuBar = new JMenuBar();

    JMenu mFile = new JMenu("File");

    JMenuItem mItem = new JMenuItem("New...");
    ActionListener lst = new ActionListener() {
      public void actionPerformed(ActionEvent e) {
        Thread newthread = new Thread() {
          public void run() {
            String result = (String)JOptionPane.showInputDialog(
              BeanContainer.this,
              "Please enter class name to create a new bean",
              "Input", JOptionPane.INFORMATION_MESSAGE, null,
              null, m_className);
            repaint();
            if (result==null)
              return;
            try {
              m_className = result;
              Class cls = Class.forName(result);
              Object obj = cls.newInstance();
              if (obj instanceof Component) {
                m_activeBean = (Component)obj;
                m_activeBean.addFocusListener(
                  BeanContainer.this);
                m_activeBean.requestFocus();
                getContentPane().add(m_activeBean);
              }
              validate();
            }
            catch (Exception ex) {
              ex.printStackTrace();
              JOptionPane.showMessageDialog(
                BeanContainer.this, "Error: "+ex.toString(),
                "Warning", JOptionPane.WARNING_MESSAGE);
            }
          }
        };
        newthread.start();
      }
    };
    mItem.addActionListener(lst);
    mFile.add(mItem);

    mItem = new JMenuItem("Load...");
    lst = new ActionListener() {
      public void actionPerformed(ActionEvent e) {
        Thread newthread = new Thread() {
          public void run() {
            m_chooser.setCurrentDirectory(m_currentDir);
            m_chooser.setDialogTitle(
              "Please select file with serialized bean");
            int result = m_chooser.showOpenDialog(
              BeanContainer.this);
            repaint();
            if (result != JFileChooser.APPROVE_OPTION)
              return;
            m_currentDir = m_chooser.getCurrentDirectory();
            File fChoosen = m_chooser.getSelectedFile();
            try {
              FileInputStream fStream =
                new FileInputStream(fChoosen);
              ObjectInput  stream  =
                new ObjectInputStream(fStream);
              Object obj = stream.readObject();
              if (obj instanceof Component) {
                m_activeBean = (Component)obj;
                m_activeBean.addFocusListener(
                  BeanContainer.this);
                m_activeBean.requestFocus();
                getContentPane().add(m_activeBean);
              }
              stream.close();
              fStream.close();
              validate();
            }
            catch (Exception ex) {
              ex.printStackTrace();
              JOptionPane.showMessageDialog(
                BeanContainer.this, "Error: "+ex.toString(),
                "Warning", JOptionPane.WARNING_MESSAGE);
            }
            repaint();
          }
        };
        newthread.start();
      }
    };
    mItem.addActionListener(lst);
    mFile.add(mItem);

    mItem = new JMenuItem("Save...");
    lst = new ActionListener() {
      public void actionPerformed(ActionEvent e) {
        Thread newthread = new Thread() {
          public void run() {
            if (m_activeBean == null)
              return;
            m_chooser.setDialogTitle(
              "Please choose file to serialize bean");
            m_chooser.setCurrentDirectory(m_currentDir);
            int result = m_chooser.showSaveDialog(
              BeanContainer.this);
            repaint();
            if (result != JFileChooser.APPROVE_OPTION)
              return;
            m_currentDir = m_chooser.getCurrentDirectory();
            File fChoosen = m_chooser.getSelectedFile();
            try {
              FileOutputStream fStream =
                new FileOutputStream(fChoosen);
              ObjectOutput stream  =
                new ObjectOutputStream(fStream);
              stream.writeObject(m_activeBean);
              stream.close();
              fStream.close();
            }
            catch (Exception ex) {
              ex.printStackTrace();
            JOptionPane.showMessageDialog(
              BeanContainer.this, "Error: "+ex.toString(),
              "Warning", JOptionPane.WARNING_MESSAGE);
            }
          }
        };
        newthread.start();
      }
    };
    mItem.addActionListener(lst);
    mFile.add(mItem);

    mFile.addSeparator();

    mItem = new JMenuItem("Exit");
    lst = new ActionListener() {
      public void actionPerformed(ActionEvent e) {
        System.exit(0);
      }
    };
    mItem.addActionListener(lst);
    mFile.add(mItem);
    menuBar.add(mFile);

    JMenu mEdit = new JMenu("Edit");

    mItem = new JMenuItem("Delete");
    lst = new ActionListener() {
      public void actionPerformed(ActionEvent e) {
        if (m_activeBean == null)
          return;
        getContentPane().remove(m_activeBean);
        m_activeBean = null;
        validate();
        repaint();
      }
    };
    mItem.addActionListener(lst);
    mEdit.add(mItem);
    menuBar.add(mEdit);

    JMenu mLayout = new JMenu("Layout");
    ButtonGroup group = new ButtonGroup();

    mItem = new JRadioButtonMenuItem("FlowLayout");
    mItem.setSelected(true);
    lst = new ActionListener() {
      public void actionPerformed(ActionEvent e){
        getContentPane().setLayout(new FlowLayout());
        validate();
        repaint();
      }
    };
    mItem.addActionListener(lst);
    group.add(mItem);
    mLayout.add(mItem);

    mItem = new JRadioButtonMenuItem("GridLayout");
    lst = new ActionListener() {
      public void actionPerformed(ActionEvent e){
        int col = 3;
        int row = (int)Math.ceil(getContentPane().
          getComponentCount()/(double)col);
        getContentPane().setLayout(new GridLayout(row, col, 10, 10));
        validate();
        repaint();
      }
    };
    mItem.addActionListener(lst);
    group.add(mItem);
    mLayout.add(mItem);

    mItem = new JRadioButtonMenuItem("BoxLayout - X");
    lst = new ActionListener() {
      public void actionPerformed(ActionEvent e) {
        getContentPane().setLayout(new BoxLayout(
          getContentPane(), BoxLayout.X_AXIS));
        validate();
        repaint();
      }
    };
    mItem.addActionListener(lst);
    group.add(mItem);
    mLayout.add(mItem);

    mItem = new JRadioButtonMenuItem("BoxLayout - Y");
    lst = new ActionListener() {
      public void actionPerformed(ActionEvent e) {
        getContentPane().setLayout(new BoxLayout(
          getContentPane(), BoxLayout.Y_AXIS));
        validate();
        repaint();
      }
    };
    mItem.addActionListener(lst);
    group.add(mItem);
    mLayout.add(mItem);

    mItem = new JRadioButtonMenuItem("DialogLayout");
    lst = new ActionListener() {
      public void actionPerformed(ActionEvent e) {
        getContentPane().setLayout(new DialogLayout());
        validate();
        repaint();
      }
    };
    mItem.addActionListener(lst);
    group.add(mItem);
    mLayout.add(mItem);

    menuBar.add(mLayout);

    return menuBar;
  }

  public void focusGained(FocusEvent e) {
    m_activeBean = e.getComponent();
    repaint();
  }

  public void focusLost(FocusEvent e) {}

  // This is a heavyweight component so we override paint
  // instead of paintComponent. super.paint(g) will
  // paint all child components first, and then we
  // simply draw over top of them.
  public void paint(Graphics g) {
    super.paint(g);

    if (m_activeBean == null)
      return;

    Point pt = getLocationOnScreen();
    Point pt1 = m_activeBean.getLocationOnScreen();
    int x = pt1.x - pt.x - 2;
    int y = pt1.y - pt.y - 2;
    int w = m_activeBean.getWidth() + 2;
    int h = m_activeBean.getHeight() + 2;

    g.setColor(Color.black);
    g.drawRect(x, y, w, h);
  }

  public static void main(String argv[]) {
    new BeanContainer();
  }
}
The Code: Clock.java
see \Chapter4\6\clock
package clock;

import java.applet.*;
import java.awt.*;
import java.awt.event.*;
import java.beans.*;
import java.io.*;
import java.util.*;

import javax.swing.*;
import javax.swing.border.*;

public class Clock
	extends    JButton
	implements Customizer, Externalizable, Runnable
{

	protected PropertyChangeSupport m_helper;
	protected boolean  m_digital = false;
	protected Calendar m_calendar;
	protected Dimension m_preffSize;

	public Clock()
	{
		m_calendar = Calendar.getInstance();
		m_helper = new PropertyChangeSupport(this);

		Border br1 = new EtchedBorder(EtchedBorder.RAISED,
			Color.white, new Color(128, 0, 0));
		Border br2 = new MatteBorder(4, 4, 4, 4, Color.red);
		setBorder(new CompoundBorder(br1, br2));

		setBackground(Color.white);
		setForeground(Color.black);

		(new Thread(this)).start();
	}

	public void writeExternal(ObjectOutput out)
		throws IOException
	{
		out.writeBoolean(m_digital);
		out.writeObject(getBackground());
		out.writeObject(getForeground());
		out.writeObject(getPreferredSize());
	}

	public void readExternal(ObjectInput in)
		throws IOException, ClassNotFoundException
	{
		setDigital(in.readBoolean());
		setBackground((Color)in.readObject());
		setForeground((Color)in.readObject());
		setPreferredSize((Dimension)in.readObject());
	}

	public Dimension getPreferredSize()
	{
		if (m_preffSize != null)
			return m_preffSize;
		else
			return new Dimension(50, 50);
	}

	public void setPreferredSize(Dimension preffSize)
	{
		m_preffSize = preffSize;
	}

	public Dimension getMinimumSize()
	{
		return getPreferredSize();
	}

	public Dimension getMaximumSize()
	{
		return getPreferredSize();
	}

	public void setDigital(boolean digital)
	{
		m_helper.firePropertyChange("digital",
			new Boolean(m_digital),
			new Boolean(digital));
		m_digital = digital;
		repaint();
	}

	public boolean getDigital()
	{
		return m_digital;
	}

	public void addPropertyChangeListener(
		PropertyChangeListener lst)
	{
		if (m_helper != null)
			m_helper.addPropertyChangeListener(lst);
	}

	public void removePropertyChangeListener(
		PropertyChangeListener lst)
	{
		if (m_helper != null)
			m_helper.removePropertyChangeListener(lst);
	}

	public void setObject(Object bean) {}

	public void paintComponent(Graphics g)
	{
                super.paintComponent(g);
                Color colorRetainer = g.getColor();

		g.setColor(getBackground());
		g.fillRect(0, 0, getWidth(), getHeight());
		getBorder().paintBorder(this, g, 0, 0, getWidth(), getHeight());

		m_calendar.setTime(new Date());	// get current time
		int hrs = m_calendar.get(Calendar.HOUR_OF_DAY);
		int min = m_calendar.get(Calendar.MINUTE);

		g.setColor(getForeground());
		if (m_digital)
		{
			String time = ""+hrs+":"+min;
			g.setFont(getFont());
			FontMetrics fm = g.getFontMetrics();
			int y = (getHeight() + fm.getAscent())/2;
			int x = (getWidth() - fm.stringWidth(time))/2;
			g.drawString(time, x, y);
		}
		else
		{
			int x = getWidth()/2;
			int y = getHeight()/2;
			int rh = getHeight()/4;
			int rm = getHeight()/3;

			double ah = ((double)hrs+min/60.0)/6.0*Math.PI;
			double am = min/30.0*Math.PI;

			g.drawLine(x, y, (int)(x+rh*Math.sin(ah)),
				(int)(y-rh*Math.cos(ah)));
			g.drawLine(x, y, (int)(x+rm*Math.sin(am)),
				(int)(y-rm*Math.cos(am)));
		}

                g.setColor(colorRetainer);
	}

	public void run()
	{
		while (true)
		{
			repaint();
			try
			{
				Thread.sleep(30*1000);
			}
			catch(InterruptedException ex) { break; }
		}
	}
}
Understanding the Code
Class BeanContainer
This class extends
JFrame to provide the frame for this application. It also implements the FocusListener interface to manage focus transfer between beans in the container. This class declares four instance variables:File m_currentDir
: the most recent directory used to load and save beans.Component m_activeBean
: a bean component which currently has the focus.String m_className
: fully qualified class name of our custom Clock bean,JFileChooser m_chooser
: used for saving and loading beans.The only GUI provided by the container itself is the menu bar. The
createMenuBar() method creates the menu bar, its items, and their corresponding action listeners. Three menus are added to the menu bar: "File," "Edit," and "Layout."
Note: All code corresponding to "New...," "Load..., and "Save..." in the "File" menu is wrapped in a separate thread to avoid unnecesary load on the event-dispatching thread. See chapter 2 for more about multithreading.
Menu item "New..." in the "File" menu displays an input dialog (using the
JOptionPane.showInputDialog() method) to enter the class name of a new bean to be added to the container. Once a name has been entered, the program attempts to load that class, create a new class instance using a default constructor, and add that new object to the container. The newly created component requests the focus and receives a this reference to BeanContainer as a FocusListener. Note that any caught exceptions will be displayed in a message box.Menu item "Load..." from the "File" menu displays a
JFileChooser dialog to select a file containing a previously serialized bean component. If this succeeds, the program opens an input stream on this file and reads the first stored object. If this object is derived from the java.awt.Component class it is added to the container. The loaded component requests the focus and receives a this reference to BeanContainer as a FocusListener. Note that any caught exceptions will be displayed in a message box.Menu item "Save..." from the "File" menu displays a
JFileChooser dialog to select a file destination for serializing the bean component which currently has the focus. If this succeeds, the program opens an output stream on that file and writes the currently active component to that stream. Note that any caught exceptions will be displayed in a message box.Menu item "Exit" simply quits and closes the application with
System.exit(0).The "Edit" menu contains a single item titled "Delete" which removes the currently active bean from the container:
      getContentPane().remove(m_activeBean);
      m_activeBean = null;
      validate();
      repaint();
Menu "Layout" contains several
JRadioButtonMenuItems managed with a ButtonGroup group. These items are titled "FlowLayout," "GridLayout," "BoxLayout - X," "BoxLayout - Y," and "DialogLayout." Each item receives an ActionListener which sets the corresponding layout manager of the application frameís content pane, calls validate to lay out the container again, and the repaints it. For example:
      getContentPane().setLayout(new DialogLayout());
      validate();
      repaint();
Method
focusGained stores a reference to the component which currently has the focus into instance variable m_activebean. Method paint() is implemented to draw a rectangle around the component which currently has the focus. It is important to note here the static JPopupMenu method called in the BeanContainer constructor:JPopupMenu.setDefaultLightWeightPopupEnabled(false);
This method forces all popup menus (which menu bars use to display their contents) to use heavyweight popups rather than lightweight popups. By default popup menus are lightweight unless they cannot fit within their parent containerís bounds. The reason we disable this is because our
paint() method will render the bean selection rectangle over top of the lightweight popups otherwise.Class Clock
This class is a sample bean clock component which can be used in a bean container just as any other bean. This class extends the
JButton component to inherit it's focus grabbing functionality. This class also implements three interfaces: Customizer to handle property listeners, Externalizable to completely manage its own serialization, and Runnable to be run by a thread. Four instance variables are declared:PropertyChangeSupport m_helper
: an object to manage PropertyChangeListeners.boolean m_digital
: a custom property for this component which manages the display state of the clock (digital or arrow-based).Calendar m_calendar
: helper object to handle Java's time objects (instances of Date).Dimension m_preffSize
: a preferred size for this component which may be set using the setPreferredSize method.The constructor of the
Clock class creates the helper objects and sets the border for this component as a CompoundBorder containing an EtchedBorder and a MatteBorder imitating the border of a real clock. It then sets the background and foreground colors and starts a new Thread to run the clock.Method
writeExternal() writes the current state of a Clock object into an ObjectOutput stream. Four properties are written: m_digital, Background, Foreground, and PreferredSize. Method readExternal() reads the previously saved state of a Clock object from an ObjectInput stream. It reads these four properties and applies them to the object previously created with the default constructor. These methods are called from the "Save" and "Load" menu bar action listener code in BeanContainer. Specifically, they are called when writeObject and readObject are invoked.
Note: The serialization mechanism in Swing has not yet matured. You can easily find that both lightweight and heavyweight components throw exceptions during the process of serialization. This is the reason we implement the
Externalizable interface to take complete control over the serialization of the Clock bean. Another reason is that the default serialization mechanism tends to serialize a substantial amount of unnecessary information, whereas our custom implementation stores only the necessities.The rest of this class need not be explained here, as it does not relate directly to the topic of this chapter and represents a simple example of a bean component. If you're interested, take note of the
paintComponent() method which, depending on whether the clock is in digital mode or not (determined by m_digital), either computes the current position of the clock's arrows and draws them, or renders the time as a drawn String.Running the Code
This application provides a framework for experimenting with any available JavaBeans, as well as with both lightweight (Swing) and heavyweight (AWT) components: we can create, serialize, delete, and restore them.
Note that we can apply several layouts to manage these components dynamically. Figures 4.18-4.23 show
BeanContainer using five different layout managers to arrange four Clock beans. To create a bean choose "New" from the "File" menu and type the fully qualifies name of the class. For instance, to create a Clock you need to type "clock.Clock" in the input dialog.Once youíve experimented with
Clock beans try loading some Swing JavaBeans. Figure 4.24 shows BeanDialog with two JButtons, and two JTextFields. They were created in the following order (and thus have corresponding container indices): JButton, JTextField, JButton, JTextField. Try doing this and remember that you need to specify fully qualified class names such as "javax.swing.JButton&qu! ot; when adding a new bean. Note that this ordering adhereís to our DialogLayout label/input field pairs scheme, except that here we are using buttons in place of labels. So when we set BeanContainerís layout to DialogLayout we know what to expect.
Note: You will notice selection problems with components such as
JComboBox, JSplitPane and JLabel (which has no selection mechanism). Because of JComboBox is actually a container containing a button, it is impossible to give it the current focus after it has been added to BeanContainer. A more complete version of BeanContainer would take this into account and implement more robust focus requesting behavior.Later in this book, after a discussion of tables, we add powerful functionality to this example allowing the manipulation of bean properties. It is highly suggested that you skip ahead for a moment and run this example: (see \Chapter18\8).
Start the chapter 18 example and create
JButton and JTextField beans exactly as you did above. Select DialogLayout from the "Layout" menu and then click on the top-most JButton to give it the focus. Now select "Properties" from the "Edit" menu. A separate frame will pop up with a JTable containing all of the JButtonís properties. Navigate to the "label" property and change it to "Button 1" (by double clicking on its "Value" field). Now select the corresponding top-most JTextField and change its "preferredSize" property to "4,40". Figure 4.24 illustrates what you should see.By changing the preferred, maximum, and minimum sizes, as well as other component properties, we can directly examine the behavior different layout managers impose on our container. Experimenting with this example is a very convenient way to learn more about how the layout managers behave. It also forms the foundation for an interface development environment (IDE), which many developers use to simplify interface design.