NetBeans project folders are marked with the  icon.
icon.
The examples in the Swing Tutorial are also provided as NetBeans projects that are ready to be opened and run inside of NetBeans IDE, a free integrated development environment that you can use to simplify application development.
This page provides information on the following tasks:
The easiest way to get NetBeans IDE is to download the NetBeans IDE installer for your operating system from the NetBeans download page.
You can then run the installer and complete a short sequence of steps in the installation wizard to set up the IDE. You can find more details on the installation process from the installation instructions that are linked to from the download page.
You can then launch the IDE in one of the following ways:
Opening a project in NetBeans IDE consists of the following steps:
NetBeans project folders are marked with the  icon.
icon.

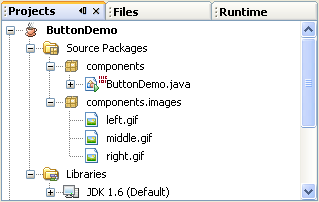
Once opened, the project appears in the IDE's Projects window. Expand the nodes of the project to show the project's structure. The project includes the following main subnodes:
To open a file, double-click the file's node in the Projects window. When opened, a file is displayed in the Source Editor, to the right of the Projects window.
The Projects window represents the "logical" structure of the project, which does not correspond to the layout of the files on your system. This logical structure highlights the parts the project that you need to access most often. The Projects window does not display compiled .class files. If you want to see how the entire project is physically represented on disk, open the Files window.
To compile your whole project, right-click the project's node in the Projects window and choose Build Project.
The Output window opens and displays output on the compilation progress.
If the build output concludes with the statement BUILD FAILED, you probably have a syntax error in your code. Errors are reported in the Output window as hyperlinked text. You double-click such a hyperlink to navigate to the source of an error. You can then fix the error and once again choose Build Project.
When you build the project, bytecode .class files are generated. You can see where the new files are generated by opening the Files window and expanding the folder for the project.
To run your project, right-click the project's node in the Projects window and choose Run Project.
You can also use the Build Main Project and Run Main Project commands in the main menu. However, these commands work only work on the project that is currently designated as the "main" project. You can make a project the main project by right-clicking its node in the Projects window and choosing Set Main Project.For more tips on using NetBeans IDE with the Java Tutorial, see .