Table of Contents
- 22.1. MySQL ODBC Support
- 22.1.22.1.1. Introduction to MyODBC
- 22.1.22.1.2. General Information About ODBC and MyODBC
- 22.1.22.1.3. How to Install MyODBC
- 22.1.22.1.4. Installing MyODBC from a Binary Distribution on Windows
- 22.1.22.1.5. Installing MyODBC from a Binary Distribution on Unix
- 22.1.22.1.6. Installing MyODBC from a Source Distribution on Windows
- 22.1.22.1.7. Installing MyODBC from a Source Distribution on Unix
- 22.1.22.1.8. Installing MyODBC from the BitKeeper Development Source Tree
- 22.1.22.1.9. MyODBC Configuration
- 22.1.22.1.10. MyODBC Connection-Related Issues
- 22.1.22.1.11. MyODBC and Microsoft Access
- 22.1.22.1.12. MyODBC and Microsoft VBA and ASP
- 22.1.22.1.13. MyODBC and Third-Party ODBC Tools
- 22.1.22.1.14. MyODBC General Functionality
- 22.1.22.1.15. Basic MyODBC Application Steps
- 22.1.22.1.16. MyODBC API Reference
- 22.1.22.1.17. MyODBC Data Types
- 22.1.22.1.18. MyODBC Error Codes
- 22.1.22.1.19. MyODBC With VB: ADO, DAO and RDO
- 22.1.22.1.20. MyODBC with Microsoft .NET
- 22.1.22.1.21. Credits
- 22.2. MySQL Java Connectivity (JDBC)
This chapter describes MySQL Connectors, drivers that provide connectivity to the MySQL server for client programs.
MySQL provides support for ODBC by means of MySQL Connector/ODBC, the family of MyODBC drivers. This is the reference for the Connector/ODBC product family of MyODBC drivers that provide ODBC 3.5x compliant access to the MySQL Database System. It will teach you how to install MyODBC and how to use it. You will also information about common programs that are known to work with MyODBC and answers to some of the most frequently asked questions about MyODBC.
This reference applies to MyODBC {No value for `myodbc3_version'}. You can find a manual for an older version of MyODBC in the binary or source distribution for that version.
This is a reference to the MySQL ODBC drivers, not a general ODBC reference. For more information about ODBC, refer to http://www.microsoft.com/data/.
The application development part of this reference assumes a good working knowledge of C, general DBMS knowledge, and finally, but not least, familiarity with MySQL. For more information about MySQL functionality and its syntax, refer to http://dev.mysql.com/doc/.
If you have questions that are not aswered in this document, please send a mail message to mailto:myodbc@@lists.mysql.com.
ODBC (Open Database Connectivity) provides a way for client programs to access a wide range of databases or data sources. ODBC is a standardized API that allows connections to SQL database servers. It was developed according to the specifications of the SQL Access Group and defines a set of function calls, error codes, and data types that can be used to develop database-independent applications. ODBC usually is used when database independence or simultaneous access to different data sources is required.
For more information about ODBC, refer to http://www.microsoft.com/data/.
Connector/ODBC is the term designating the MySQL AB product family of MySQL ODBC drivers. These are known as the MyODBC drivers.
MyODBC 2.50 is a 32-bit ODBC driver from MySQL AB that is based on ODBC 2.50 specification level 0 (with level 1 and 2 features). This is one of the most popular ODBC drivers in the open source market, used by many users to access the MySQL functionality.
MyODBC 3.51 is a 32-bit ODBC driver, also known as the MySQL ODBC 3.51 driver. This version is enhanced compared to the existing MyODBC 2.50 driver. It has support for ODBC 3.5x specification level 1 (complete core API + level 2 features) in order to continue to provide all functionality of ODBC for accessing MySQL.
MySQL AB distributes all its products under the General Public License (GPL). You can get a copy of the latest version of MyODBC binaries and sources from the MySQL AB Web site http://dev.mysql.com/downloads/.
For more information about MyODBC, visit http://www.mysql.com/products/myodbc/.
MyODBC can be used on all major platforms supported by MySQL, such as:
Windows 95, 98, Me, NT, 2000, and XP
All Unix Operating Systems
AIX
Amiga
BSDI
DEC
FreeBSD
HP-UX 10, 11
Linux
Mac OS X Server
Mac OS X
NetBSD
OpenBSD
OS/2
SGI Irix
Solaris
SunOS
SCO OpenServer
SCO UnixWare
Tru64 Unix
If a binary distribution is not available for downloading for a particular platform, you can build the driver yourself by downloading the driver sources. You can contribute the binaries to MySQL by sending a mail message to mailto:myodbc@@lists.mysql.com, so that it becomes available for other users.
MySQL AB provides assistance to the user community by means of its mailing lists. For MyODBC-related issues, you can get help from experienced users by using the mailto:myodbc@@lists.mysql.com mailing list.
For information about subscribing to MySQL mailing lists or to browse list archives, visit http://lists.mysql.com/.
For the success of any product, support from the product vendor or the development team plays a key role. If you want any of the following, you must get a support contract from MySQL AB:
Bugs to be resolved within time
To have immediate patches delivered directly to your mailbox
To request a feature in the driver
To have enhancement to the driver
To resolve any MySQL or MyODBC issues
To have direct interaction with MySQL and MyODBC developers
MySQL AB offers different types of support licenses in order to help you by keeping your requirements and ability to purchase in mind. For more information about MySQL support, visit https://order.mysql.com/ or send a mail message to mailto:sales@@mysql.com.
Once you have the support means, you can send queries or bug reports using the MySQL support wizard from http://support.mysql.com/. Then the MySQL team will work on your problem immediately until it gets resolved.
If you encounter difficulties or problems with MyODBC, you should start by making a log file from the ODBC Manager (the log you get when requesting logs from ODBC ADMIN) and MyODBC. The procedure for doing this is described in the section called “Getting an ODBC Trace File”.
Check the MyODBC trace file to find out what could be wrong. You should be able to determine what statements were issued by searching for the string >mysql_real_query in the myodbc.log file.
You should also try issuing the statements from the mysql client program or from admndemo. This will help you determine whether the error is in MyODBC or MySQL.
If you find out something is wrong, please only send the relevant rows (maximum 40 rows) to the myodbc mailing list. See the section called “The MySQL Mailing Lists”. Please never send the whole MyODBC or ODBC log file!
If you are unable to find out what's wrong, the last option is to create an archive in tar or Zip format that contains a MyODBC trace file, the ODBC log file, and a README file that explains the problem. You can send this to ftp://ftp.mysql.com/pub/mysql/upload/. Only we at MySQL AB will have access to the files you upload, and we will be very discreet with the data.
If you can create a program that also demonstrates the problem, please include it in the archive as well.
If the program works with some other SQL server, you should include an ODBC log file where you do exactly the same thing in the other SQL server.
Remember that the more information you can supply to us, the more likely it is that we can fix the problem.
You must have a support contract from MySQL AB in order to request a new feature that is not in the TO-DO list, or if you want a patch prior to its release. For more information on obtaining support, see the section called “How to Get MyODBC Support”.
You can send a patch or suggest a better solution for any existing code or problems by sending a mail message to mailto:myodbc@@lists.mysql.com.
Open Database Connectivity (ODBC) is a widely accepted application-programming interface (API) for database access. It is based on the Call-Level Interface (CLI) specifications from X/Open and ISO/IEC for database APIs and uses Structured Query Language (SQL) as its database access language.
A survey of ODBC functions supported by MyODBC is given at the section called “MyODBC API Reference”. For general information about ODBC, see http://www.microsoft.com/data/.
The MyODBC architecture is based on five components, as shown in the following diagram:
- Application:
An application is a program that calls the ODBC API to access the data from the MySQL server. The Application communicates with the Driver Manager using the standard ODBC calls. The Application does not care where the data is stored, how it is stored, or even how the system is configured to access the data. It needs to know only the Data Source Name (DSN).
A number of tasks are common to all applications, no matter how they use ODBC. These tasks are:
Selecting the MySQL server and connecting to it
Submitting SQL statements for execution
Retrieving results (if any)
Processing errors
Committing or rolling back the transaction enclosing the SQL statement
Disconnecting from the MySQL server
Because most data access work is done with SQL, the primary tasks for applications that use ODBC are submitting SQL statements and retrieving any results generated by those statements.
- Driver manager:
The Driver Manager is a library that manages communication between application and driver or drivers. It performs the following tasks:
Resolves Data Source Names (DSN)
Driver loading and unloading
Processes ODBC function calls or passes them to the driver
- MyODBC Driver:
The MyODBC driver is a library that implements the functions in the ODBC API. It processes ODBC function calls, submits SQL requests to MySQL server, and returns results back to the application. If necessary, the driver modifies an application's request so that the request conforms to syntax supported by the MySQL.
- ODBC.INI:
ODBC.INI is the ODBC configuration file that stores the driver and database information required to connect to the server. It is used by the Driver Manager to determine which driver to be loaded using the Data Source Name. The driver uses this to read connection parameters based on the DSN specified. For more information, the section called “MyODBC Configuration”.
- MySQL Server:
The MySQL server is the source of data. MySQL is:
A database management system (DBMS)
A relational database management system (RDBMS)
Open Source Software
An ODBC Driver Manager is a library that manages communication between the ODBC aware application and driver(s). Its main functionality includes:
Resolving Data Source Names (DSN)
Driver loading and unloading
Processing ODBC function calls or passing them to the driver
The following driver managers are commonly used:
Microsoft Windows ODBC Driver Manager (odbc32.dll), http://www.microsoft.com/data/
unixODBC Driver Manager for Unix (libodbc.so), http://www.unixodbc.org.
iODBC ODBC Driver Manager for Unix (libiodbc.so), http://www.iodbc.org
MyODBC 3.51 also is shipped with UnixODBC beginning with version 2.1.2.
MySQL AB supports two Open Source ODBC drivers for accessing MySQL functionality through the ODBC API: MyODBC (MyODBC 2.50) and MySQL ODBC 3.51 Driver (MyODBC 3.51).
Note: From this section onward, we refer both the drivers generically as MyODBC. Whenever there is a difference, we use the original names.
MyODBC works on Windows 9x, Me, NT, 2000, and XP, and on most Unix platforms.
MyODBC is Open Source. You can find the newest version at http://dev.mysql.com/downloads/connector/odbc/. Please note that the 2.50.x versions are LGPL licensed, whereas the 3.51.x versions are GPL licensed.
If you have problem with MyODBC and your program also works with OLEDB, you should try the OLEDB driver.
Normally you need to install MyODBC only on Windows machines. You need MyODBC for Unix only if you have a program like ColdFusion that is running on a Unix machine and uses ODBC to connect for database access.
If you want to install MyODBC on a Unix box, you will also need an ODBC manager. MyODBC is known to work with most Unix ODBC managers.
To make a connection to a Unix box from a Windows box with an ODBC application (one that doesn't support MySQL natively), you must first install MyODBC on the Windows machine.
The user and Windows machine must have access privileges for the MySQL server on the Unix machine. This is set up with the GRANT command. See GRANT.
You must create an ODBC DSN entry as follows:
Open the Control Panel on the Windows machine.
Double-click the ODBC Data Sources 32-bit icon.
Click the tab User DSN.
Click the Add button.
Select MySQL in the screen Create New Data Source and click the Finish button.
The MySQL Driver default configuration screen will be shown. See the section called “Configuring a MyODBC DSN on Windows”.
Now start your application and select the ODBC driver with the DSN that you specified in the ODBC administrator.
Notice that other configuration options are shown on the MySQL screen that you can try if you run into problems (options such as trace, don't prompt on connect, and so forth).
To install MyODBC on Windows, you should download the appropriate distribution file from http://dev.mysql.com/downloads/connector/odbc/, unpack it, and execute the MyODBC-VERSION.exe file.
On Windows, you may get the following error when trying to install the older MyODBC 2.50 driver:
An error occurred while copying C:\WINDOWS\SYSTEM\MFC30.DLL. Restart
Windows and try installing again (before running any applications
which use ODBC)
The problem is that some other program is using ODBC. Because of how Windows is designed, you may not be able in this case to install new ODBC drivers with Microsoft's ODBC setup program. In most cases, you can continue by pressing Ignore to copy the rest of the MyODBC files and the final installation should still work. If it doesn't, the solution is to re-boot your computer in “safe mode.” Choose safe mode by pressing F8 just before your machine starts Windows during re-booting, install MyODBC, and re-boot to normal mode.
To install or upgrade MyODBC from an RPM distribution on Linux, simply download the RPM distribution of the latest version of MyODBC and follow the instructions below. Use su root to become root, then install the RPM file.
If you are installing for the first time:
shell> su root
shell> rpm -ivh MyODBC-3.51.01.i386-1.rpm
If the driver already exists, upgrade like this:
shell> su root
shell> rpm -Uvh MyODBC-3.51.01.i386-1.rpm
If there is any dependancy error for MySQL client library, libmysqlclient, simply ignore it by supplying the --nodeps option, and then make sure the MySQL client shared library is in the path or set through LD_LIBRARY_PATH.
This installs the driver libraries and related documents to /usr/local/lib and /usr/share/doc/MyODBC respectively. Now proceed onto configuring the DSN on Unix.
To uninstall the driver, become root and execute an rpm command:
shell> su root
shell> rpm -e MyODBC
To install the driver from a tarball distribution (.tar.gz file), download the latest version of the driver for your operating system and follow these steps:
shell> su root
shell> gunzip MyODBC-3.51.01-i686-pc-linux.tar.gz
shell> tar xvf MyODBC-3.51.01-i686-pc-linux.tar
shell> cd MyODBC-3.51.01-i686-pc-linux
Read the installation instructions in the INSTALL-BINARY file and execute these commands.
shell> cp libmyodbc* /usr/local/lib
shell> cp odbc.ini /usr/local/etc
shell> export ODBCINI=/usr/local/etc/odbc.ini
Then proceed on to how to configure the DSN on unix to configure the DSN for MyODBC. For more information, refer to the INSTALL-BINARY file that comes with your distribution.
MDAC, Microsoft Data Access SDK from http://www.microsoft.com/data/.
MySQL client libraries and include files from MySQL 4.0.0 or higher. (Preferably MySQL 4.0.16 or higher). This is required because MyODBC uses new calls and structures that exist only starting from this version of the library. To get the client libraries and include files, visit http://dev.mysql.com/downloads/.
MyODBC 3.51 source distributions include Makefiles that uses nmake. In the distribution, you can find Makefile for building the release version and Makefile_debug for building debugging versions of the driver libraries and DLLs.
To build the driver, use this procedure:
Download and extract the sources to a folder, then change location into that folder. The following command assumes the folder is named myodbc3-src:
C:\> cd myodbc3-src
Edit Makefile to specify the correct path for the MySQL client libraries and headers files. Then use use the following commands to build and install the release version:
C:\> nmake -f Makefile
C:\> nmake -f Makefile install
nmake -f Makefile builds the release version of the driver and places the binaries in subdirectory called Release.
nmake -f Makefile install installs (copies) the driver DLLs and libraries(myodbc3.dll, myodbc3.lib) to your system directory.
To build the debug version, use Makefile_Debug rather than Makefile, as shown below:
C:\> nmake -f Makefile_debug
C:\> nmake -f Makefile_debug install
You can clean and rebuild the driver by using:
C:\> nmake -f Makefile clean
C:\> nmake -f Makefile install
Note:
Make sure to specify the correct MySQL client libraries and header files path in the Makefiles (set the MYSQL_LIB_PATH and MYSQL_INCLUDE_PATH variables). The default header file path is assumed to be C:\mysql\include. The default library path is assumed to be C:\mysql\lib\opt for release DLLs and C:\mysql\lib\debug for debug versions.
For the complete usage of nmake, visit http://msdn.microsoft.com/library/default.asp?url=/library/en-us/wcepb40/htm/_wcepb_nmake_tool.asp.
If you are using the BitKeeper tree for compiling, All Windows-specific Makefiles are named as Win_Makefile*.
After the driver libraries are copied/installed to the system directory, you can test whether the libraries are properly built by using the samples provided in the samples subdirectory:
C:\> cd samples
C:\> nmake -f Makefile all
MySQL client libraries and include files from MySQL 4.0.0 or higher. (Preferably MySQL 4.0.16 or higher). This is required because MyODBC uses new calls and structures that exist only starting from this version of the library. To get the client libraries and include files, visit http://dev.mysql.com/downloads/.
The MySQL library must be configured with the --enable-thread-safe-client option. libmysqlclient installed as a shared library.
One of the following Unix ODBC driver managers must be installed:
iodbc 3.0 or later (http://www.iodbc.org)
unixodbc Alpha 3 or later (http://www.unixodbc.org)
If using a character set that isn't compiled into the MySQL client library (the defaults are: latin1 big5 czech euc_kr gb2312 gbk sjis tis620 ujis) then you need to install the mysql character definitions from the charsets directory into SHAREDIR (by default, /usr/local/mysql/share/mysql/charsets). These should already be into place if you have installed the MySQL server on the same machine.
Once you have all the required files, unpack the source files to a separate directory and follow the instructions as given below:
The configure script gives you a great deal of control over how you configure your MyODBC build. Typically you do this using options on the configure command line. You can also affect configure using certain environment variables. For a list of options and environment variables supported by configure, run this command:
shell> ./configure --help
Some of the more commonly used configure options are described here:
To compile MyODBC, you need to supply the MySQL client include and library files path using the --with-mysql-path=DIR option, where DIR is the directory where the MySQL is installed.
MySQL compile options can be determined by running DIR/bin/mysql_config.
Supply the standard header and library files path for your ODBC Driver Manager(iodbc or unixobc).
If you are using iodbc and iodbc is not installed in its default location (/usr/local), you might have to use the --with-iodbc=DIR option, where DIR is the directory where iodbc is installed.
If the iodbc headers do not reside in DIR/include, you can use the --with-iodbc-includes=INCDIR option to specify their location.
The applies to libraries. If they are not in DIR/lib, you can use the --with-iodbc-libs=LIBDIR option.
If you are using unixODBC, use the --with-unixODBC=DIR option (case sensitive) to make configure look for unixODBC instead of iodbc by default, DIR is the directory where unixODBC is installed.
If the unixODBC headers and libraries aren't located in DIR/include and DIR/lib, use the --with-unixODBC-includes=INCDIR and --with-unixODBC-libs=LIBDIR options.
You might want to specify an installation prefix other than /usr/local. For example, to install the MyODBC drivers in /usr/local/odbc/lib, use the --prefix=/usr/local/odbc option.
The final configuration command will look something like this:
shell> ./configure --prefix=/usr/local \
           --with-iodbc=/usr/local \
           --with-mysql-path=/usr/local/mysql
In order to link the driver with MySQL thread safe client libraries libmysqlclient_r.so or libmysqlclient_r.a, you must specify the following configure option:
--enable-thread-safe
and can be disabled(default) using
--disable-thread-safe
This option enables the building of driver thread-safe library libmyodbc3_r.so from by linking with mysql thread-safe client library libmysqlclient_r.so (The extensions are OS dependent).
In case while configuring with thread-safe option, and gotten into a configure error; then look at the config.log and see if it is due to the lack of thread-libraries in the system; and supply one with LIBS options i.e.
LIBS="-lpthread" ./configure ..
You can enable or disable the shared and static versions using these options:
--enable-shared[=yes/no]
--disable-shared
--enable-static[=yes/no]
--disable-static
By default, all the binary distributions are built as non-debugging versions (configured with --without-debug).
To enable debugging information, build the driver from source distribution and use the --with-debug) when you run configure.
This option is available only for BK clone trees; not for normal source distributions.
By default, the driver is built with (--without-docs); And in case if you want the documentation to be taken care in the normal build, then configure with:
--with-docs
To build the driver libraries, you have to just execute make, which takes care of everything.
shell> make
If any errors occur, correct them and continue the build process. If you aren't able to build, then send a detailed email to mailto:myodbc@@lists.mysql.com for further assistance.
On most platforms, MySQL doesn't build or support .so (shared) client libraries by default, because building with shared libraries has caused us problems in the past.
In cases like this, you have to download the MySQL distribution and configure it with these options:
--without-server --enable-shared
To build shared driver libraries, you must specify the --enable-shared option for configure. By default, configure does not enable this option.
If you have configured with the --disable-shared option, you can build the .so file from the static libraries using the following commands:
shell> cd MyODBC-3.51.01
shell> make
shell> cd driver
shell> CC=/usr/bin/gcc \
       $CC -bundle -flat_namespace -undefined error \
           -o .libs/libmyodbc3-3.51.01.so \
           catalog.o connect.o cursor.o dll.o error.o execute.o \
           handle.o info.o misc.o myodbc3.o options.o prepare.o \
           results.o transact.o utility.o \
           -L/usr/local/mysql/lib/mysql/ \
           -L/usr/local/iodbc/lib/ \
           -lz -lc -lmysqlclient -liodbcinst
Make sure to change -liodbcinst to -lodbcinst if you are using unixODBC instead of iODBC, and configure the library paths accordingly.
This builds and places the libmyodbc3-3.51.01.so file in the .libs directory. Copy this file to MyODBC library directory (/usr/local/lib (or the lib directory under the installation directory that you supplied with the --prefix).
shell> cd .libs
shell> cp libmyodbc3-3.51.01.so /usr/local/lib
shell> cd /usr/local/lib
shell> ln -s libmyodbc3-3.51.01.so libmyodbc3.so
To build the thread-safe driver library:
shell> CC=/usr/bin/gcc \
       $CC -bundle -flat_namespace -undefined error
	      -o .libs/libmyodbc3_r-3.51.01.so
	      catalog.o connect.o cursor.o dll.o error.o execute.o
	      handle.o info.o misc.o myodbc3.o options.o prepare.o
	      results.o transact.o utility.o
	      -L/usr/local/mysql/lib/mysql/
	      -L/usr/local/iodbc/lib/
	      -lz -lc -lmysqlclient_r -liodbcinst
To install the driver libraries, execute the following command:
shell> make install
That command installs one of the following sets of libraries:
For MyODBC 3.51:
libmyodbc3.so
libmyodbc3-3.51.01.so, where 3.51.01 is the version of the driver
libmyodbc3.a
For thread-safe MyODBC 3.51:
libmyodbc3_r.so
libmyodbc3-3_r.51.01.so
libmyodbc3_r.a
For MyODBC 2.5.0:
libmyodbc.so
libmyodbc-2.50.39.so, where 2.50.39 is the version of the driver
libmyodbc.a
For more information on build process, refer to the INSTALL file that comes with the source distribution. Note that if you are trying to use the make from Sun, you may end up with errors. On the other hand, GNU gmake should work fine on all platforms.
To run the basic samples provided in the distribution with the libraries that you built, just execute:
shell> make test
Make sure the DSN 'myodbc3' is configured first in odbc.ini and environment variable ODBCINI is pointing to the right odbc.ini file; and MySQL server is running. You can find a sample odbc.ini with the driver distribution.
You can even modify the samples/run-samples script to pass the desired DSN, UID, and PASSWORD values as the command line arguments to each sample.
To build the driver on Mac OS X (Darwin), make use of the following configure example:
shell> ./configure --prefix=/usr/local
			       --with-unixODBC=/usr/local
			       --with-mysql-path=/usr/local/mysql
			       --disable-shared
			       --enable-gui=no
			       --host=powerpc-apple
The command assumes that the unixODBC and MySQL are installed in the default locations. If not, configure accordingly.
On Mac OS X, --enable-shared builds .dylib files by default. You can build .so files like this:
shell> make
shell> cd driver
shell> CC=/usr/bin/gcc \
       $CC -bundle -flat_namespace -undefined error
           -o .libs/libmyodbc3-3.51.01.so *.o
           -L/usr/local/mysql/lib/
           -L/usr/local/iodbc/lib
           -liodbcinst -lmysqlclient -lz -lc
To build the thread-safe driver library:
shell> CC=/usr/bin/gcc \
       $CC -bundle -flat_namespace -undefined error
       -o .libs/libmyodbc3-3.51.01.so *.o
       -L/usr/local/mysql/lib/
       -L/usr/local/iodbc/lib
       -liodbcinst -lmysqlclienti_r -lz -lc -lpthread
Make sure to change the -liodbcinst to -lodbcinst in case of using unixODBC instead of iODBC and configure the libraries path accordingly.
In Apple's version of GCC, both cc and gcc are actually symbolic links to gcc3.
Now copy this library to the $prefix/lib directory and symlink to libmyodbc3.so.
You can cross-check the output shared-library properties using this command:
shell> otool -LD .libs/libmyodbc3-3.51.01.so
To build the driver on HP-UX 10.x or 11.x, make use of the following configure example:
If using cc:
shell> CC="cc" \
       CFLAGS="+z" \
       LDFLAGS="-Wl,+b:-Wl,+s" \
       ./configure --prefix=/usr/local
			       --with-unixodbc=/usr/local
			       --with-mysql-path=/usr/local/mysql/lib/mysql
			       --enable-shared
			       --enable-thread-safe
If using gcc:
shell> CC="gcc" \
       LDFLAGS="-Wl,+b:-Wl,+s" \
       ./configure --prefix=/usr/local
			       --with-unixodbc=/usr/local
			       --with-mysql-path=/usr/local/mysql
			       --enable-shared
			       --enable-thread-safe
Once the driver is built, cross-check its attributes using chatr .libs/libmyodbc3.sl to see whether or not you need to have the MySQL client libraries path using the SHLIB_PATH environment variable. For static versions, ignore all shared-library options and run configure with the --disable-shared option.
To build the driver on AIX, make use of the following configure example:
shell> ./configure --prefix=/usr/local
			       --with-unixodbc=/usr/local
			       --with-mysql-path=/usr/local/mysql
			       --disable-shared
			       --enable-thread-safe
NOTE: For more information about how to build and set up the static and shared libraries across the different platforms refer to ' Using static and shared libraries across platforms'.
Note: You should read this section only if you are interested in helping us test our new code.
To obtain our most recent development source tree, use these instructions:
Download BitKeeper from http://www.bitmover.com/cgi-bin/download.cgi. You will need BitKeeper 3.0 or newer to access our repository.
Follow the instructions to install it.
After BitKeeper is installed, first go to the directory you want to work from, and then use this command if you want to clone the MyODBC 3.51 branch:
shell> bk clone bk://mysql.bkbits.net/myodbc3 myodbc-3.51
In the preceding example, the source tree will be set up in the myodbc-3.51/ or by default myodbc3/ subdirectory of your current directory. If you are behind the firewall and can only initiate HTTP connections, you can also use BitKeeper via HTTP. If you are required to use a proxy server, simply set the environment variable http_proxy to point to your proxy:
shell> export http_proxy="http://your.proxy.server:8080/"
Now, simply replace the bk:// with http:// when doing a clone. Example:
shell> bk clone http://mysql.bkbits.net/myodbc3 myodbc-3.51
The initial download of the source tree may take a while, depending on the speed of your connection; be patient.
You will need GNU autoconf 2.52 (or newer), automake 1.4, libtool 1.4, and m4 to run the next set of commands.
shell> cd myodbc-3.51
shell> bk -r edit
shell> aclocal; autoheader; autoconf;  automake;
shell> ./configure  # Add your favorite options here
shell> make
For more information on how to build, refer to INSTALL file located in the same directory. On Windows, make use of Windows Makefiles WIN-Makefile and WIN-Makefile_debug in building the driver, for more information, see the section called “Installing MyODBC from a Source Distribution on Windows”.
When the build is done, run make install to install the MyODBC 3.51 driver on your system.
If you have gotten to the make stage and the distribution does not compile, please report it to mailto:myodbc@@lists.mysql.com.
After the initial bk clone operation to get the source tree, you should run bk pull periodically to get the updates.
You can examine the change history for the tree with all the diffs by using bk sccstool. If you see some funny diffs or code that you have a question about, do not hesitate to send e-mail to mailto:myodbc@@lists.mysql.com.
Also, if you think you have a better idea on how to do something, send an e-mail to the same address with a patch. bk diffs will produce a patch for you after you have made changes to the source. If you do not have the time to code your idea, just send a description.
BitKeeper has a nice help utility that you can access via bk helptool.
You can also browse changesets, comments and source code online by browsing to http://mysql.bkbits.net:8080/myodbc3.
This section describes how to configure MyODBC, including DSN creation and the different arguments that the driver takes as an input arguments in the connection string. It also describes how to create an ODBC trace file.
A "data source" is a place where data comes from. The data source must have a persistent identifier, the Data Source Name. Using the Data Source Name, MySQL can access initialization information. With the initialization information, MySQL knows where to access the database and what settings to use when the access starts.
In effect, the data source is the path to the data. In different contexts this might mean different things, but typically it identifies a running MySQL server (for example via a network address or service name), plus the default database for that server at connection time, plus necessary connection information such as the port. The MySQL drivers (and, on Windows systems, the ODBC Driver Manager) will use the data source for connecting. An administrative utility called the Microsoft ODBC Data Source Administrator may be useful for this purpose.
There are two places where the initialization information might be: in the Windows registry (on a Windows system), or in a DSN file (on any system).
If the information is in the Windows registry, it is called a "Machine data source". It might be a "User data source", in which case only one user can see it. Or it might be a "System data source" in which case it is accessible to all users on the computer, or indeed to all users connected to the computer, if the users are connected by Microsoft Windows NT services. When you run the ODBC Data Administration program, you will have a choice whether to use "User" or "System" – there are separate tabs.
If the information is in a DSN file, it is called a "File data source". This is a text file. Its advantages are: (a) it is an option for any kind of computer, not just a computer with a Windows operating system; (b) its contents can be transmitted or copied relatively easily.
To add and configure a new MyODBC data source on Windows, use the ODBC Data Source Administrator. The ODBC Administrator updates your data source connection information. As you add data sources, the ODBC Administrator updates the registry information for you.
To open the ODBC Administrator from the Control Panel:
Click Start, point to Settings, and then click Control Panel.
On computers running Microsoft Windows 2000 or newer, double-click Administrative Tools, and then double-click Data Sources (ODBC). On computers running older versions of Windows, double-click 32-bit ODBC or ODBC.

The ODBC Data Source Administrator dialog box appears, as shown here:

Click Help for detailed information about each tab of the ODBC Data Source Administrator dialog box.
To add a data source on Windows:
Open the ODBC Data Source Administrator.
In the ODBC Data Source Administrator dialog box, click Add. The Create New Data Source dialog box appears.
Select MySQL ODBC 3.51 Driver, and then click Finish. The MySQL ODBC 3.51 Driver - DSN Configuration dialog box appears, as shown here:
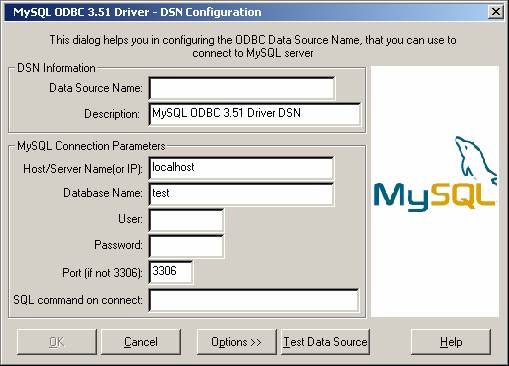
In the Data Source Name box, enter the name of the data source you want to access. It can be any valid name that you choose.
In the Description box, enter the description needed for the DSN.
For Host or Server Name (or IP) box, enter the name of the MySQL server host that you want to access. By default, it is localhost.
In the Database Name box, enter the name of the MySQL database that you want to use as the default database.
In the User box, enter your MySQL username (your database user ID).
In the Password box, enter your password.
In the Port box, enter the port number if it is not the default (3306).
In the SQL Command box, you can enter an optional SQL statement that you want to issue automatically after the connection has been established.
The final dialog looks like this:
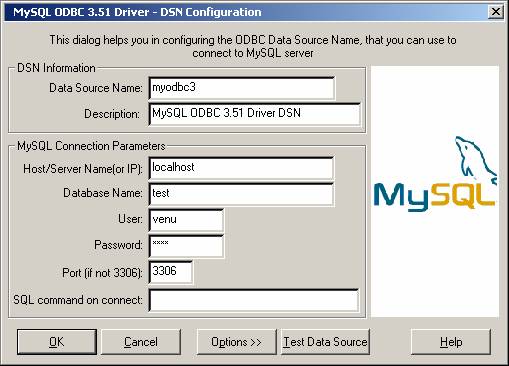
Click OK to add this data source.
Note: Upon clicking OK, the Data Sources dialog box appears, and the ODBC Administrator updates the registry information. The username and connect string that you entered become the default connection values for this data source when you connect to it.
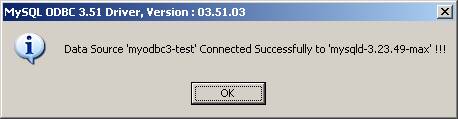
You can also test whether your settings are suitable for connecting to the server using the button Test Data Source. This feature is available only for the MyODBC 3.51 driver. A successful test results in the following window:
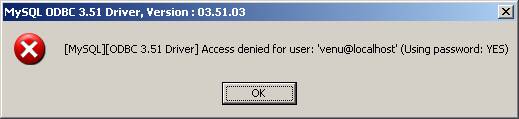
A failed test results in an error:
The DSN configuration dialog also has an Options button. If you select it, the following options dialog appears displaying that control driver behavior. Refer to the section called “Connection Parameters” for information about the meaning of these options.
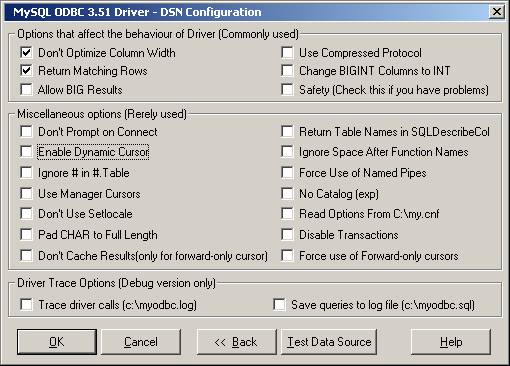
Note: The options listed under Driver Trace Options are disabled (grayed out) unless you are using the debugging version of the driver DLL.
To modify a data source on Windows:
Open the ODBC Data Source Administrator. Click the appropriate DSN tab.
Select the MySQL data source that you want to modify and then click Configure. The MySQL ODBC 3.51 Driver - DSN Configuration dialog box appears.
Modify the applicable data source fields, and then click OK.
When you have finished modifying the information in this dialog box, the ODBC Administrator updates the registry information.
On Unix, you configure DSN entries directly in the odbc.ini file. Here is a typical odbc.ini file that configures myodbc and myodbc3 as the DSN names for MyODBC 2.50 and MyODBC 3.51, respectively:
;
;  odbc.ini configuration for MyODBC and MyODBC 3.51 drivers
;

[ODBC Data Sources]
myodbc      = MyODBC 2.50 Driver DSN
myodbc3     = MyODBC 3.51 Driver DSN

[myodbc]
Driver       = /usr/local/lib/libmyodbc.so
Description  = MyODBC 2.50 Driver DSN
SERVER       = localhost
PORT         =
USER         = root
Password     =
Database     = test
OPTION       = 3
SOCKET       =

[myodbc3]
Driver       = /usr/local/lib/libmyodbc3.so
Description  = MyODBC 3.51 Driver DSN
SERVER       = localhost
PORT         =
USER         = root
Password     =
Database     = test
OPTION       = 3
SOCKET       =

[Default]
Driver       = /usr/local/lib/libmyodbc3.so
Description  = MyODBC 3.51 Driver DSN
SERVER       = localhost
PORT         =
USER         = root
Password     =
Database     = test
OPTION       = 3
SOCKET       =
Refer to the the section called “Connection Parameters”, for the list of connection parameters that can be supplied.
Note: If you are using unixODBC, you can use the following tools in order to set up the DSN:
ODBCConfig GUI tool(HOWTO: ODBCConfig)
odbcinst
In some cases when using unixODBC, you might get this error:
Data source name not found and no default driver specified
If this happens, make sure the ODBCINI and ODBCSYSINI environment variables are pointing to the right odbc.ini file. For example, if your odbc.ini file is located in /usr/local/etc, set the environment variables like this:
export ODBCINI=/usr/local/etc/odbc.ini
export ODBCSYSINI=/usr/local/etc
You can specify the following parameters for MyODBC in the [Data Source Name] section of an ODBC.INI file or through the InConnectionString argument in the SQLDriverConnect() call.
| Parameter | Default Value | Comment |
| user | ODBC (on Windows) | The username used to connect to MySQL. |
| server | localhost | The hostname of the MySQL server. |
| database | The default database. | |
| option | 0 | Options that specify how MyODBC should work. See below. |
| port | 3306 | The TCP/IP port to use if server is not localhost. |
| stmt | A statement to execute when connecting to MySQL. | |
| password | The password for the user account on server. | |
| socket | The Unix socket file or Windows named pipe to connect to if server is localhost. |
The option argument is used to tell MyODBC that the client isn't 100% ODBC compliant. On Windows, you normally select options by toggling the checkboxes in the connection screen, but you can also select them in the option argument. The following options are listed in the order in which they appear in the MyODBC connect screen:
| Value | Description |
| 1 | The client can't handle that MyODBC returns the real width of a column. |
| 2 | The client can't handle that MySQL returns the true value of affected rows. If this flag is set, MySQL returns “found rows” instead. You must have MySQL 3.21.14 or newer to get this to work. |
| 4 | Make a debug log in c:\myodbc.log. This is the same as putting MYSQL_DEBUG=d:t:O,c::\myodbc.log in AUTOEXEC.BAT. (On Unix, the file is /tmp/myodbc.log.) |
| 8 | Don't set any packet limit for results and parameters. |
| 16 | Don't prompt for questions even if driver would like to prompt. |
| 32 | Enable or disable the dynamic cursor support. (Not allowed in MyODBC 2.50.) |
| 64 | Ignore use of database name in db_name.tbl_name.col_name. |
| 128 | Force use of ODBC manager cursors (experimental). |
| 256 | Disable the use of extended fetch (experimental). |
| 512 | Pad CHAR columns to full column length. |
| 1024 | SQLDescribeCol() will return fully qualified column names. |
| 2048 | Use the compressed client/server protocol. |
| 4096 | Tell server to ignore space after function name and before ‘(’ (needed by PowerBuilder). This will make all function names keywords. |
| 8192 | Connect with named pipes to a mysqld server running on NT. |
| 16384 | Change LONGLONG columns to INT columns (some applications can't handle LONGLONG). |
| 32768 | Return 'user' as Table_qualifier and Table_owner from SQLTables (experimental). |
| 65536 | Read parameters from the [client] and [odbc] groups from my.cnf. |
| 131072 | Add some extra safety checks (should not be needed but...). |
| 262144 | Disable transactions. |
| 524288 | Enable query logging to c:\myodbc.sql(/tmp/myodbc.sql) file. (Enabled only in debug mode.) |
| 1048576 | Do not cache the results locally in the driver, instead read from server (mysql_use_result()). This works only for forward-only cursors. This option is very important in dealing with large tables when you don't want the driver to cache the entire result set. |
| 2097152 | Force the use of Forward-only cursor type. In case of applications setting the default static/dynamic cursor type, and one wants driver to use non-cache result sets, then this option will ensure the forward-only cursor behavior. |
To select multiple options, add together their values. For example, setting option to 12 (4+8) gives you debugging without packet limits.
The default myodbc3.dll is compiled for optimal performance. If you want to to debug MyODBC 3.51 (for example, to enable tracing), you should instead use myodbc3d.dll. To install this file, copy myodbc3d.dll over the installed myodbc3.dll file. Make sure to revert back to the release version of the driver DLL once you are done with the debugging because the debug version may cause performance issues.
For MyODBC 2.50, myodbc.dll and myodbcd.dll are used instead.
The following table shows some recommended option values for various configurations:
| Configuration | Option Value |
| Microsoft Access | 3 |
| Microsoft Visual Basic | 3 |
| Large tables with too many rows | 2049 |
| Driver trace generation (Debug mode) | 4 |
| Query log generation (Debug mode) | 524288 |
| Generate driver trace as well as query log (Debug mode) | 524292 |
| Large tables with no-cache results | 3145731 |
Yes. You can connect to the MySQL server using SQLDriverConnect, by specifying the DRIVER name field. Here are the connection strings for MyODBC using DSN-Less connection:
For MyODBC 2.50:
ConnectionString = "DRIVER={MySQL};\
                    SERVER=localhost;\
                    DATABASE=test;\
                    USER=venu;\
                    PASSWORD=venu;\
                    OPTION=3;"
For MyODBC 3.51:
ConnectionString = "DRIVER={MySQL ODBC 3.51 Driver};\
                    SERVER=localhost;\
                    DATABASE=test;\
                    USER=venu;\
                    PASSWORD=venu;\
                    OPTION=3;"
If your programming language converts backslash followed by whitespace to a space, it is preferable to specify the connection string as a single long string, or to use a concatenation of multiple strings that does not add spaces in between. For example:
ConnectionString = "DRIVER={MySQL ODBC 3.51 Driver};"
                    "SERVER=localhost;"
                    "DATABASE=test;"
                    "USER=venu;"
                    "PASSWORD=venu;"
                    "OPTION=3;"
Refer to the the section called “Connection Parameters”, for the list of connection parameters that can be supplied.
If you want to connect to system A from system B with a username and password of myuser and mypassword, here is a simple procedure.
On system A, follow these steps:
Start the MySQL server.
Use GRANT to set up an account with a username of myuser that can connect from system B using a password of myuser:
GRANT ALL ON *.* to 'myuser'@'B' IDENTIFIED BY 'mypassword';
The GRANT statement grants all privileges to user myuser for connecting from system B using the password mypassword. To execute this statement, you should be either root on system A (or another user who has appropriate privileges). For more information about MySQL privileges, refer to the section called “MySQL User Account Management”.
On system B, follow these steps:
Configure a MyODBC DSN using the following connection parameters:
DSN            = remote_test
SERVER or HOST = A (or IP address of system A)
DATABASE       = test (The default database or an appropriate one)
USER           = myuser
PASSWORD       = mypassword
To set up a DSN-less connection, refer to the section called “Connecting Without a Predefined DSN”.
Check whether you are able to access system A from system B by using ping or other means. If you are not able to reach system A, check your network or Internet connections or contact your system administrator.
Now, try to connect using DSN=remote_test. If it fails, trace the MyODBC log, and take the further steps based on the error message from the log. If you need further assistance, send a detailed mail message to mailto:myodbc@@lists.mysql.com.
You can also find a simple HOWTO at http://www.phphelp.com/tutorial/using-myodbc-to-connect-to-a-remote-database.html.
If you encounter difficulties or problems with MyODBC, you should start by making a log file from the ODBC Manager (the log you get when requesting logs from ODBC ADMIN) and MyODBC.
To get an ODBC trace through Driver Manager, do the following:
Open ODBC Data source administrator:
Click Start, point to Settings, and then click Control Panel.
On computers running Microsoft Windows 2000 or XP, double-click Administrative Tools, and then double-click Data Sources (ODBC), as shown below.
On computers running an earlier version of Microsoft Windows, double-click 32-bit ODBC or ODBC in the Control Panel.
The ODBC Data Source Administrator dialog box appears, as shown below:
Click Help for detailed information about each tab of the ODBC Data Source Administrator dialog box.
Enable the trace option. The procedure for this differs for Windows and Unix.
To enable the trace option on Windows:
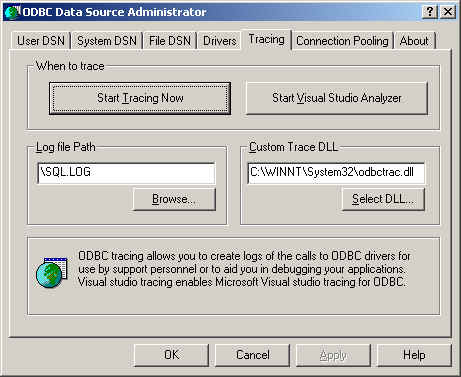
The Tracing tab of the ODBC Data Source Administrator dialog box enables you to configure the way ODBC function calls are traced.
When you activate tracing from the Tracing tab, the Driver Manager will log all ODBC function calls for all subsequently run applications.
ODBC function calls from applications running before tracing is activated are not logged. ODBC function calls are recorded in a log file you specify.
Tracing ceases only after you click Stop Tracing Now. Remember that while tracing is on, the log file continues to increase in size and that tracing affects the performance of all your ODBC applications.
To enable the trace option on Unix:
On Unix, you need to explicitly set the Trace option in the ODBC.INI file.
Set the tracing ON or OFF by using TraceFile and Trace parameters in odbc.ini as shown below:
TraceFile  = /tmp/odbc.trace
Trace      = 1
TraceFile specifies the name and full path of the trace file and Trace is set to ON or OFF. You can also use 1 or YES for ON and 0 or NO for OFF. If you are using ODBCConfig from unixODBC, then follow the instructions for tracing unixODBC calls at HOWTO-ODBCConfig.
To generate a MyODBC log, do the following:
Ensure that you are using the driver debug DLL (that is, myodbc3d.dll and not myodbc3.dll for MyODBC 3.51, and myodbcd.dll for MyODBC 2.50).
The easiest way to do this is to get myodbc3d.dll (or myodbcd.dll) from the MyODBC 3.51 distribution and copy it over the myodbc3.dll (or myodbc.dll), which is probably in your C:\windows\system32 or C:\winnt\system32 directory. Note that you probably want to restore the old myodbc.dll file when you have finished testing, as this is a lot faster than myodbc3d.dll (or myodbcd.dll), so do keep a backup copy of original DLLs.
Enable the Trace MyODBC option flag in the MyODBC connect/configure screen. The log will be written to file C:\myodbc.log. If the trace option is not remembered when you are going back to the above screen, it means that you are not using the myodbcd.dll driver (see above). On Linux or if you are using DSN-Less connection, then you need to supply OPTION=4 in the connection string.
Start your application and try to get it to fail. Then check the MyODBC trace file to find out what could be wrong.
If you find out something is wrong, please send a mail message to mailto:myodbc@@lists.mysql.com (or to mailto:support@@mysql.com if you have a support contract from MySQL AB) with a brief description of the problem, with the following additional information:
MyODBC version
ODBC Driver Manager type and version
MySQL server version
ODBC trace from Driver Manager
MyODBC log file from MyODBC driver
Simple reproducible sample
Remember that the more information you can supply to us, the more likely it is that we can fix the problem!
Also, before posting the bug, check the MyODBC mailing list archive at http://lists.mysql.com/.
MyODBC has been tested with the following applications:
MS Access 95, 97, 2000, and 2002
C++-Builder, Borland Builder 4
Centura Team Developer (formerly Gupta SQL/Windows)
ColdFusion (on Solaris and NT with service pack 5), How-to: MySQL and Coldfusion. Troubleshooting Data Sources and Database Connectivity for UnixPlatforms.
Crystal Reports
DataJunction
Delphi
ERwin
MS Excel
iHTML
FileMaker Pro
FoxPro
Notes 4.5/4.6
MS Visio Enterprise 2000
Vision
Visual Objects
Visual Interdev
SBSS
Perl DBD-ODBC
Paradox
Powerbuilder
Powerdesigner 32-bit
MS Visual C++
Visual Basic
ODBC.NET through CSharp(C#), VB and C++
Data Architect(http://thekompany.com/products/dataarchitect/)
SQLExpress for Xbase++(http://www.SQLExpress.net)
Open Office (http://www.openoffice.org) How-to: MySQL + OpenOffice. How-to: OpenOffice + MyODBC + unixODBC.
Star Office (http://wwws.sun.com/software/star/staroffice/6.0/index.html)
G2-ODBC bridge (http://www.gensym.com)
Sambar Server (http://www.sambarserver.info) How-to: MyODBC + SambarServer + MySQL.
If you know of any other applications that work with MyODBC, please send mail to mailto:myodbc@@lists.mysql.com about them.
Most programs should work with MyODBC, but for each of those listed here, we have tested it ourselves or received confirmation from some user that it works. Many of the descriptions provide workarounds for problems that you might encounter.
- Program
- Access
To make Access work:
If you are using Access 2000, you should get and install the newest (version 2.6 or higher) Microsoft MDAC (Microsoft Data Access Components) from http://www.microsoft.com/data/. This will fix a bug in Access that when you export data to MySQL, the table and column names aren't specified. Another way to work around this bug is to upgrade to MyODBC 2.50.33 and MySQL 3.23.x, which together provide a workaround for the problem.
You should also get and apply the Microsoft Jet 4.0 Service Pack 5 (SP5) which can be found at http://support.microsoft.com/default.aspx?scid=kb;EN-US;q239114. This will fix some cases where columns are marked as #DELETED# in Access.
Note: If you are using MySQL 3.22, you must to apply the MDAC patch and use MyODBC 2.50.32 or 2.50.34 and up to work around this problem.
For all versions of Access, you should enable the MyODBC Return matching rows option. For Access 2.0, you should additionally enable the Simulate ODBC 1.0 option.
You should have a timestamp in all tables that you want to be able to update. For maximum portability, don't use a length specification in the column declaration. That is, use TIMESTAMP, not TIMESTAMP(n), n < 14.
You should have a primary key in the table. If not, new or updated rows may show up as #DELETED#.
Use only DOUBLE float fields. Access fails when comparing with single floats. The symptom usually is that new or updated rows may show up as #DELETED# or that you can't find or update rows.
If you are using MyODBC to link to a table that has a BIGINT column, the results will be displayed as #DELETED. The work around solution is:
Have one more dummy column with TIMESTAMP as the data type.
Select the Change BIGINT columns to INT option in the connection dialog in ODBC DSN Administrator.
Delete the table link from Access and re-create it.
Old records still will display as #DELETED#, but newly added/updated records will be displayed properly.
If you still get the error Another user has changed your data after adding a TIMESTAMP column, the following trick may help you:
Don't use a table data sheet view. Instead, create a form with the fields you want, and use that form data sheet view. You should set the DefaultValue property for the TIMESTAMP column to NOW(). It may be a good idea to hide the TIMESTAMP column from view so your users are not confused.
In some cases, Access may generate illegal SQL statements that MySQL can't understand. You can fix this by selecting "Query|SQLSpecific|Pass-Through" from the Access menu.
On NT, Access will report BLOB columns as OLE OBJECTS. If you want to have MEMO columns instead, you should change BLOB columns to TEXT with ALTER TABLE.
Access can't always handle DATE columns properly. If you have a problem with these, change the columns to DATETIME.
If you have in Access a column defined as BYTE, Access will try to export this as TINYINT instead of TINYINT UNSIGNED. This will give you problems if you have values larger than 127 in the column.
- ADO
When you are coding with the ADO API and MyODBC, you need to pay attention to some default properties that aren't supported by the MySQL server. For example, using the CursorLocation Property as adUseServer will return a result of −1 for the RecordCount Property. To have the right value, you need to set this property to adUseClient, as shown in the VB code here:
Dim myconn As New ADODB.Connection
Dim myrs As New Recordset
Dim mySQL As String
Dim myrows As Long

myconn.Open "DSN=MyODBCsample"
mySQL = "SELECT * from user"
myrs.Source = mySQL
Set myrs.ActiveConnection = myconn
myrs.CursorLocation = adUseClient
myrs.Open
myrows = myrs.RecordCount

myrs.Close
myconn.Close
Another workaround is to use a SELECT COUNT(*) statement for a similar query to get the correct row count.
- Active server pages (ASP)
You should select the Return matching rows option.
- BDE applications
To get these to work, you should select the Don't optimize column widths and Return matching rows options.
- Borland Builder 4
When you start a query, you can use the Active property or the Open method. Note that Active will start by automatically issuing a SELECT * FROM ... query. That may not be a good thing if your tables are large.
- ColdFusion (On Unix)
The following information is taken from the ColdFusion documentation:
Use the following information to configure ColdFusion Server for Linux to use the unixODBC driver with MyODBC for MySQL data sources. Allaire has verified that MyODBC 2.50.26 works with MySQL 3.22.27 and ColdFusion for Linux. (Any newer version should also work.) You can download MyODBC at http://dev.mysql.com/downloads/connector/odbc/.
ColdFusion Version 4.5.1 allows you to us the ColdFusion Administrator to add the MySQL data source. However, the driver is not included with ColdFusion Version 4.5.1. Before the MySQL driver will appear in the ODBC datasources drop-down list, you must build and copy the MyODBC driver to /opt/coldfusion/lib/libmyodbc.so.
The Contrib directory contains the program mydsn-xxx.zip which allows you to build and remove the DSN registry file for the MyODBC driver on Coldfusion applications.
- DataJunction
You have to change it to output VARCHAR rather than ENUM, as it exports the latter in a manner that causes MySQL problems.
- Excel
If you have problems with dates, try to select them as strings using the CONCAT() function. For example:
SELECT CONCAT(rise_time), CONCAT(set_time)
    FROM sunrise_sunset;
Values retrieved as strings this way should be correctly recognized as time values by Excel97.
The purpose of CONCAT() in this example is to fool ODBC into thinking the column is of “string type.” Without the CONCAT(), ODBC knows the column is of time type, and Excel does not understand that.
Note that this is a bug in Excel, because it automatically converts a string to a time. This would be great if the source was a text file, but is unfortunate when the source is an ODBC connection that reports exact types for each column.
- Word
To retrieve data from MySQL to Word/Excel documents, you need to use the MyODBC driver and the Add-in Microsoft Query help.
For example, create a database with a table containing two columns of text:
Insert rows using the mysql client command-line tool.
Create a DSN file using the ODBC manager, for example, my for the database that was just created.
Open the Word application.
Create a blank new document.
In the Database tool bar, press the Insert Database button.
Press the Get Data button.
At the right hand of the Get Data screen, press the Ms Query button.
In Ms Query, create a new data source using the my DSN file.
Select the new query.
Select the columns that you want.
Make a filter if you want.
Make a Sort if you want.
Select Return Data to Microsoft Word.
Click Finish.
Click Insert Data and select the records.
Click OK and you see the rows in your Word document.
- odbcadmin
- Delphi
You must use BDE Version 3.2 or newer. Select the Don't optimize column width option when connecting to MySQL.
Also, here is some potentially useful Delphi code that sets up both an ODBC entry and a BDE entry for MyODBC. The BDE entry requires a BDE Alias Editor that is free at a Delphi Super Page near you. (Thanks to Bryan Brunton mailto:bryan@@flesherfab.com for this):
fReg:= TRegistry.Create; fReg.OpenKey('\Software\ODBC\ODBC.INI\DocumentsFab', True); fReg.WriteString('Database', 'Documents'); fReg.WriteString('Description', ' '); fReg.WriteString('Driver', 'C:\WINNT\System32\myodbc.dll'); fReg.WriteString('Flag', '1'); fReg.WriteString('Password', ''); fReg.WriteString('Port', ' '); fReg.WriteString('Server', 'xmark'); fReg.WriteString('User', 'winuser'); fReg.OpenKey('\Software\ODBC\ODBC.INI\ODBC Data Sources', True); fReg.WriteString('DocumentsFab', 'MySQL'); fReg.CloseKey; fReg.Free; Memo1.Lines.Add('DATABASE NAME='); Memo1.Lines.Add('USER NAME='); Memo1.Lines.Add('ODBC DSN=DocumentsFab'); Memo1.Lines.Add('OPEN MODE=READ/WRITE'); Memo1.Lines.Add('BATCH COUNT=200'); Memo1.Lines.Add('LANGDRIVER='); Memo1.Lines.Add('MAX ROWS=-1'); Memo1.Lines.Add('SCHEMA CACHE DIR='); Memo1.Lines.Add('SCHEMA CACHE SIZE=8'); Memo1.Lines.Add('SCHEMA CACHE TIME=-1'); Memo1.Lines.Add('SQLPASSTHRU MODE=SHARED AUTOCOMMIT'); Memo1.Lines.Add('SQLQRYMODE='); Memo1.Lines.Add('ENABLE SCHEMA CACHE=FALSE'); Memo1.Lines.Add('ENABLE BCD=FALSE'); Memo1.Lines.Add('ROWSET SIZE=20'); Memo1.Lines.Add('BLOBS TO CACHE=64'); Memo1.Lines.Add('BLOB SIZE=32'); AliasEditor.Add('DocumentsFab','MySQL',Memo1.Lines);- C++ Builder
Tested with BDE Version 3.0. The only known problem is that when the table schema changes, query fields are not updated. BDE, however, does not seem to recognize primary keys, only the index named PRIMARY, though this has not been a problem.
- Vision
You should select the Return matching rows option.
- Visual Basic
To be able to update a table, you must define a primary key for the table.
Visual Basic with ADO can't handle big integers. This means that some queries like SHOW PROCESSLIST will not work properly. The fix is to use OPTION=16384 in the ODBC connect string or to select the Change BIGINT columns to INT option in the MyODBC connect screen. You may also want to select the Return matching rows option.
- VisualInterDev
If you have a BIGINT in your result, you may get the error [Microsoft][ODBC Driver Manager] Driver does not support this parameter Try selecting the Change BIGINT columns to INT option in the MyODBC connect screen.
- Visual Objects
You should select the Don't optimize column widths option.
- MS Visio Enterprise 2000
We made database model diagram by connecting from MS Vision Enterprise 2000 to MySQL via MyODBC (2.50.37 or greater) and using Visio's reverse engineer function to retrieve information about the DB (Visio shows all the column definitions, primary keys, Indexes and so on). Also we tested by designing new tables in Visio and exported them to MySQL via MyODBC.
This section answers MyODBC connection-related questions.
For more information, refer to MS KnowledgeBase Article(Q260558). Also, make sure you have the latest valid ctl3d32.dll in your system directory.
Refer to this document about connection pooling: http://support.microsoft.com/default.aspx?scid=kb;EN-US;q169470.
This section of the document answers questions related to MyODBC with Microsoft Access.
The following must be done on your client PC in order to make Microsoft Access work with MyODBC.
If you are using Access 2000, you should get and install the newest (version 2.6 or higher) Microsoft MDAC (Microsoft Data Access Components) from http://www.microsoft.com/data/. This will fix a bug in Access that when you export data to MySQL, the table and column names aren't specified. Another way to work around this bug is to upgrade to MyODBC 2.50.33 and MySQL 3.23.x, which together provide a workaround for the problem.
You should also get and apply the Microsoft Jet 4.0 Service Pack 5 (SP5) which can be found at http://support.microsoft.com/default.aspx?scid=kb;EN-US;q239114. This will fix some cases where columns are marked as #DELETED# in Access.
Note: If you are using MySQL 3.22, you must to apply the MDAC patch and use MyODBC 2.50.32 or 2.50.34 and up to work around this problem.
Install the latest version of MySQL from http://dev.mysql.com/downloads/.
Install the latest version of MyODBC 3.51 or 2.50 from http://dev.mysql.com/downloads/connector/odbc/.
For all Access versions, you should enable the Return matching rows option.
Now start working with Access as the front-end for MySQL Server through MyODBC.
You cannot export a table or query to MySQL unless you have installed MyODBC.
To export a table from Access to MySQL, follow these instructions:
When you open an Access database or an Access project, a Database window will appear. It displays shortcuts for creating new database objects and opening existing objects.
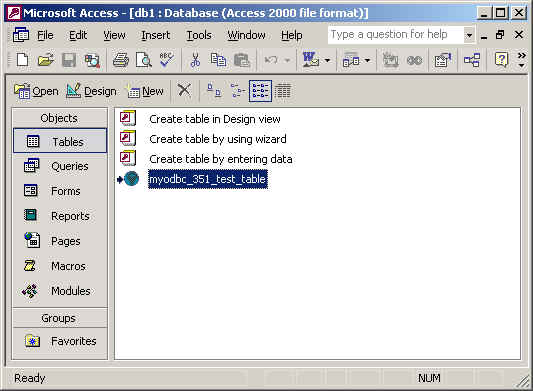
Click the name of the table or query you want to export, and then in the File menu, select Export.
In the Export Object Type Object name To dialog box, in the Save As Type box, select ODBC Databases () as shown here:
In the Export dialog box, enter a name for the file (or use the suggested name), and then select OK.
The Select Data Source dialog box is displayed; it lists the defined data sources for any ODBC drivers installed on your computer. Click either the File Data Source or Machine Data Source tab, and then double-click the MyODBC or MyODBC 3.51 data source that you want to export to. To define a new data source for MyODBC, please the section called “Configuring a MyODBC DSN on Windows”.
Microsoft Access connects to the MySQL Server through this data source and exports new tables and or data.
You cannot export a table or query to MySQL database unless you have installed the MyODBC.
To import or link a table(s) from MySQL to Access, follow the instructions:
Open a database, or switch to the Database window for the open database.
To import tables, on the File menu, point to Get External Data, and then click Import. To link tables, on the File menu, point to Get External Data, and then click Link Tables.
In the Import (or Link) dialog box, in the Files Of Type box, select ODBC Databases (). The Select Data Source dialog box lists the defined data sources The Select Data Source dialog box is displayed; it lists the defined data sources for any ODBC drivers installed on your computer. Click either the File Data Source or Machine Data Source tab, and then double-click the MyODBC or MyODBC 3.51 data source that you want to export to. To define a new data source for the MyODBC or MyODBC 3.51 driver, please the section called “Configuring a MyODBC DSN on Windows”.
If the ODBC data source that you selected requires you to log on, enter your login ID and password (additional information might also be required), and then click OK.
Microsoft Access connects to the MySQL server through ODBC data source and displays the list of tables that you can import or link.
Click each table that you want to import or link, and then click OK. If you're linking a table and it doesn't have an index that uniquely identifies each record, then Microsoft Access displays a list of the fields in the linked table. Click a field or a combination of fields that will uniquely identify each record, and then click OK.
Yes. Use the following procedure to view or to refresh links when the structure or location of a linked table has changed. The Linked Table Manager lists the paths to all currently linked tables.
To wiew or refresh links:
Open the database that contains links to tables.
On the Tools menu, point to Add-ins, and then click Linked Table Manager.
Select the check box for the tables whose links you want to refresh.
Click OK to refresh the links.
Microsoft Access confirms a successful refresh or, if the table wasn't found, displays the Select New Location of <table name> dialog box in which you can specify its the table's new location.If several selected tables have moved to the new location that you specify, the Linked Table Manager searches that location for all selected tables, and updates all links in one step.
To vhange the path for a set of linked tables:
Open the database that contains links to tables.
On the Tools menu, point to Add-ins, and then click Linked Table Manager.
Select the Always Prompt For A New Location check box.
Select the check box for the tables whose links you want to change, and then click OK.
In the Select New Location of <table name> dialog box, specify the new location, click Open, and then click OK.
If the inserted or updated records are shown as #DELETED# in the access, then:
If you are using Access 2000, you should get and install the newest (version 2.6 or higher) Microsoft MDAC (Microsoft Data Access Components) from http://www.microsoft.com/data/. This will fix a bug in Access that when you export data to MySQL, the table and column names aren't specified. Another way to work around this bug is to upgrade to MyODBC 2.50.33 and MySQL 3.23.x, which together provide a workaround for the problem.
You should also get and apply the Microsoft Jet 4.0 Service Pack 5 (SP5) which can be found at http://support.microsoft.com/default.aspx?scid=kb;EN-US;q239114. This will fix some cases where columns are marked as #DELETED# in Access.
Note: If you are using MySQL 3.22, you must to apply the MDAC patch and use MyODBC 2.50.32 or 2.50.34 and up to work around this problem.
For all versions of Access, you should enable the MyODBC Return matching rows option. For Access 2.0, you should additionally enable the Simulate ODBC 1.0 option.
You should have a timestamp in all tables that you want to be able to update. For maximum portability, don't use a length specification in the column declaration. That is, use TIMESTAMP, not TIMESTAMP(n), n < 14.
You should have a primary key in the table. If not, new or updated rows may show up as #DELETED#.
Use only DOUBLE float fields. Access fails when comparing with single floats. The symptom usually is that new or updated rows may show up as #DELETED# or that you can't find or update rows.
If you are using MyODBC to link to a table that has a BIGINT column, the results will be displayed as #DELETED. The work around solution is:
Have one more dummy column with TIMESTAMP as the data type.
Select the Change BIGINT columns to INT option in the connection dialog in ODBC DSN Administrator.
Delete the table link from Access and re-create it.
Old records still will display as #DELETED#, but newly added/updated records will be displayed properly.
If you see the following errors, select the Return Matching Rows option in the DSN configuration dialog, or specify OPTION=2, as the connection parameter:
Write Conflict. Another user has changed your data.

Row cannot be located for updating. Some values may have been changed
since it was last read.
This is a strange issue from Access 97, and doesn't appear with Access 2000 or 2002. You can overcome this by upgrading the MyODBC driver to at least MyODBC 3.51.02.
With some programs, this error may occur: Another user has modified the record that you have modified. In most cases, this can be solved by doing one of the following things:
Add a primary key for the table if there isn't one already.
Add a timestamp column if there isn't one already.
Only use double float fields. Some programs may fail when they compare single floats.
If these strategies don't help, you should start by making a log file from the ODBC manager (the log you get when requesting logs from ODBCADMIN) and a MyODBC log to help you figure out why things go wrong. For instructions, see the section called “Getting an ODBC Trace File”.
Read “How to Trap ODBC Login Error Messages in Access” at http://support.microsoft.com/support/kb/articles/Q124/9/01.asp?LN=EN-US&SD=gn&FR=0 .
If you have very large (long) tables in Access, it might take a very long time to open them. Or you might run low on virtual memory and eventually get an ODBC Query Failed error and the table will not open. To deal with this, select the following options:
Return Matching Rows (2)
Allow BIG Results (8).
These add up to a value of 10 (OPTION=10).
Read “Set the QueryTimeout Value for ODBC Connections” at http://support.microsoft.com/default.aspx?scid=kb%3Ben-us%3B153756.
Refer to converters section for list of available tools.
This section answers questions related to using MyODBC with Microsoft Visual Basic(ADO, DAO & RDO) and ASP.
It's because the COUNT(*) expression is returning a BIGINT, and ADO can't make sense of a number this big. Select the Change BIGINT columns to INT option (option value 16384).
The GetChunk() and AppendChunk() methods from ADO doesn't work as expected when the cursor location is specified as adUseServer. On the other hand, you can overcome this error by using adUseClient.
A simple example can be found from, http://www.dwam.net/iishelp/ado/docs/adomth02_4.htm
You can make use of RecordsAffected property in the ADO execute method. For more information on the usage of execute method, refer to http://msdn.microsoft.com/library/default.asp?url=/library/en-us/ado270/htm/mdmthcnnexecute.asp.
Here is an excellent article from Mike Hillyer (mailto:m.hillyer@@telusplanet.net); explaining how to insert and/or fetch data from blob columns through MyODBC from ADO: MySQL BLOB columns and Visual Basic 6.
Here is yet another good article from Mike Hillyer (mailto:m.hillyer@@telusplanet.net): How to map Visual basic data type to MySQL types.
A simple examples for the usage of ADO, DAO and RDO with VB can be found her:
If you find any other good example or HOW-TO on ADO/DAO/RDO, then please send the details to mailto:myodbc@@lists.mysql.com
For more information about how to access MySQL via ASP using MyODBC, refer to the following articles:
A Frequently Asked Questions list for ASP can be found at http://support.microsoft.com/default.aspx?scid=/Support/ActiveServer/faq/data/adofaq.asp.
For information, see ActiveX Data Objects(ADO) Freqently Asked Questions.
This section answers questions related to MyODBC with various ODBC-related tools; such as Microsoft Word, Excel and ColdFusion.
To retrieve data from MySQL to Word/Excel documents, you need to use the MyODBC driver and the Add-in Microsoft Query help.
For example, create a database with a table containing two columns of text:
Insert rows using the mysql client command-line tool.
Create a DSN file using the ODBC manager, for example, my for the database that was just created.
Open the Word application.
Create a blank new document.
In the Database tool bar, press the Insert Database button.
Press the Get Data button.
At the right hand of the Get Data screen, press the Ms Query button.
In Ms Query, create a new data source using the my DSN file.
Select the new query.
Select the columns that you want.
Make a filter if you want.
Make a Sort if you want.
Select Return Data to Microsoft Word.
Click Finish.
Click Insert Data and select the records.
Click OK and you see the rows in your Word document.
This is an issue similar to that of Access 97 when your table consists of TEXT or VARCHAR data types. You can fix this error by upgrading your MyODBC driver to version 3.51.02 or higher.
This section of the document answers questions related to MyODBC general functionality.
A common problem is how to get the value of an automatically generated ID from an INSERT statement. With ODBC, you can do something like this (assuming that auto is an AUTO_INCREMENT field):
INSERT INTO tbl (auto,text) VALUES(NULL,'text');
SELECT LAST_INSERT_ID();
Or, if you are just going to insert the ID into another table, you can do this:
INSERT INTO tbl (auto,text) VALUES(NULL,'text');
INSERT INTO tbl2 (id,text) VALUES(LAST_INSERT_ID(),'text');
See the section called “How to Get the Unique ID for the Last Inserted Row”.
For the benefit of some ODBC applications (at least Delphi and Access), the following query can be used to find a newly inserted row:
SELECT * FROM tbl WHERE auto IS NULL;
Yes. MyODBC 3.51 supports Dynamic cursor type along with Forward-only and static.
Due to the performance issues, the driver does not support this feature by default. You can enable this by specifying the connection option flag as OPTION=32 or by checking the Enable Dynamic Cursor option from the DSN configuration.
The driver returns this error when an application issues any transactional call but the underlying MySQL server either does not support transactions or they are not enabled.
To avoid this problem, you must use a server that has either or both of the InnoDB or BDB storage engines enabled, and use tables of those types. MySQL servers from version 4.0 and up support InnoDB by default. MySQL-Max servers also support BDB on platforms where BDB is available.
Also, if your server supports transactional table types (InnoDB and BDB) make sure the disable transactions option is not set from the DSN configuration.
This is becuase the application is using old MyODBC 2.50 version, and it did not set the cursor name explicitly through SQLSetCursorName. The fix is to upgrade to MyODBC 3.51 version.
Yes. If you find something is not working with MyODBC 3.51 that works with MyODBC 2.50, then send a mail message to mailto:myodbc@@lists.mysql.com
Yes. You can make use of odbc.net to connect to MySQL through MyODBC. Here are the few basic samples to connect to MySQL from VC.NET and VB.NET.
Here is yet another excellent article "Exploring MySQL on .NET environment" by Venu (MyODBC developer) that covers about all MySQL .NET interfaces along with some useful examples.
Caution: Using ODBC.NET with MyODBC, while fetching empty string (0 length), it starts giving the SQL_NO_DATA exception. You can get the patch for this from http://support.microsoft.com/default.aspx?scid=kb;EN-US;q319243.
MyODBC is a lot faster than any other ODBC driver. Slowness might be due to not using the following options.
The ODBC Tracing option is turned on. You can cross-check whether this option is not turned on by following the instructions from here.
As shown in the above image, the 'When to trace' option from the ODBC Data Source Administrator 'Tracing' tab should always point to 'Start Tracing Now', instead of 'Stop Tracing Now'.
The Debug version of the driver is used. If you are using the debug version of the driver DLL, it can also relatively slow down the query processing time. You can cross-check whether you are using the debug or release version of the DLL from the 'Comments' section of the driver DLL properties (from the sytem directory, right click on the driver DLL and click on properties) as shown below:
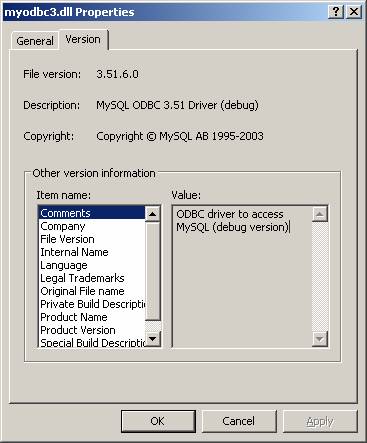
The Driver trace and query logs are enabled. Even if you intent to use the debug version of the driver (you should always use the release version in the production environment), make sure the driver trace and query log options(OPTION=4,524288 respectively) are not enabled as shown below:
Interacting with a MySQL server from MyODBC applications involves the following operations:
Configure the MyODBC DSN
Connect to MySQL server
Initialization operations
Execute SQL statements
Retrieve results
Perform Transactions
Disconnect from the server
Most applications use some variation of these steps. The basic application steps are shown in the following diagram:
This section summarizes ODBC routines, categorized by functionality.
For the complete ODBC API reference, please refer to the ODBC Programer's Reference at http://msdn.microsoft.com/library/en-us/odbc/htm/odbcabout_this_manual.asp.
An application can call SQLGetInfo function to obtain conformance information about MyODBC. To obtain information about support for a specific function in the driver, an application can call SQLGetFunctions.
Note: For backward compatibility, the MyODBC 3.51 driver supports all deprecated functions.
The following tables list MyODBC API calls grouped by task:
Connecting to a data source:
| Function name | MyODBC | MyODBC | Conformance | Purpose |
| 2.50 | 3.51 | |||
| SQLAllocHandle | No | Yes | ISO 92 | Obtains an environment, connection, statement, or descriptor handle. |
| SQLConnect | Yes | Yes | ISO 92 | Connects to a specific driver by data source name, user ID, and password. |
| SQLDriverConnect | Yes | Yes | ODBC | Connects to a specific driver by connection string or requests that the Driver Manager and driver display connection dialog boxes for the user. |
| SQLAllocEnv | Yes | Yes | Deprecated | Obtains an environment handle allocated from driver. |
| SQLAllocConnect | Yes | Yes | Deprecated | Obtains a connection handle |
Obtaining information about a driver and data source:
| Function name | MyODBC | MyODBC | Conformance | Purpose |
| 2.50 | 3.51 | |||
| SQLDataSources | No | No | ISO 92 | Returns the list of available data sources, handled by the Driver Manager |
| SQLDrivers | No | No | ODBC | Returns the list of installed drivers and their attributes, handles by Driver Manager |
| SQLGetInfo | Yes | Yes | ISO 92 | Returns information about a specific driver and data source. |
| SQLGetFunctions | Yes | Yes | ISO 92 | Returns supported driver functions. |
| SQLGetTypeInfo | Yes | Yes | ISO 92 | Returns information about supported data types. |
Setting and retrieving driver attributes:
| Function name | MyODBC | MyODBC | Conformance | Purpose |
| 2.50 | 3.51 | |||
| SQLSetConnectAttr | No | Yes | ISO 92 | Sets a connection attribute. |
| SQLGetConnectAttr | No | Yes | ISO 92 | Returns the value of a connection attribute. |
| SQLSetConnectOption | Yes | Yes | Deprecated | Sets a connection option |
| SQLGetConnectOption | Yes | Yes | Deprecated | Returns the value of a connection option |
| SQLSetEnvAttr | No | Yes | ISO 92 | Sets an environment attribute. |
| SQLGetEnvAttr | No | Yes | ISO 92 | Returns the value of an environment attribute. |
| SQLSetStmtAttr | No | Yes | ISO 92 | Sets a statement attribute. |
| SQLGetStmtAttr | No | Yes | ISO 92 | Returns the value of a statement attribute. |
| SQLSetStmtOption | Yes | Yes | Deprecated | Sets a statement option |
| SQLGetStmtOption | Yes | Yes | Deprecated | Returns the value of a statement option |
Preparing SQL requests:
| Function name | MyODBC | MyODBC | Conformance | Purpose |
| 2.50 | 3.51 | |||
| SQLAllocStmt | Yes | Yes | Deprecated | Allocates a statement handle |
| SQLPrepare | Yes | Yes | ISO 92 | Prepares an SQL statement for later execution. |
| SQLBindParameter | Yes | Yes | ODBC | Assigns storage for a parameter in an SQL statement. |
| SQLGetCursorName | Yes | Yes | ISO 92 | Returns the cursor name associated with a statement handle. |
| SQLSetCursorName | Yes | Yes | ISO 92 | Specifies a cursor name. |
| SQLSetScrollOptions | Yes | Yes | ODBC | Sets options that control cursor behavior. |
Submitting requests:
| Function name | MyODBC | MyODBC | Conformance | Purpose |
| 2.50 | 3.51 | |||
| SQLExecute | Yes | Yes | ISO 92 | Executes a prepared statement. |
| SQLExecDirect | Yes | Yes | ISO 92 | Executes a statement |
| SQLNativeSql | Yes | Yes | ODBC | Returns the text of an SQL statement as translated by the driver. |
| SQLDescribeParam | Yes | Yes | ODBC | Returns the description for a specific parameter in a statement. |
| SQLNumParams | Yes | Yes | ISO 92 | Returns the number of parameters in a statement. |
| SQLParamData | Yes | Yes | ISO 92 | Used in conjunction with SQLPutData to supply parameter data at execution time. (Useful for long data values.) |
| SQLPutData | Yes | Yes | ISO 92 | Sends part or all of a data value for a parameter. (Useful for long data values.) |
Retrieving results and information about results:
| Function name | MyODBC | MyODBC | Conformance | Purpose |
| 2.50 | 3.51 | |||
| SQLRowCount | Yes | Yes | ISO 92 | Returns the number of rows affected by an insert, update, or delete request. |
| SQLNumResultCols | Yes | Yes | ISO 92 | Returns the number of columns in the result set. |
| SQLDescribeCol | Yes | Yes | ISO 92 | Describes a column in the result set. |
| SQLColAttribute | No | Yes | ISO 92 | Describes attributes of a column in the result set. |
| SQLColAttributes | Yes | Yes | Deprecated | Describes attributes of a column in the result set. |
| SQLFetch | Yes | Yes | ISO 92 | Returns multiple result rows. |
| SQLFetchScroll | No | Yes | ISO 92 | Returns scrollable result rows. |
| SQLExtendedFetch | Yes | Yes | Deprecated | Returns scrollable result rows. |
| SQLSetPos | Yes | Yes | ODBC | Positions a cursor within a fetched block of data and allows an application to refresh data in the rowset or to update or delete data in the result set. |
| SQLBulkOperations | No | Yes | ODBC | Performs bulk insertions and bulk bookmark operations, including update, delete, and fetch by bookmark. |
Retrieving error or diagnostic information:
| Function name | MyODBC | MyODBC | Conformance | Purpose |
| 2.50 | 3.51 | |||
| SQLError | Yes | Yes | Deprecated | Returns additional error or status information |
| SQLGetDiagField | Yes | Yes | ISO 92 | Returns additional diagnostic information (a single field of the diagnostic data structure). |
| SQLGetDiagRec | Yes | Yes | ISO 92 | Returns additional diagnostic information (multiple fields of the diagnostic data structure). |
Obtaining information about the data source's system tables (catalog functions) item:
| Function name | MyODBC | MyODBC | Conformance | Purpose |
| 2.50 | 3.51 | |||
| SQLColumnPrivileges | Yes | Yes | ODBC | Returns a list of columns and associated privileges for one or more tables. |
| SQLColumns | Yes | Yes | X/Open | Returns the list of column names in specified tables. |
| SQLForeignKeys | Yes | Yes | ODBC | Returns a list of column names that make up foreign keys, if they exist for a specified table. |
| SQLPrimaryKeys | Yes | Yes | ODBC | Returns the list of column names that make up the primary key for a table. |
| SQLSpecialColumns | Yes | Yes | X/Open | Returns information about the optimal set of columns that uniquely identifies a row in a specified table, or the columns that are automatically updated when any value in the row is updated by a transaction. |
| SQLStatistics | Yes | Yes | ISO 92 | Returns statistics about a single table and the list of indexes associated with the table. |
| SQLTablePrivileges | Yes | Yes | ODBC | Returns a list of tables and the privileges associated with each table. |
| SQLTables | Yes | Yes | X/Open | Returns the list of table names stored in a specific data source. |
Performing transactions:
| Function name | MyODBC | MyODBC | Conformance | Purpose |
| 2.50 | 3.51 | |||
| SQLTransact | Yes | Yes | Deprecated | Commits or rolls back a transaction |
| SQLEndTran | No | Yes | ISO 92 | Commits or rolls back a transaction. |
Terminating a statement:
| Function name | MyODBC | MyODBC | Conformance | Purpose |
| 2.50 | 3.51 | |||
| SQLFreeStmt | Yes | Yes | ISO 92 | Ends statement processing, discards pending results, and, optionally, frees all resources associated with the statement handle. |
| SQLCloseCursor | Yes | Yes | ISO 92 | Closes a cursor that has been opened on a statement handle. |
| SQLCancel | Yes | Yes | ISO 92 | Cancels an SQL statement. |
Terminating a connection:
| Function name | MyODBC | MyODBC | Conformance | Purpose |
| 2.50 | 3.51 | |||
| SQLDisconnect | Yes | Yes | ISO 92 | Closes the connection. |
| SQLFreeHandle | No | Yes | ISO 92 | Releases an environment, connection, statement, or descriptor handle. |
| SQLFreeConnect | Yes | Yes | Deprecated | Releases connection handle |
| SQLFreeEnv | Yes | Yes | Deprecated | Releases an environment handle |
The following table illustrates how driver maps the server data types to default SQL and C data types:
| Native Value | SQL Type | C Type |
| bit | SQL_BIT | SQL_C_BIT |
| tinyint | SQL_TINYINT | SQL_C_STINYINT |
| tinyint unsigned | SQL_TINYINT | SQL_C_UTINYINT |
| bigint | SQL_BIGINT | SQL_C_SBIGINT |
| bigint unsigned | SQL_BIGINT | SQL_C_UBIGINT |
| long varbinary | SQL_LONGVARBINARY | SQL_C_BINARY |
| blob | SQL_VARBINARY | SQL_C_BINARY |
| longblob | SQL_VARBINARY | SQL_C_BINARY |
| tinyblob | SQL_BINARY | SQL_C_BINARY |
| mediumblob | SQL_LONGVARBINARY | SQL_C_BINARY |
| long varchar | SQL_LONGVARCHAR | SQL_C_CHAR |
| text | SQL_LONGVARCHAR | SQL_C_CHAR |
| mediumtext | SQL_LONGVARCHAR | SQL_C_CHAR |
| char | SQL_CHAR | SQL_C_CHAR |
| numeric | SQL_NUMERIC | SQL_C_CHAR |
| decimal | SQL_DECIMAL | SQL_C_CHAR |
| integer | SQL_INTEGER | SQL_C_SLONG |
| integer unsigned | SQL_INTEGER | SQL_C_ULONG |
| int | SQL_INTEGER | SQL_C_SLONG |
| int unsigned | SQL_INTEGER | SQL_C_ULONG |
| mediumint | SQL_INTEGER | SQL_C_SLONG |
| mediumint unsigned | SQL_INTEGER | SQL_C_ULONG |
| smallint | SQL_SMALLINT | SQL_C_SSHORT |
| smallint unsigned | SQL_SMALLINT | SQL_C_USHORT |
| real | SQL_FLOAT | SQL_C_DOUBLE |
| double | SQL_FLOAT | SQL_C_DOUBLE |
| float | SQL_REAL | SQL_C_FLOAT |
| double precision | SQL_DOUBLE | SQL_C_DOUBLE |
| date | SQL_DATE | SQL_C_DATE |
| time | SQL_TIME | SQL_C_TIME |
| year | SQL_SMALLINT | SQL_C_SHORT |
| datetime | SQL_TIMESTAMP | SQL_C_TIMESTAMP |
| timestamp | SQL_TIMESTAMP | SQL_C_TIMESTAMP |
| text | SQL_VARCHAR | SQL_C_CHAR |
| varchar | SQL_VARCHAR | SQL_C_CHAR |
| enum | SQL_VARCHAR | SQL_C_CHAR |
| set | SQL_VARCHAR | SQL_C_CHAR |
| bit | SQL_CHAR | SQL_C_CHAR |
| bool | SQL_CHAR | SQL_C_CHAR |
The following tables lists the error codes returned by the driver apart from the server errors.
| Native Code | SQLSTATE 2 | SQLSTATE 3 | Error Message |
| 500 | 01000 | 01000 | General warning |
| 501 | 01004 | 01004 | String data, right truncated |
| 502 | 01S02 | 01S02 | Option value changed |
| 503 | 01S03 | 01S03 | No rows updated/deleted |
| 504 | 01S04 | 01S04 | More than one row updated/deleted |
| 505 | 01S06 | 01S06 | Attempt to fetch before the result set returned the first row set |
| 506 | 07001 | 07002 | SQLBindParameter not used for all parameters |
| 507 | 07005 | 07005 | Prepared statement not a cursor-specification |
| 508 | 07009 | 07009 | Invalid descriptor index |
| 509 | 08002 | 08002 | Connection name in use |
| 510 | 08003 | 08003 | Connection does not exist |
| 511 | 24000 | 24000 | Invalid cursor state |
| 512 | 25000 | 25000 | Invalid transaction state |
| 513 | 25S01 | 25S01 | Transaction state unknown |
| 514 | 34000 | 34000 | Invalid cursor name |
| 515 | S1000 | HY000 | General driver defined error |
| 516 | S1001 | HY001 | Memory allocation error |
| 517 | S1002 | HY002 | Invalid column number |
| 518 | S1003 | HY003 | Invalid application buffer type |
| 519 | S1004 | HY004 | Invalid SQL data type |
| 520 | S1009 | HY009 | Invalid use of null pointer |
| 521 | S1010 | HY010 | Function sequence error |
| 522 | S1011 | HY011 | Attribute can not be set now |
| 523 | S1012 | HY012 | Invalid transaction operation code |
| 524 | S1013 | HY013 | Memory management error |
| 525 | S1015 | HY015 | No cursor name available |
| 526 | S1024 | HY024 | Invalid attribute value |
| 527 | S1090 | HY090 | Invalid string or buffer length |
| 528 | S1091 | HY091 | Invalid descriptor field identifier |
| 529 | S1092 | HY092 | Invalid attribute/option identifier |
| 530 | S1093 | HY093 | Invalid parameter number |
| 531 | S1095 | HY095 | Function type out of range |
| 532 | S1106 | HY106 | Fetch type out of range |
| 533 | S1117 | HY117 | Row value out of range |
| 534 | S1109 | HY109 | Invalid cursor position |
| 535 | S1C00 | HYC00 | Optional feature not implemented |
| 0 | 21S01 | 21S01 | Column count does not match value count |
| 0 | 23000 | 23000 | Integrity constraint violation |
| 0 | 42000 | 42000 | Syntax error or access violation |
| 0 | 42S02 | 42S02 | Base table or view not found |
| 0 | 42S12 | 42S12 | Index not found |
| 0 | 42S21 | 42S21 | Column already exists |
| 0 | 42S22 | 42S22 | Column not found |
| 0 | 08S01 | 08S01 | Communication link failure |
This section contains simple examples of the use of MySQL ODBC 3.51 Driver with ADO, DAO and RDO.
The following ADO (ActiveX Data Objects) example creates a table my_ado and demonstrates the use of rs.addNew, rs.delete, and rs.update.
Private Sub myodbc_ado_Click()

  Dim conn As ADODB.Connection
  Dim rs As ADODB.Recordset
  Dim fld As ADODB.Field
  Dim sql As String

  'connect to MySQL server using MySQL ODBC 3.51 Driver
  Set conn = New ADODB.Connection
  conn.ConnectionString = "DRIVER={MySQL ODBC 3.51 Driver};"_
                        & "SERVER=localhost;"_
                        & " DATABASE=test;"_
                        & "UID=venu;PWD=venu; OPTION=3"

  conn.Open

  'create table
  conn.Execute "DROP TABLE IF EXISTS my_ado"
  conn.Execute "CREATE TABLE my_ado(id int not null primary key, name varchar(20)," _
                                 & "txt text, dt date, tm time, ts timestamp)"

  'direct insert
  conn.Execute "INSERT INTO my_ado(id,name,txt) values(1,100,'venu')"
  conn.Execute "INSERT INTO my_ado(id,name,txt) values(2,200,'MySQL')"
  conn.Execute "INSERT INTO my_ado(id,name,txt) values(3,300,'Delete')"

  Set rs = New ADODB.Recordset
  rs.CursorLocation = adUseServer

  'fetch the initial table ..
  rs.Open "SELECT * FROM my_ado", conn
    Debug.Print rs.RecordCount
    rs.MoveFirst
    Debug.Print String(50, "-") & "Initial my_ado Result Set " & String(50, "-")
    For Each fld In rs.Fields
      Debug.Print fld.Name,
      Next
      Debug.Print

      Do Until rs.EOF
      For Each fld In rs.Fields
      Debug.Print fld.Value,
      Next
      rs.MoveNext
      Debug.Print
    Loop
  rs.Close

  'rs insert
  rs.Open "select * from my_ado", conn, adOpenDynamic, adLockOptimistic
  rs.AddNew
  rs!Name = "Monty"
  rs!txt = "Insert row"
  rs.Update
  rs.Close

  'rs update
  rs.Open "SELECT * FROM my_ado"
  rs!Name = "update"
  rs!txt = "updated-row"
  rs.Update
  rs.Close

  'rs update second time..
  rs.Open "SELECT * FROM my_ado"
  rs!Name = "update"
  rs!txt = "updated-second-time"
  rs.Update
  rs.Close

  'rs delete
  rs.Open "SELECT * FROM my_ado"
  rs.MoveNext
  rs.MoveNext
  rs.Delete
  rs.Close

  'fetch the updated table ..
  rs.Open "SELECT * FROM my_ado", conn
    Debug.Print rs.RecordCount
    rs.MoveFirst
    Debug.Print String(50, "-") & "Updated my_ado Result Set " & String(50, "-")
    For Each fld In rs.Fields
      Debug.Print fld.Name,
      Next
      Debug.Print

      Do Until rs.EOF
      For Each fld In rs.Fields
      Debug.Print fld.Value,
      Next
      rs.MoveNext
      Debug.Print
    Loop
  rs.Close
  conn.Close
End Sub
The following DAO (Data Access Objects) example creates a table my_dao and demonstrates the use of rs.addNew, rs.update, and result set scrolling.
Private Sub myodbc_dao_Click()

  Dim ws As Workspace
  Dim conn As Connection
  Dim queryDef As queryDef
  Dim str As String

  'connect to MySQL using MySQL ODBC 3.51 Driver
  Set ws = DBEngine.CreateWorkspace("", "venu", "venu", dbUseODBC)
  str = "odbc;DRIVER={MySQL ODBC 3.51 Driver};"_
                        & "SERVER=localhost;"_
                        & " DATABASE=test;"_
                        & "UID=venu;PWD=venu; OPTION=3"
  Set conn = ws.OpenConnection("test", dbDriverNoPrompt, False, str)

  'Create table my_dao
  Set queryDef = conn.CreateQueryDef("", "drop table if exists my_dao")
  queryDef.Execute

  Set queryDef = conn.CreateQueryDef("", "create table my_dao(Id INT AUTO_INCREMENT PRIMARY KEY, " _
                                                           & "Ts TIMESTAMP(14) NOT NULL, Name varchar(20), Id2 INT)")
  queryDef.Execute

  'Insert new records using rs.addNew
  Set rs = conn.OpenRecordset("my_dao")
  Dim i As Integer

    For i = 10 To 15
    rs.AddNew
    rs!Name = "insert record" & i
    rs!Id2 = i
    rs.Update
    Next i
             rs.Close

  'rs update..
  Set rs = conn.OpenRecordset("my_dao")
  rs.Edit
  rs!Name = "updated-string"
  rs.Update
  rs.Close

  'fetch the table back...
  Set rs = conn.OpenRecordset("my_dao", dbOpenDynamic)
  str = "Results:"
  rs.MoveFirst
  While Not rs.EOF
  str = " " & rs!Id & " , " & rs!Name & ", " & rs!Ts & ", " & rs!Id2
  Debug.Print "DATA:" & str
  rs.MoveNext
  Wend

  'rs Scrolling
  rs.MoveFirst
  str = " FIRST ROW: " & rs!Id & " , " & rs!Name & ", " & rs!Ts & ", " & rs!Id2
  Debug.Print str

  rs.MoveLast
  str = " LAST ROW: " & rs!Id & " , " & rs!Name & ", " & rs!Ts & ", " & rs!Id2
  Debug.Print str

  rs.MovePrevious
  str = " LAST-1 ROW: " & rs!Id & " , " & rs!Name & ", " & rs!Ts & ", " & rs!Id2
  Debug.Print str

  'free all resources
  rs.Close
  queryDef.Close
  conn.Close
  ws.Close

End Sub
The following RDO (Remote Data Objects) example creates a table my_rdo and demonstrates the use of rs.addNew and rs.update.
Dim rs As rdoResultset
    Dim cn As New rdoConnection
    Dim cl As rdoColumn
    Dim SQL As String

    'cn.Connect = "DSN=test;"
    cn.Connect = "DRIVER={MySQL ODBC 3.51 Driver};"_
                        & "SERVER=localhost;"_
                        & " DATABASE=test;"_
                        & "UID=venu;PWD=venu; OPTION=3"

    cn.CursorDriver = rdUseOdbc
    cn.EstablishConnection rdDriverPrompt


    'drop table my_rdo
    SQL = "drop table if exists my_rdo"
    cn.Execute SQL, rdExecDirect

    'create table my_rdo
    SQL = "create table my_rdo(id int, name varchar(20))"
    cn.Execute SQL, rdExecDirect

    'insert - direct
    SQL = "insert into my_rdo values (100,'venu')"
    cn.Execute SQL, rdExecDirect

    SQL = "insert into my_rdo values (200,'MySQL')"
    cn.Execute SQL, rdExecDirect

    'rs insert
    SQL = "select * from my_rdo"
    Set rs = cn.OpenResultset(SQL, rdOpenStatic, rdConcurRowVer, rdExecDirect)
    rs.AddNew
    rs!id = 300
    rs!Name = "Insert1"
    rs.Update
    rs.Close

    'rs insert
    SQL = "select * from my_rdo"
    Set rs = cn.OpenResultset(SQL, rdOpenStatic, rdConcurRowVer, rdExecDirect)
    rs.AddNew
    rs!id = 400
    rs!Name = "Insert 2"
    rs.Update
    rs.Close

    'rs update
    SQL = "select * from my_rdo"
    Set rs = cn.OpenResultset(SQL, rdOpenStatic, rdConcurRowVer, rdExecDirect)
    rs.Edit
    rs!id = 999
    rs!Name = "updated"
    rs.Update
    rs.Close

    'fetch back...
    SQL = "select * from my_rdo"
    Set rs = cn.OpenResultset(SQL, rdOpenStatic, rdConcurRowVer, rdExecDirect)
    Do Until rs.EOF
    For Each cl In rs.rdoColumns
                Debug.Print cl.Value,
      Next
      rs.MoveNext
      Debug.Print
               Loop
    Debug.Print "Row count="; rs.RowCount

    'close
    rs.Close
    cn.Close

End Sub
This section contains simple examples that demonstrate the use of MyODBC drivers with ODBC.NET.
The following sample creates a table my_odbc_net and demonstrates the use in C#.
 /**
 * @sample    : mycon.cs
 * @purpose   : Demo sample for ODBC.NET using MyODBC
 * @author    : Venu, mailto:venu@@mysql.com
 *
 * (C) Copyright MySQL AB, 1995-2004
 *
 **/

 /* build command
  *
  *  csc /t:exe
  *      /out:mycon.exe mycon.cs
  *      /r:Microsoft.Data.Odbc.dll
  */

 using Console = System.Console;
 using Microsoft.Data.Odbc;

 namespace myodbc3
 {
  class mycon
  {
    static void Main(string[] args)
    {
      try
      {
        //Connection string for MyODBC 2.50
        /*string MyConString = "DRIVER={MySQL};" +
                             "SERVER=localhost;" +
                             "DATABASE=test;" +
                             "UID=venu;" +
                             "PASSWORD=venu;" +
                             "OPTION=3";
        */
        //Connection string for MyODBC 3.51
        string MyConString = "DRIVER={MySQL ODBC 3.51 Driver};" +
                             "SERVER=localhost;" +
                             "DATABASE=test;" +
                             "UID=venu;" +
                             "PASSWORD=venu;" +
                             "OPTION=3";

        //Connect to MySQL using MyODBC
        OdbcConnection MyConnection = new OdbcConnection(MyConString);
        MyConnection.Open();

        Console.WriteLine("\n !!! success, connected successfully !!!\n");

        //Display connection information
        Console.WriteLine("Connection Information:");
        Console.WriteLine("\tConnection String:" + MyConnection.ConnectionString);
        Console.WriteLine("\tConnection Timeout:" + MyConnection.ConnectionTimeout);
        Console.WriteLine("\tDatabase:" + MyConnection.Database);
        Console.WriteLine("\tDataSource:" + MyConnection.DataSource);
        Console.WriteLine("\tDriver:" + MyConnection.Driver);
        Console.WriteLine("\tServerVersion:" + MyConnection.ServerVersion);

        //Create a sample table
        OdbcCommand MyCommand = new OdbcCommand("DROP TABLE IF EXISTS my_odbc_net",MyConnection);
        MyCommand.ExecuteNonQuery();
        MyCommand.CommandText = "CREATE TABLE my_odbc_net(id int, name varchar(20), idb bigint)";
        MyCommand.ExecuteNonQuery();

        //Insert
        MyCommand.CommandText = "INSERT INTO my_odbc_net VALUES(10,'venu', 300)";
        Console.WriteLine("INSERT, Total rows affected:" + MyCommand.ExecuteNonQuery());;

        //Insert
        MyCommand.CommandText = "INSERT INTO my_odbc_net VALUES(20,'mysql',400)";
        Console.WriteLine("INSERT, Total rows affected:" + MyCommand.ExecuteNonQuery());

        //Insert
        MyCommand.CommandText = "INSERT INTO my_odbc_net VALUES(20,'mysql',500)";
        Console.WriteLine("INSERT, Total rows affected:" + MyCommand.ExecuteNonQuery());

        //Update
        MyCommand.CommandText = "UPDATE my_odbc_net SET id=999 WHERE id=20";
        Console.WriteLine("Update, Total rows affected:" + MyCommand.ExecuteNonQuery());

        //COUNT(*)
        MyCommand.CommandText = "SELECT COUNT(*) as TRows FROM my_odbc_net";
        Console.WriteLine("Total Rows:" + MyCommand.ExecuteScalar());

        //Fetch
        MyCommand.CommandText = "SELECT * FROM my_odbc_net";
        OdbcDataReader MyDataReader;
        MyDataReader =  MyCommand.ExecuteReader();
        while (MyDataReader.Read())
        {
         if(string.Compare(MyConnection.Driver,"myodbc3.dll") == 0) {
           Console.WriteLine("Data:" + MyDataReader.GetInt32(0) + " " +
                                       MyDataReader.GetString(1) + " " +
                                       MyDataReader.GetInt64(2)); //Supported only by MyODBC 3.51
         }
         else {
           Console.WriteLine("Data:" + MyDataReader.GetInt32(0) + " " +
                                       MyDataReader.GetString(1) + " " +
                                       MyDataReader.GetInt32(2)); //BIGINTs not supported by MyODBC
         }
        }

        //Close all resources
        MyDataReader.Close();
        MyConnection.Close();
      }
      catch (OdbcException MyOdbcException)//Catch any ODBC exception ..
      {
        for (int i=0; i < MyOdbcException.Errors.Count; i++)
        {
          Console.Write("ERROR #" + i + "\n" +
            "Message: " + MyOdbcException.Errors[i].Message + "\n" +
            "Native: " + MyOdbcException.Errors[i].NativeError.ToString() + "\n" +
            "Source: " + MyOdbcException.Errors[i].Source + "\n" +
            "SQL: " + MyOdbcException.Errors[i].SQLState + "\n");
        }
      }
    }
  }
 }
The following sample creates a table my_vb_net and demonstrates the use in VB.
' @sample    : myvb.vb
' @purpose   : Demo sample for ODBC.NET using MyODBC
' @author    : Venu, mailto:venu@@mysql.com
'
' (C) Copyright MySQL AB, 1995-2004
'
'

'
' build command
'
' vbc /target:exe
'     /out:myvb.exe
'     /r:Microsoft.Data.Odbc.dll
'     /r:System.dll
'     /r:System.Data.dll
'

Imports Microsoft.Data.Odbc
Imports System

Module myvb
    Sub Main()
        Try

            'MyODBC 3.51 connection string
            Dim MyConString As String = "DRIVER={MySQL ODBC 3.51 Driver};" & _
                           "SERVER=localhost;" & _
                           "DATABASE=test;" & _
                           "UID=venu;" & _
                           "PASSWORD=venu;" & _
                           "OPTION=3;"

            'Connection
            Dim MyConnection As New OdbcConnection(MyConString)
            MyConnection.Open()

            Console.WriteLine ("Connection State::" & MyConnection.State.ToString)

            'Drop
            Console.WriteLine ("Dropping table")
            Dim MyCommand As New OdbcCommand()
            MyCommand.Connection = MyConnection
            MyCommand.CommandText = "DROP TABLE IF EXISTS my_vb_net"
            MyCommand.ExecuteNonQuery()

            'Create
            Console.WriteLine ("Creating....")
            MyCommand.CommandText = "CREATE TABLE my_vb_net(id int, name varchar(30))"
            MyCommand.ExecuteNonQuery()

            'Insert
            MyCommand.CommandText = "INSERT INTO my_vb_net VALUES(10,'venu')"
            Console.WriteLine("INSERT, Total rows affected:" & MyCommand.ExecuteNonQuery())

            'Insert
            MyCommand.CommandText = "INSERT INTO my_vb_net VALUES(20,'mysql')"
            Console.WriteLine("INSERT, Total rows affected:" & MyCommand.ExecuteNonQuery())

            'Insert
            MyCommand.CommandText = "INSERT INTO my_vb_net VALUES(20,'mysql')"
            Console.WriteLine("INSERT, Total rows affected:" & MyCommand.ExecuteNonQuery())

            'Insert
            MyCommand.CommandText = "INSERT INTO my_vb_net(id) VALUES(30)"
            Console.WriteLine("INSERT, Total rows affected:" & MyCommand.ExecuteNonQuery())

            'Update
            MyCommand.CommandText = "UPDATE my_vb_net SET id=999 WHERE id=20"
            Console.WriteLine("Update, Total rows affected:" & MyCommand.ExecuteNonQuery())

            'COUNT(*)
            MyCommand.CommandText = "SELECT COUNT(*) as TRows FROM my_vb_net"
            Console.WriteLine("Total Rows:" & MyCommand.ExecuteScalar())

            'Select
            Console.WriteLine ("Select * FROM my_vb_net")
            MyCommand.CommandText = "SELECT * FROM my_vb_net"
            Dim MyDataReader As OdbcDataReader
            MyDataReader = MyCommand.ExecuteReader
            While MyDataReader.Read
                If MyDataReader("name") Is DBNull.Value Then
                    Console.WriteLine ("id = " & CStr(MyDataReader("id")) & "  name = " & _
                      "NULL")
                Else
                    Console.WriteLine ("id = " & CStr(MyDataReader("id")) & "  name = " & _
                                          CStr(MyDataReader("name")))
                End If
            End While

        'Catch ODBC Exception
        Catch MyOdbcException As OdbcException
            Dim i As Integer
            Console.WriteLine (MyOdbcException.ToString)

        'Catch program exception
        Catch MyException As Exception
            Console.WriteLine (MyException.ToString)
    End Try
    End Sub
End Module